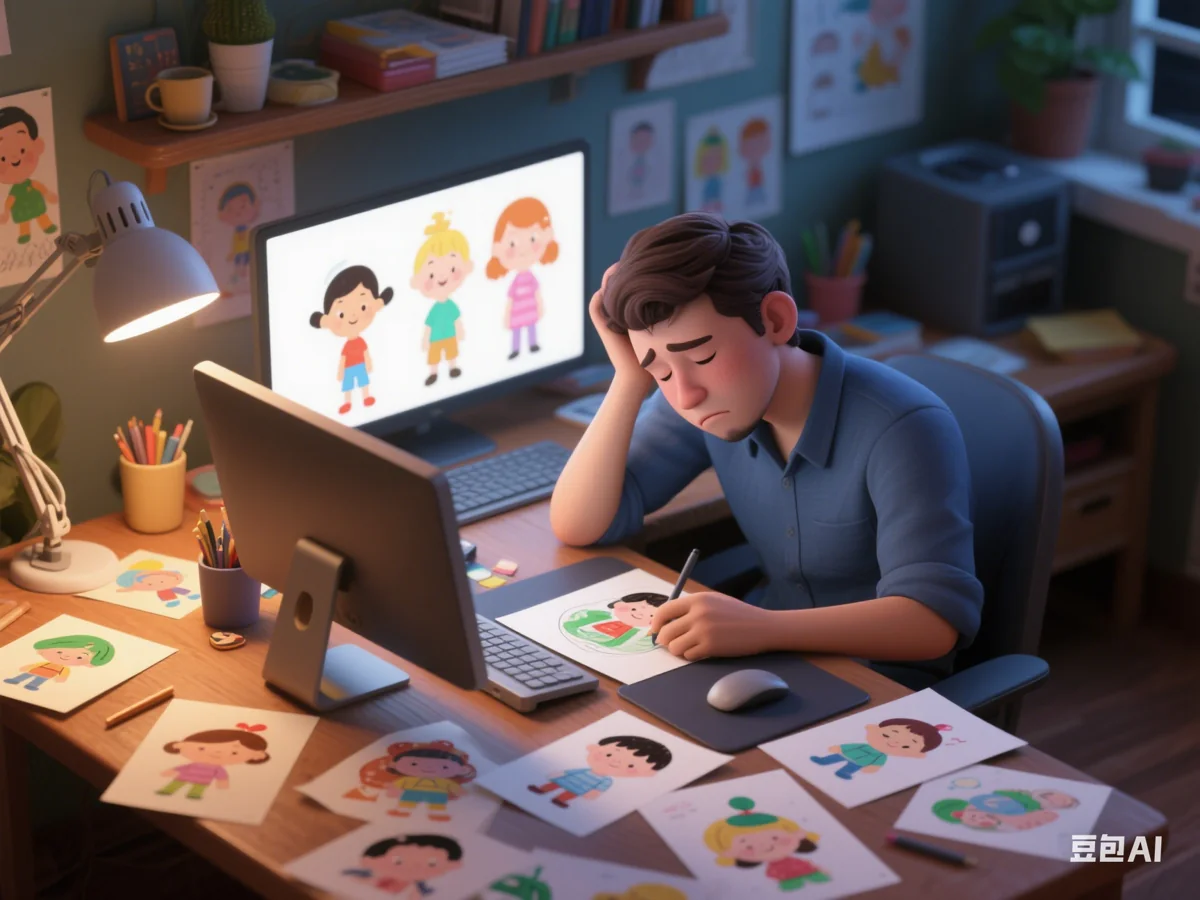
I landed a gig creating illustrations for a children’s e-book company. This article chronicles my journey: from assessing feasibility and initial prep to delivering the first order and, ultimately, walking away.
You’ll find AI tips and technical insights sprinkled throughout, focusing on principles over nitty-gritty details. Don’t worry if AI jargon isn’t your thing; the story is easy to follow. I’ve separated the tech talk, so feel free to skip those sections without missing the narrative.
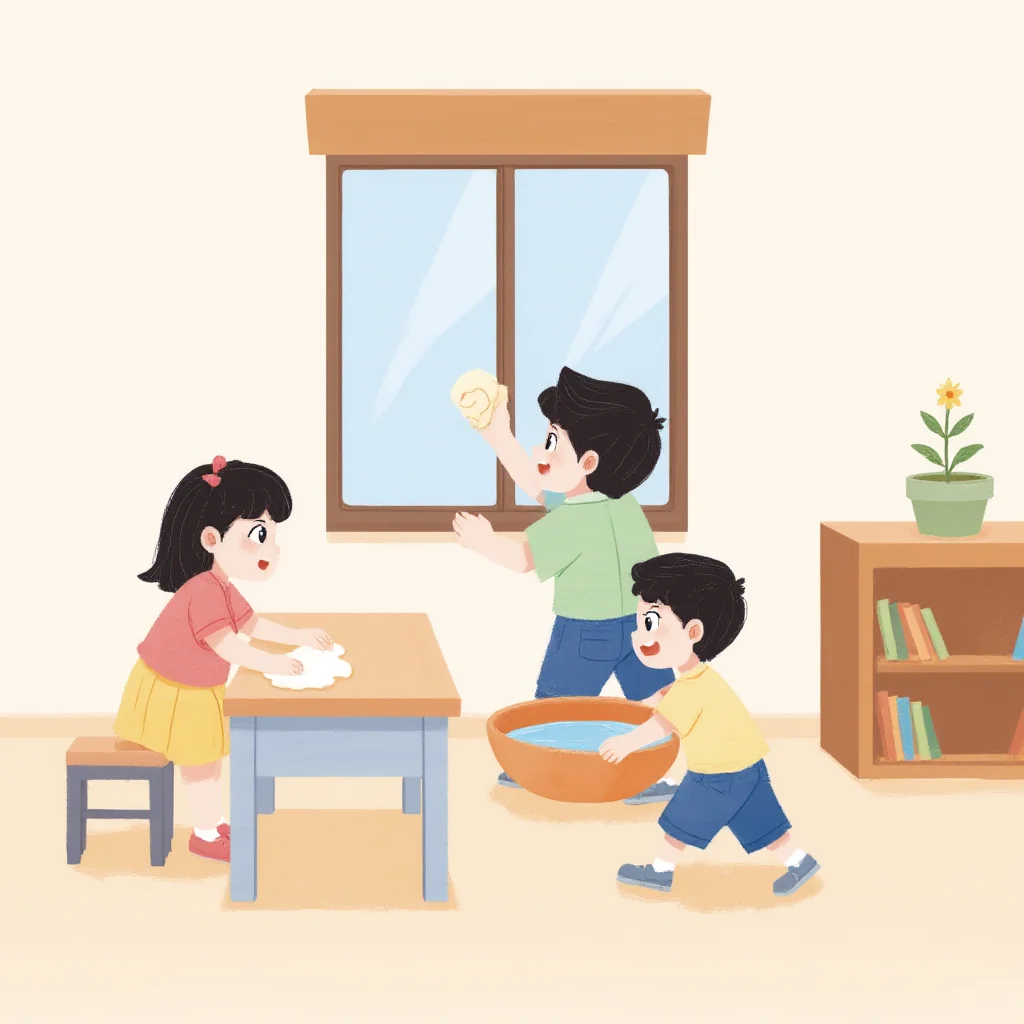
Due to client confidentiality, I can’t share the actual deliverables. Instead, I’ve recreated similar images to illustrate the effects. All images in this post were generated by me for this purpose.
The project is now complete. Before diving in, here’s my main takeaway: AI won’t replace illustrators for the average person, but it empowers Photoshop-savvy graphic designers to do so.
The Opportunity
In April 2025, a friend tipped me off to a gig: AI-generated children’s illustrations. The volume was massive—around ten thousand images monthly. My friend’s quote suggested that even handling 2,000 images could be highly profitable if I had the capacity.
The high volume was the main draw.
My specialty is untangling complex processes and automating them. I break down tasks, then use Python, prompt engineering, Excel, and other tools to build efficient pipelines—essentially becoming a one-man production line.
In short, I industrialize processes.
My extensive experience with AI image generation was, of course, a prerequisite.
Financially, it looked promising. While anyone can generate a few decent children’s illustrations with today’s AI tools, producing tens of thousands is another beast entirely. Doing that manually would be a full-time job.
My strategy was to automate the entire illustration pipeline, letting it churn out images in the background with minimal oversight. My main focus would be on image selection and client communication. Since AI image generation has its quirks (it’s a bit of a “gacha” game), I’d generate multiple options for each illustration. If none were suitable, I’d flag them for a retry until I got a good one.
For detailed edits, like fixing extra fingers, I could use AI tools and Photoshop, but doing it myself would cripple my output. My goal was to profit from automation, so I planned to outsource manual fixes to illustrators. Luckily, my friend had connections and found illustrators open to collaboration at a price I could offer.
Everything seemed to be falling into place. This setup offered an efficient way to leverage my time for profits well beyond my hourly rate. I was in high spirits, even humming while washing baby bottles.
🔮 Tech Share
▽ ▽ ▽ 🔮 Tech Talk Begins 🔮 ▽ ▽ ▽
Choosing the Model
At the time, top-tier AI image generation models included GPT-4o (international) and Jimeng (Doubao, domestic). Among open-source options, Flux dev offered the best results and a mature ecosystem.
With high volume, cost was as crucial as quality. GPT-4o was too pricey, and Jimeng lacked an official API. The client also had extremely specific style demands, making open-source models the only practical choice.
The main open-source contenders were SDXL and Flux dev. SDXL is cheap and fast, but flawed. For instance, if a prompt described a boy in a blue striped shirt and a mom in a khaki cardigan, SDXL might color both outfits blue or khaki, leading to high rejection rates. Flux dev was far more reliable.
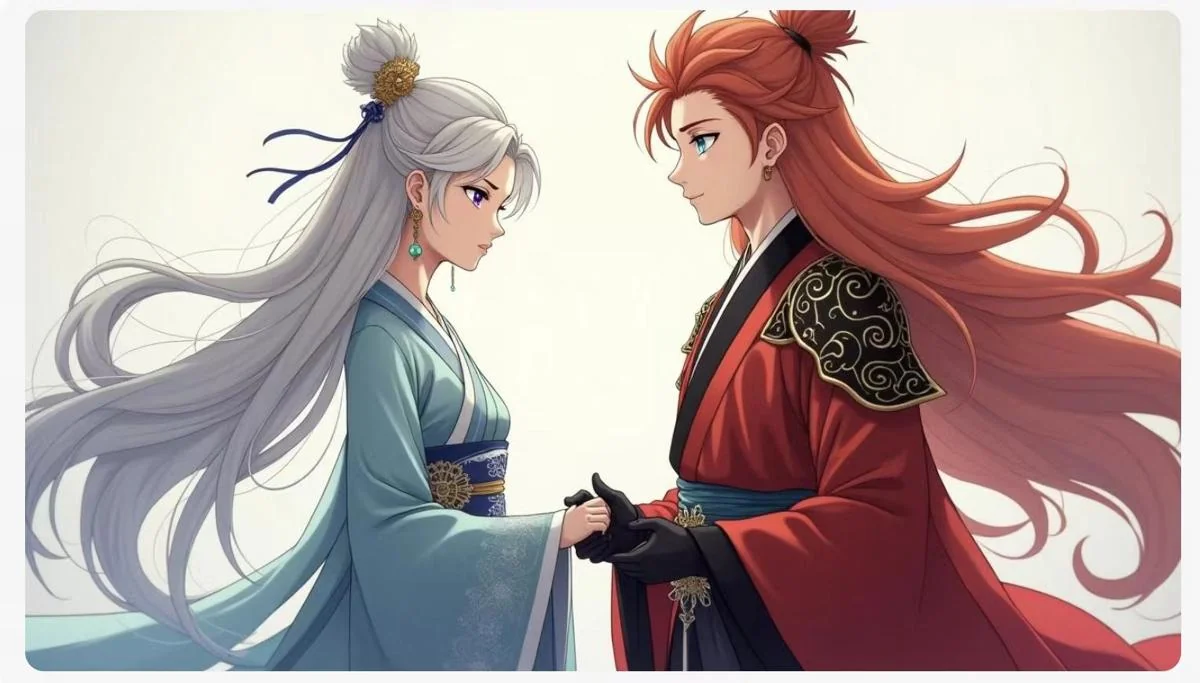
Here’s an example from another project. The Flux dev image above perfectly matched my character descriptions: a female lead in teal with silver-gray hair, and a male lead in red with red hair. Even eye colors were accurate.
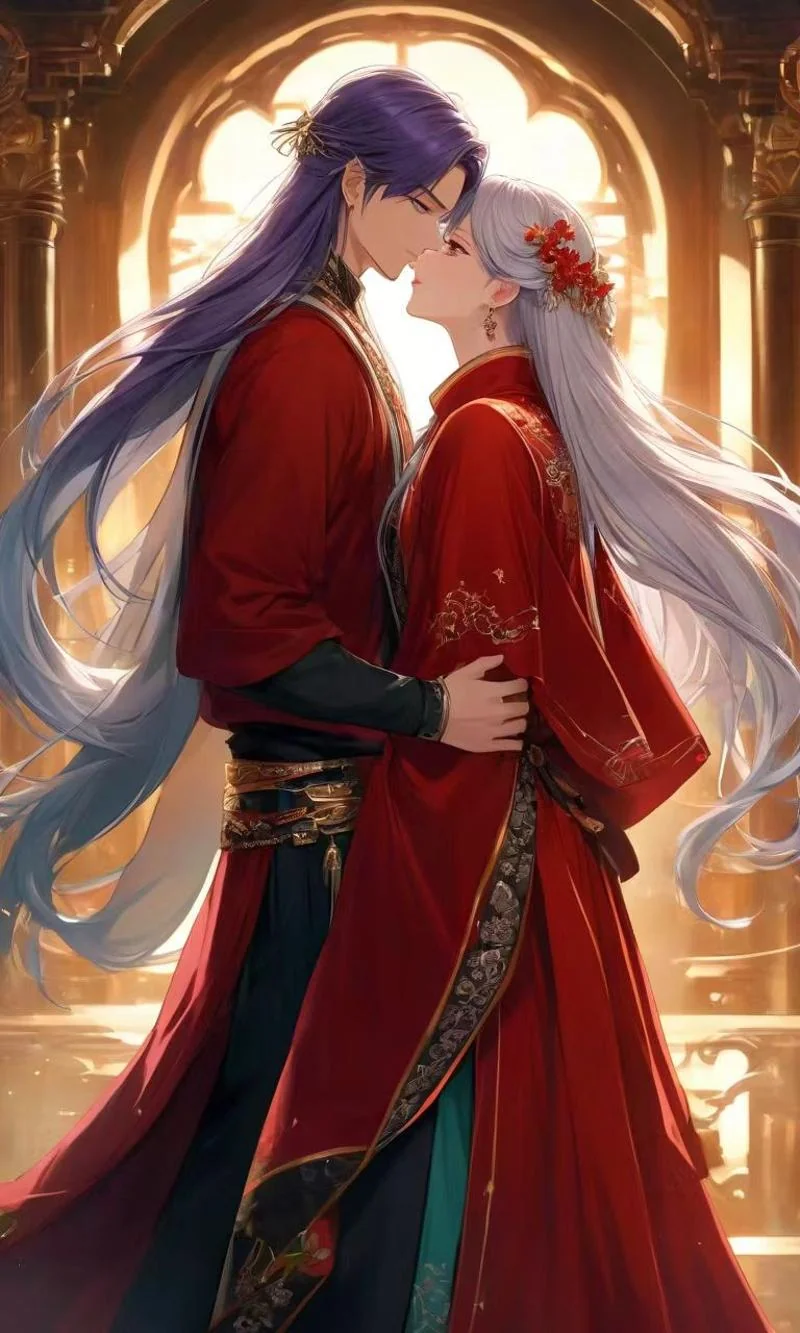
In contrast, SDXL produced this mess. Total chaos.
This discrepancy stems from their differing CLIP model capabilities. CLIP models interpret text-image relationships. Diffusion models don’t grasp human language; CLIP translates prompts into a format diffusion models understand. A poor translator (CLIP) leads to misinterpretations.
So, Flux dev was the clear choice.
Choosing How to Call the Model
To automate image generation, I needed programmatic access.
There are three main ways to generate images: Flux WebUI, ComfyUI, and direct API calls. I preferred ComfyUI for its API, which accepts entire workflows. With the model and resources set up, the program sends a workflow and receives an image. Wrapping this in a utility function and looping it allows for bulk image generation.
Choosing the Runtime Environment
AI image generation is resource-intensive. My i7 Windows laptop (over 7,000 RMB) has a weak GPU; an SDXL image took 10 minutes. A new PC was an option, but with the project still tentative and needing scalable resources, cloud computing was better.

The hardcore route—buying cloud machines and storage—was too complex for my ‘half-baked’ developer skills. I opted for simpler platforms: Replicate and Runcomfy. I just needed to use their APIs, avoiding machine configuration hassles.
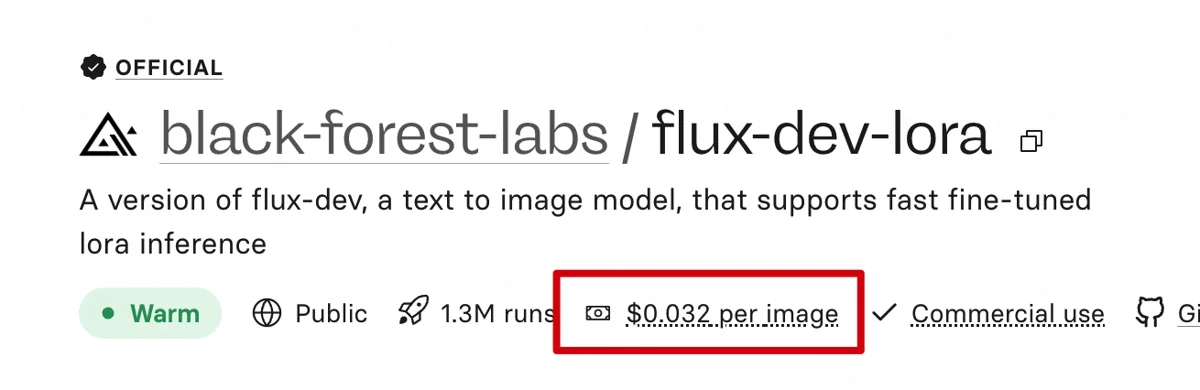
Replicate offers the Flux dev LoRA model. Input prompts and parameters, run it, and get an image—simple. For a custom LoRA, I’d train it, upload it (Hugging Face/Civitai), and call it via URL. It costs about 0.2 RMB per image.
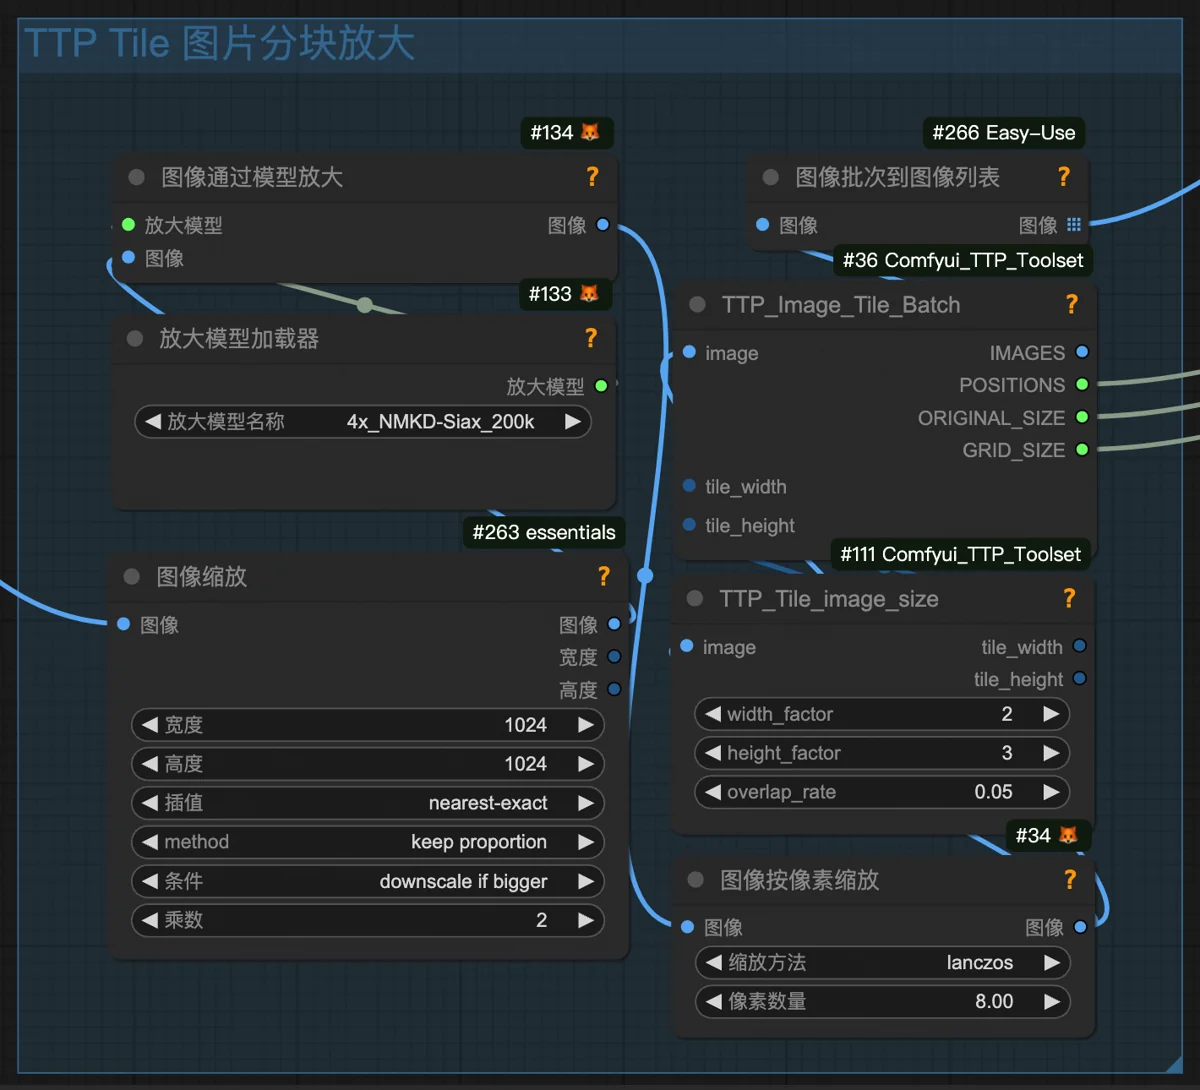
However, Replicate had a key drawback: no support for arbitrary custom nodes. Understandably, as a multi-modal platform (text, voice, etc.), it couldn’t offer deep ComfyUI-specific support. My planned upscaling technique needed a TTP_Image_Tile_Batch node, which Replicate lacked.
Runcomfy, however, specializes in ComfyUI. It offers cloud machines with storage, letting me upload custom models and nodes. In theory, it supports any image model and custom node. Runcomfy bills by the minute for machine runtime. Each generation session (manual UI or API) required starting a machine; billing began at launch and ended at shutdown.
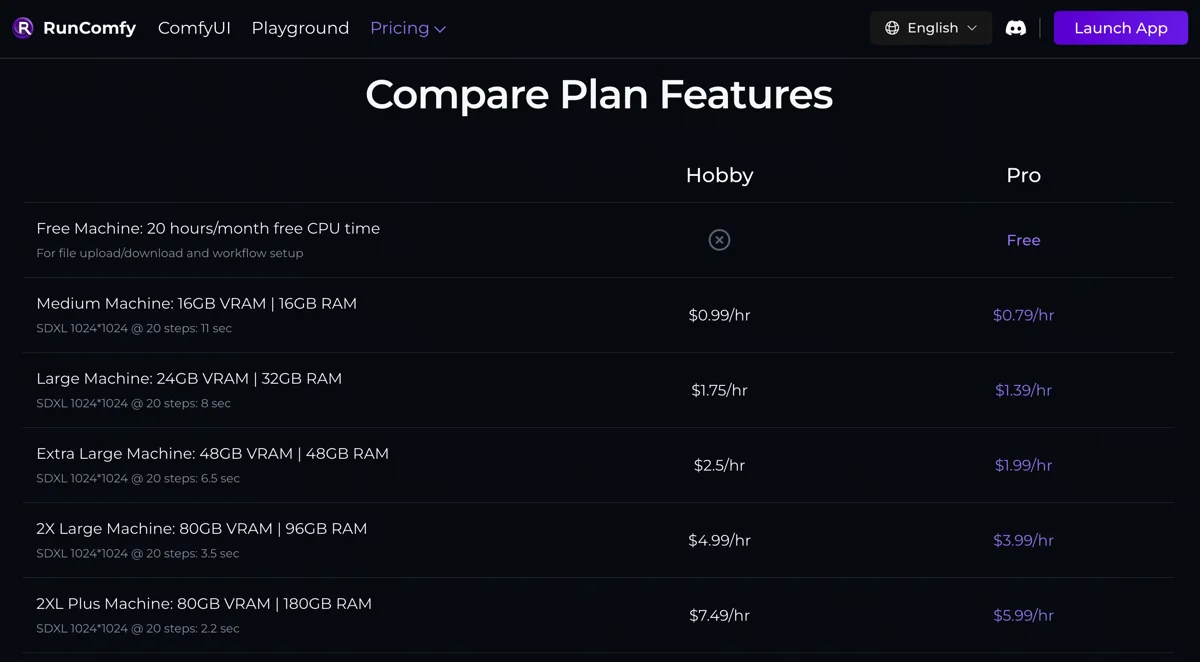
The kicker? It was actually cheaper per image than Replicate!
△ △ △ 🔮 Tech Talk Ends 🔮 △ △ △
Preparation
Before taking orders, I completed two trial rounds.
Trial Drafts, Client Approval
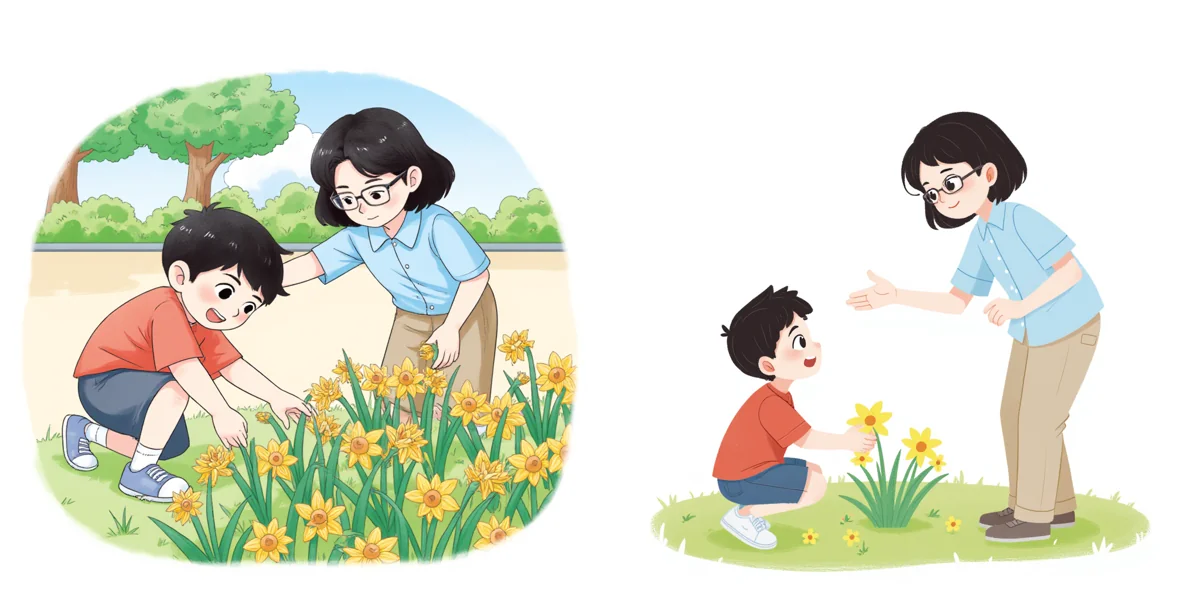
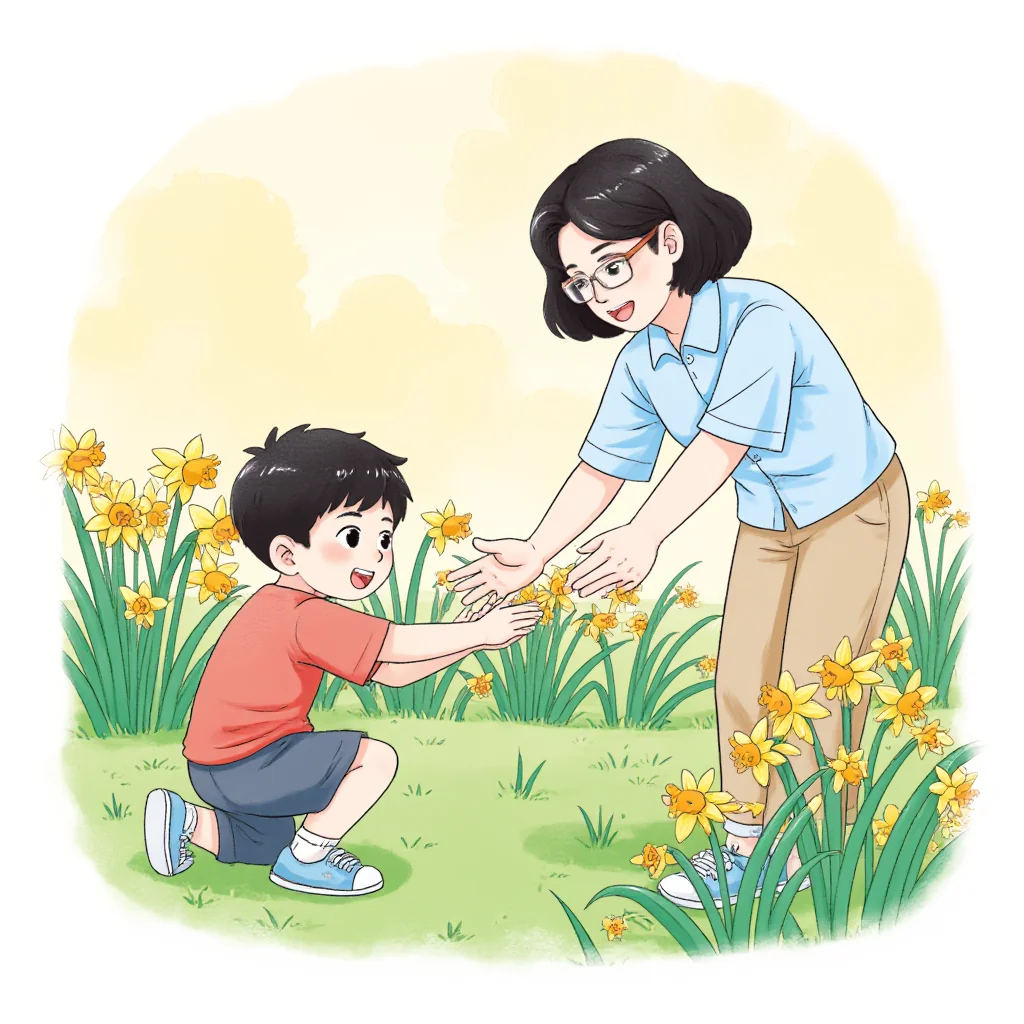
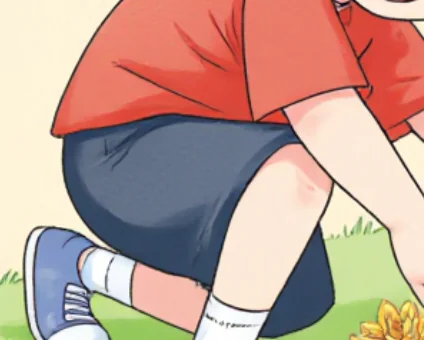
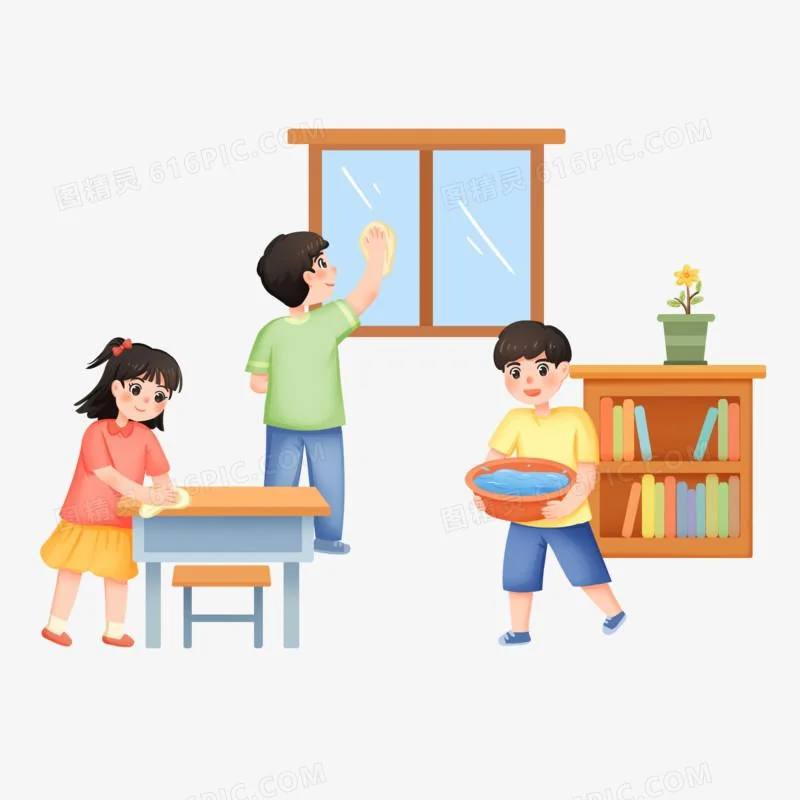
For the first trial, using the client’s style references, I created illustrations in two styles—watercolor and flat—depicting a boy in a park reaching for a flower, with his mom quickly stopping him.
The client approved a style similar to this (watercolor left, flat right). Ignore the limb issues (I generated these later); focus on the style:
Challenge 1: Meeting Style Requirements
Initially, I cut corners, underestimating the client’s strict style demands. I used community AI models instead of training a dedicated one. After a few attempts, the client reluctantly accepted the watercolor style but found the flat style too different from their references.
Results from someone else’s model.
The client’s company had a large team of in-house illustrators and many hand-drawn illustrations. They were incredibly meticulous about style, with specific requirements for character eye size, drawing method, watercolor outline textures, and even subtle pencil textures on flat color blocks.
No more shortcuts. I had to train my own model for precision. It sounds daunting, but AI tools have advanced, making it quite simple. The training was also inexpensive, costing less than 100 RMB.
The client provided dozens of reference images for each style, sufficient for training. The trained model was nearly indistinguishable from the originals, with minor discrepancies I could fix (and automate) in Photoshop. Style was no longer an issue; the client was pleased.
Challenge 2: Accurately Depicting Character Interaction
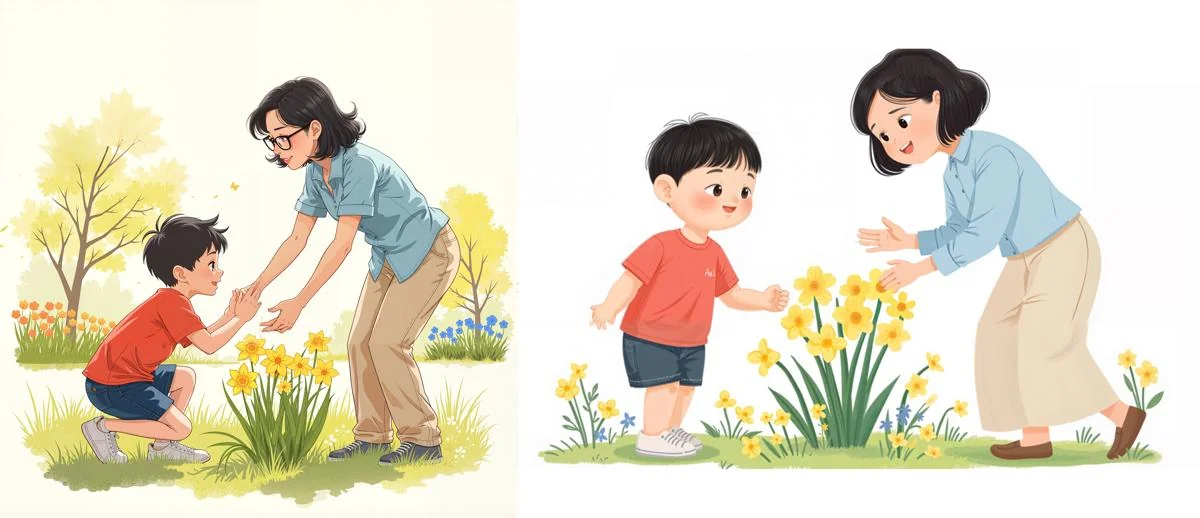
Another hurdle was AI’s grasp of image content. It could draw elements like a park, flower, boy, and mom, but character actions were often inaccurate. For instance, a boy might pick a flower without looking, or squat awkwardly, or the mom’s gesture to stop him might look like she was receiving flowers.
This one looks like the mom is helping the boy up, and who knows where the boy is looking.
The core issue: AI understands objects, not relationships. Unlike humans who learn from the physical world, AI is like a captive artist in a cellar, endlessly seeing paintings and crudely imitating them.
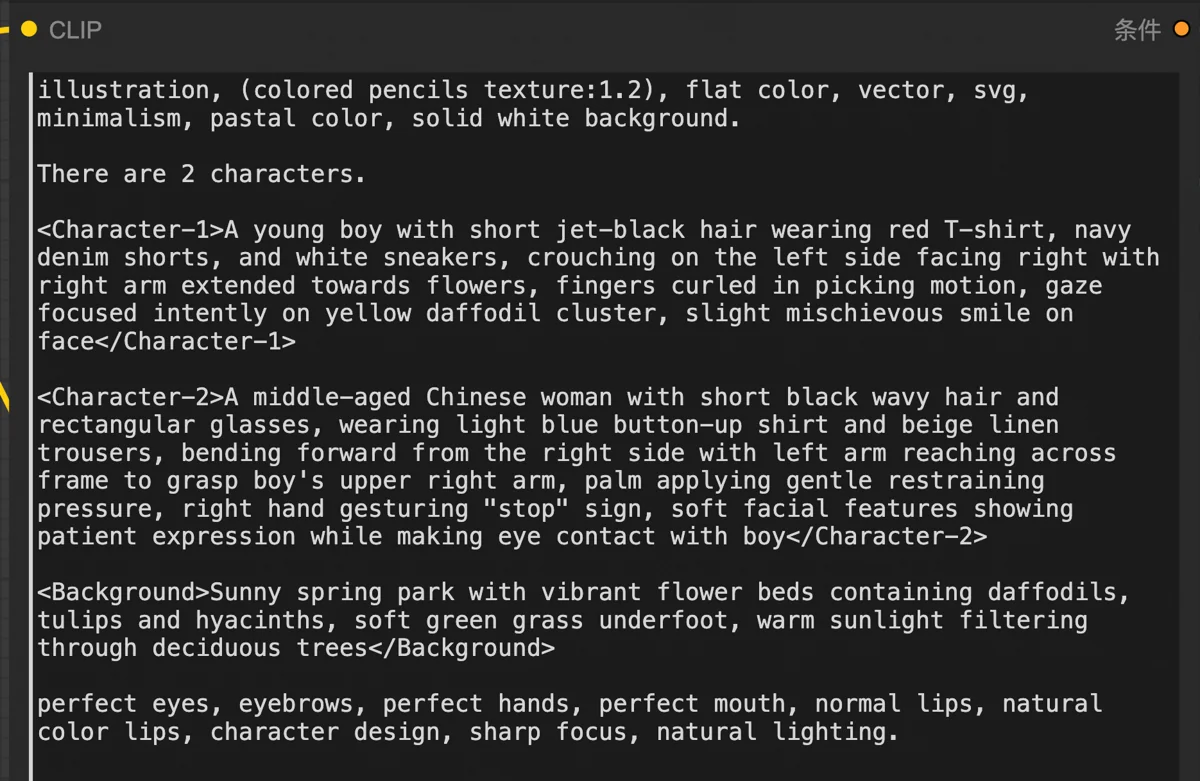
To address this, I optimized my image generation system. I had DeepSeek generate highly detailed prompts, specifying character actions, expressions, positions, orientation, gaze, and even individual hand movements.
This significantly improved results but didn’t eliminate all issues. AI has its limits. If rerolling (“gacha”) failed, manual editing was necessary.
Challenge 3: Fixing Deformed Hands
Then came the notorious AI challenge: deformed hands. Hands, our primary tools for interacting with diverse objects, are incredibly varied. Even AI that draws realistic faces struggles with hand variations after seeing countless images.
Again, AI lacks physical world understanding. Unlike art students learning anatomy, AI processes pixels, often miscounting fingers.
Moreover, the client’s trial task made hands tricky. With two full-body figures, hands were tiny, receiving little AI attention, leading to predictable issues.
The boy picking a flower required hand-flower interaction. Humans use thumb and index finger; AI, lacking anatomical understanding, sometimes depicted him holding the stem between index and middle fingers, like a wine glass.
Meanwhile, the mother’s hand stopping him added hand-to-hand interaction. Her hand on his was toughest; overlapping fingers often blurred. Workarounds included placing her hand on his forearm or having her wag a finger.
The style issue was resolved. Interaction and hand problems were manageable by generating more images, making the trial drafts passable. The second trial, with five illustrations of single subjects, was an easy pass.
🔮 Tech Share
▽ ▽ ▽ 🔮 Tech Talk Begins 🔮 ▽ ▽ ▽
Training the Model
To accurately replicate the client’s watercolor and flat styles, training a custom LoRA model was essential.
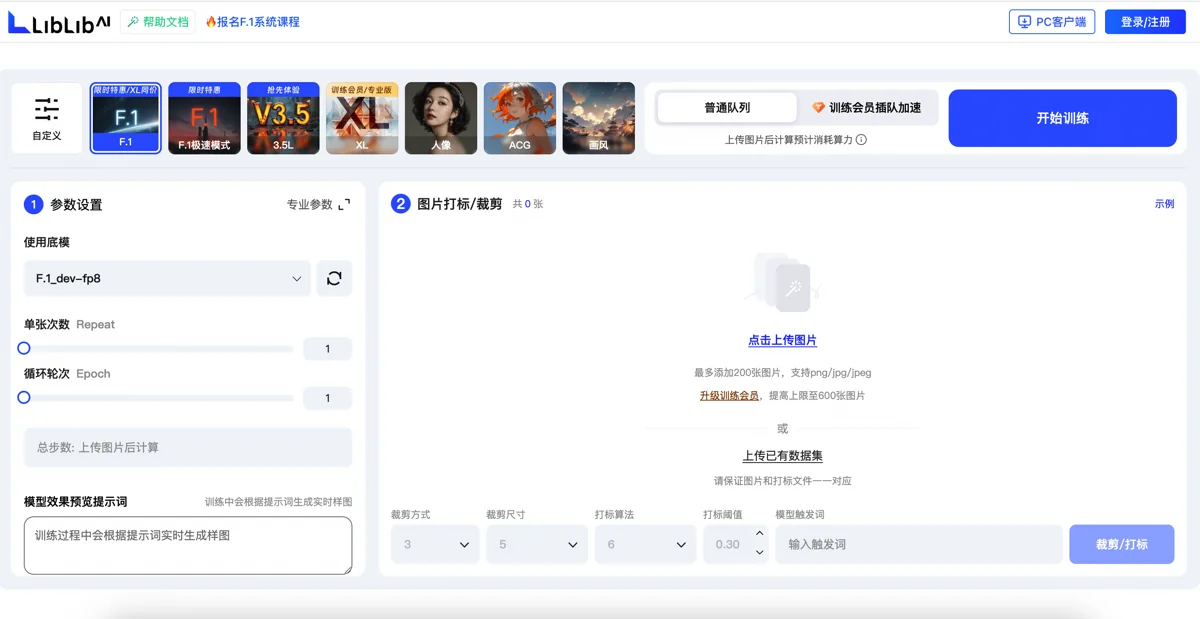
Despite long experience with SD and ComfyUI, this was my first LoRA training. I’d assumed training would simplify and be learnable on demand. Indeed, Liblib’s GUI now makes it a point-and-click affair.
Still, training involved careful consideration of settings like image cropping, tagging, and epoch count.
Reading another user’s LoRA training diary clarified these points:
- Square images are best for training. I scripted square cropping instead of using Liblib’s tool, allowing me to discard bad crops (e.g., half-faces, incomplete subjects) for better model quality.
- For style LoRAs (applying features image-wide), no tagging is a good option. Such LoRAs apply style upon loading, no trigger words needed.
- Monitor the LOSS function. It decreases with epochs, then flattens. Sample images help determine if it’s a local or global minimum. For simpler, non-realistic images, 8-10 epochs often suffice.
Automated Image Generation Workflow
With the trained LoRA uploaded to Runcomfy’s storage, resources were set. I configured a basic Flux text-to-image workflow, adding two LoRAs: one for hand detail optimization, one for my custom style.
This gave me two image generation workflows (watercolor and flat), exported as API files for programmatic use.
High-resolution upscaling was another core workflow, a modified Flux image-to-image setup:
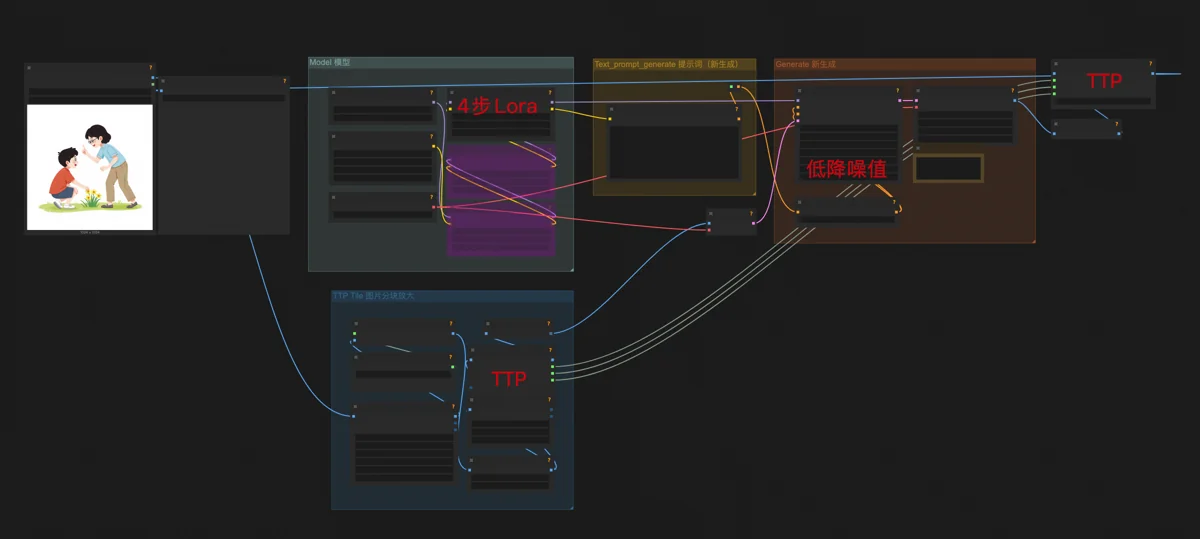
- Denoising strength at 0.15 to preserve original content.
- A 4-step generation LoRA. This speeds up Flux dev (usually 20 steps) like Flux schnell, reducing quality slightly but acceptably for upscaling, where the difference is imperceptible.
- TTP_Image_Tile_Batch nodes before and after sampling. These divide the image into tiles. Flux processes one tile at a time, focusing attention for richer, more accurate details. The image is then reassembled, achieving high-res upscaling.
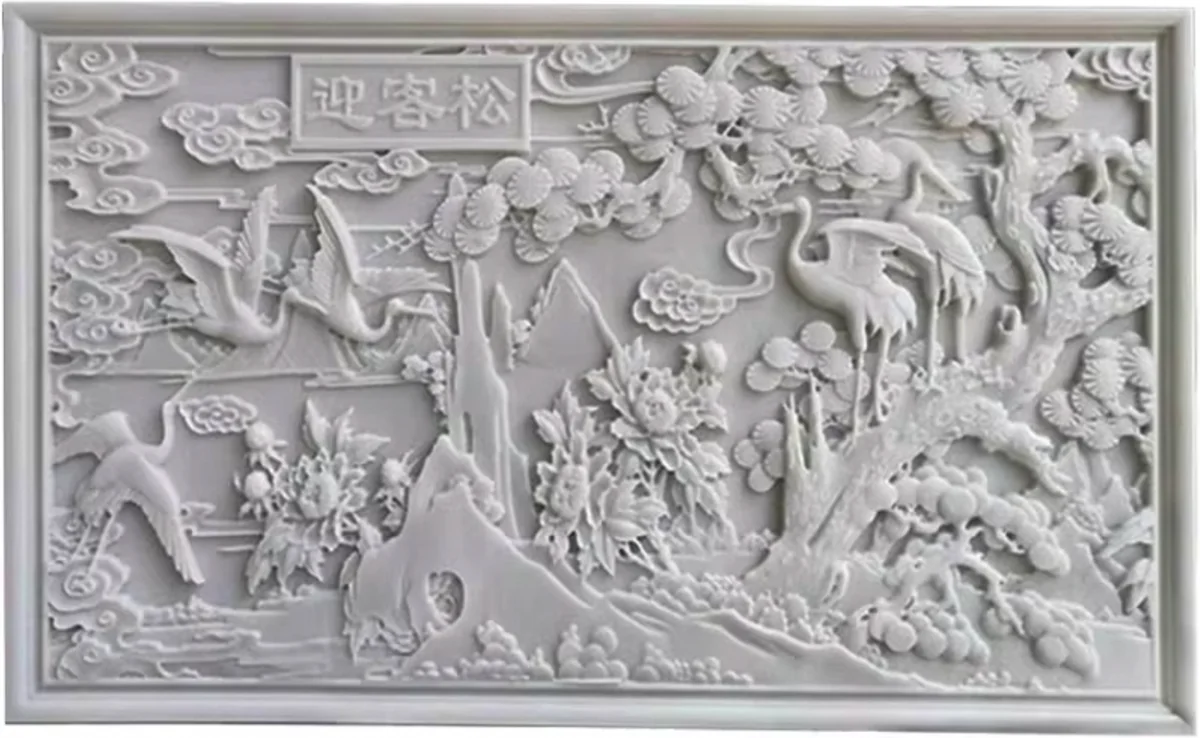
Understanding denoising strength is key to mastering ComfyUI. I visualize it as carving a 1-meter thick marble wall. Denoising 1 (max) allows free carving, even through the wall. Denoising 0.15 limits work to the top 15% (surface), creating a shallow relief.
For text-to-image, the “wall” is blank. Higher denoising gives AI more creative freedom, so it’s usually maxed out.
For image-to-image, the “wall” has an existing image. Lower denoising preserves original features. On a Nine-Dragon Wall, low denoising would refine scales and whiskers, not transform the dragon into a Greeting Pine.
Manual Touch-up Workflow
With stable LoRA and workflows, I still needed manual touch-up tools for special modifications. Though planned for illustrators, I needed a Plan B to step in if they were busy.
The manual touch-up workflows included Text-to-Image Inpainting, Image-to-Image Inpainting, and Image-to-Image (Style Transfer/Redrawing).
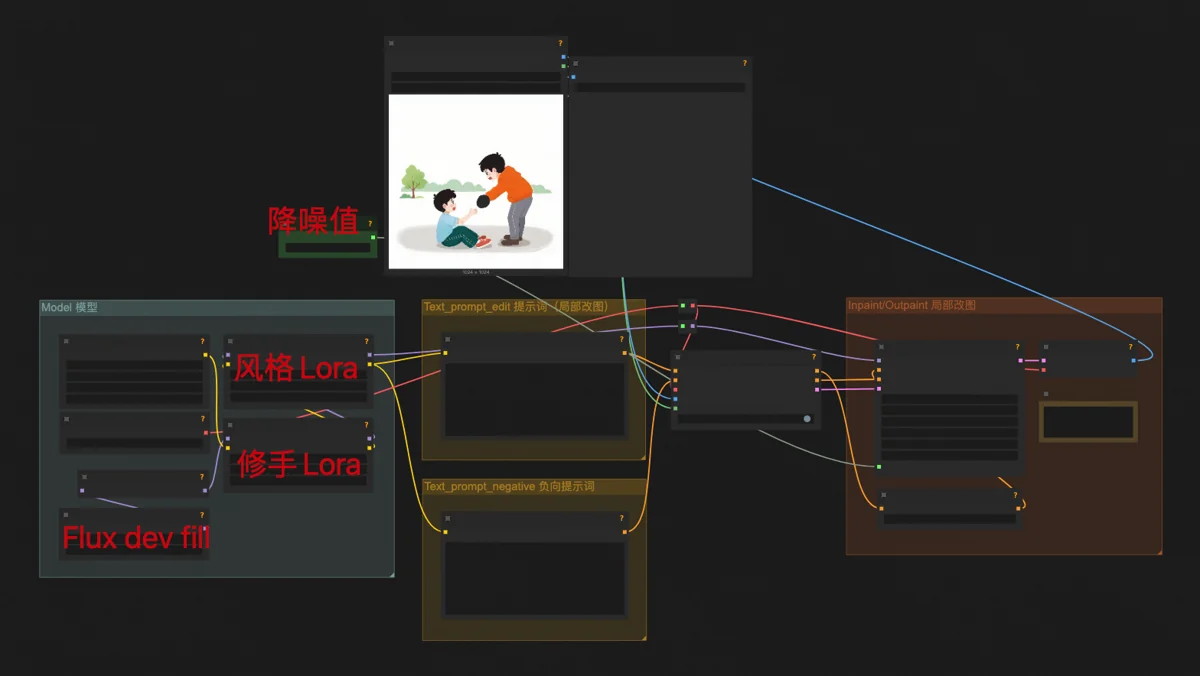
Text-to-Image Inpainting uses the Flux dev fill model (for inpainting/outpainting) with my style LoRA, similar to basic text-to-image. Used for adding hats, changing shoes, or altering a cat’s tail.
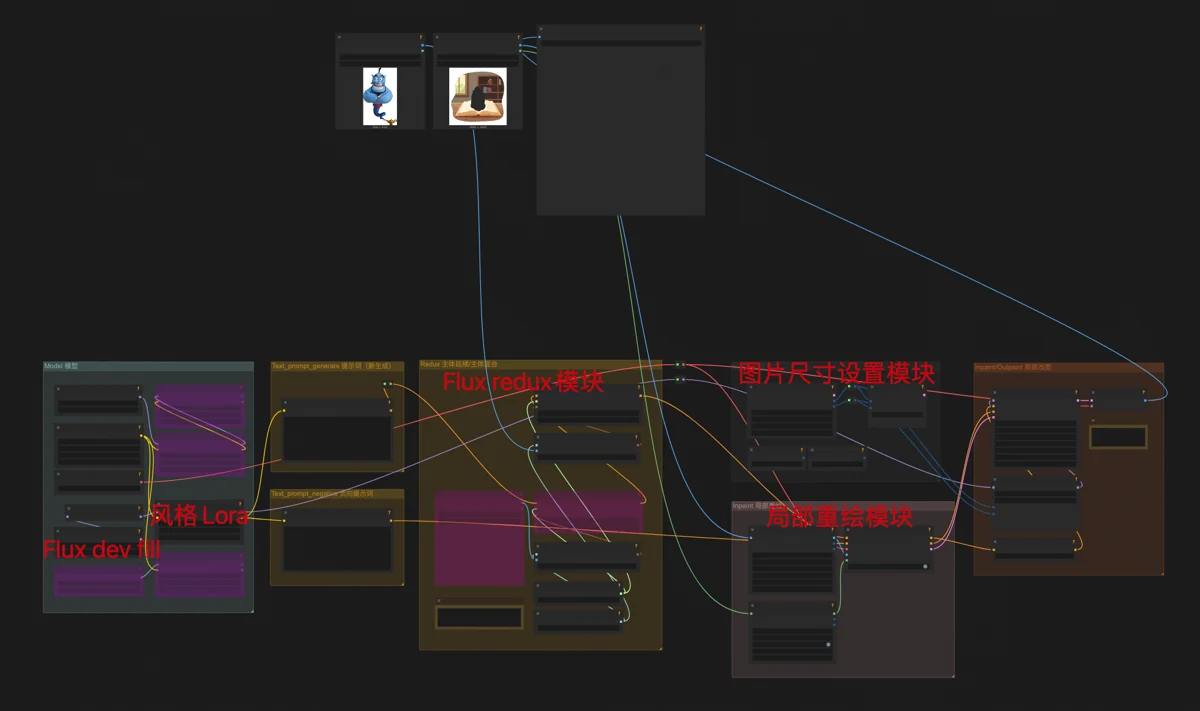
Image-to-Image Inpainting combines Flux dev fill and Flux redux. Redux processes inserted objects to blend them stylistically and naturally, preserving features. It ignores text prompts, using only the image input. Common for changing clothes on e-commerce models.
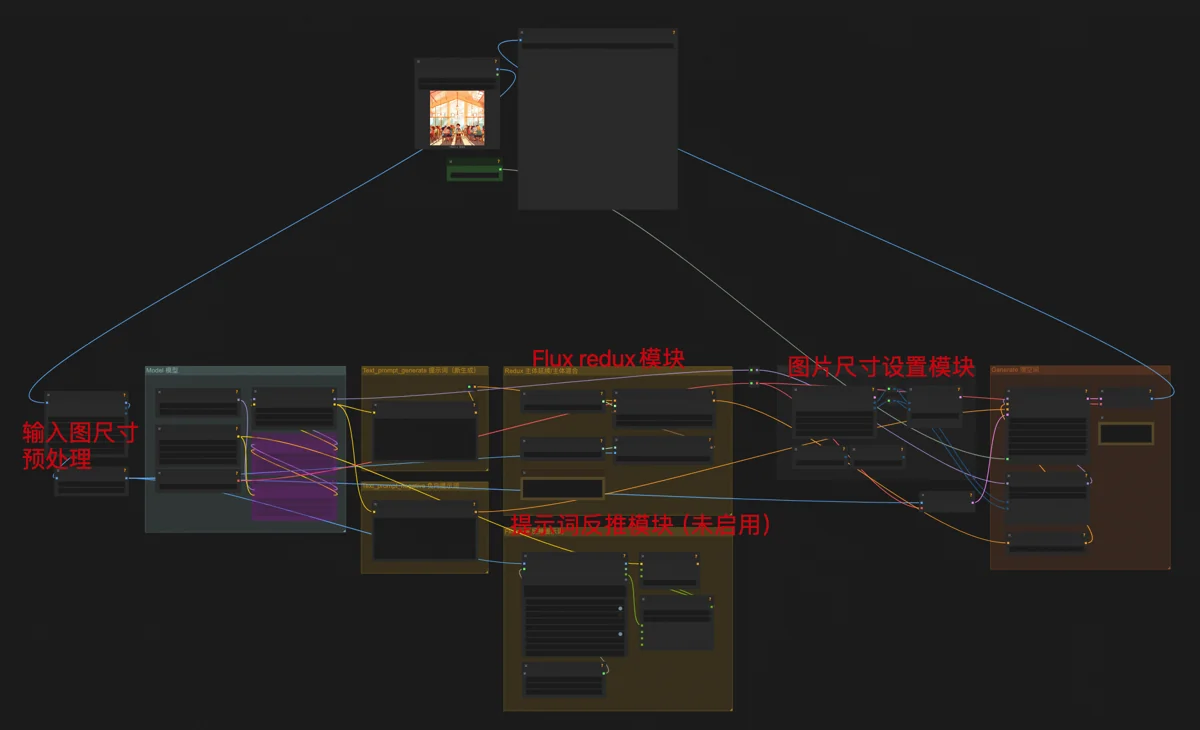
Image-to-Image (Redrawing/Style Transfer) uses Flux dev and Flux redux to create a similar-looking “copy” with different details. Adding my style LoRA transforms photos into illustrations, preserving original features. Useful for social media “content spinning”—modifying online images to appear original and avoid plagiarism.
All these modules are in my Flux Versatile Workflow.
Subsequently, manual edits (besides Photoshop and occasional Doubao) used these three workflows, varied by denoising strength for different problems.
△ △ △ 🔮 Tech Talk Ends 🔮 △ △ △
Building the Automated Image Generation System
I manually generated trial drafts while debugging and building my automated image system.
After two successful trial rounds, the client offered work. My system wasn’t ready, and manual generation was too slow, so I declined, promising to start once the system was complete.
Once built, I reran the second trial tasks through the system smoothly. My involvement was reduced to:
- Paste client’s illustration content (Excel column) into my multi-dimensional table; DeepSeek auto-generates prompts.
- Export table as a spreadsheet to my program directory.
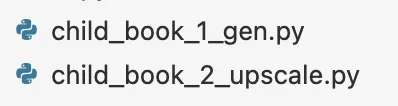
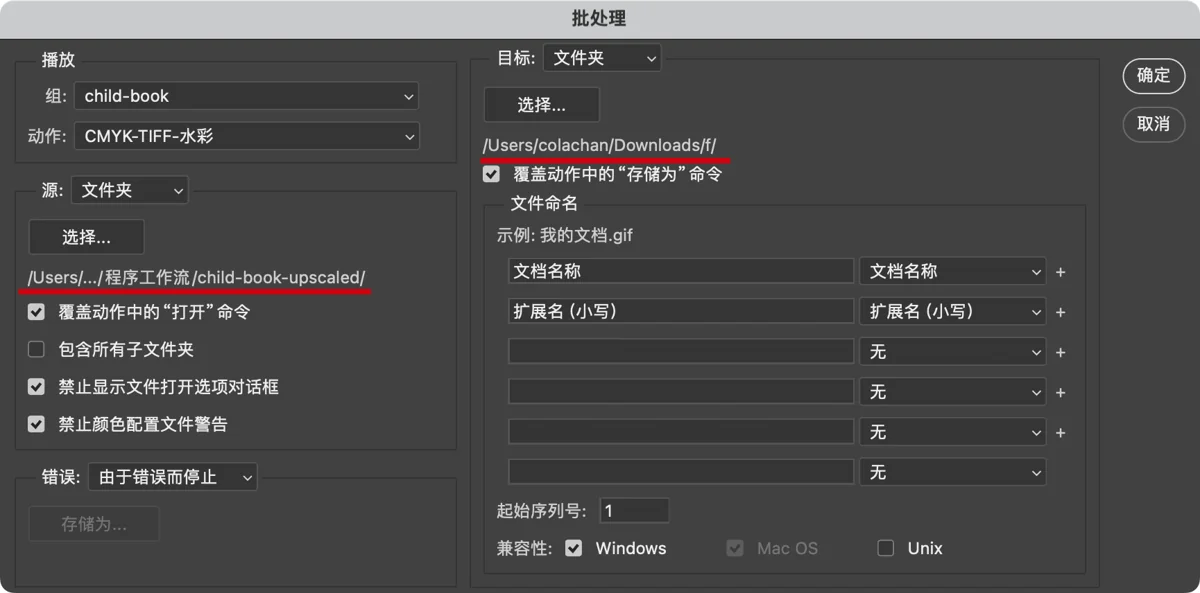
- Run Program #1 (Generate): reads prompts, starts cloud machine, outputs 4 images per illustration, auto-shuts down machine.
- Manually select images. If none are usable, mark for retry in the table, repeat steps 2-3.
- Run Program #2 (Upscale): starts cloud machine, upscales selected images to high-definition (for print).
- Run Program #3 (Resolution): converts images to print resolution and client-specified dimensions.
- Run Photoshop batch action for texture details.
- Run Program #4 (Organize): sorts images into book folders for client delivery.
This setup seems complex, but manual work is minimal. Image selection takes time; other steps are just a button press, then I’m AFK.
Crucially, the process is the same for 100 or 2,000 images. For large, urgent volumes, I can use faster (slightly costlier) cloud machines—still negligible compared to illustrator costs.
🔮 Tech Share
▽ ▽ ▽ 🔮 Tech Talk Begins 🔮 ▽ ▽ ▽
To build this system, I connected automation features from various tools. The workflow starts with client Excel input (brief illustration descriptions) and ends with project folders of images. I automated every possible intermediate step, tackling hurdles individually.
Generating Drawing Prompts with Feishu Base (Lark Base)
Feishu Base (Lark Base) was ideal for converting brief descriptions to specific drawing prompts. It integrates with various third-party AI models, automating complex text processing.
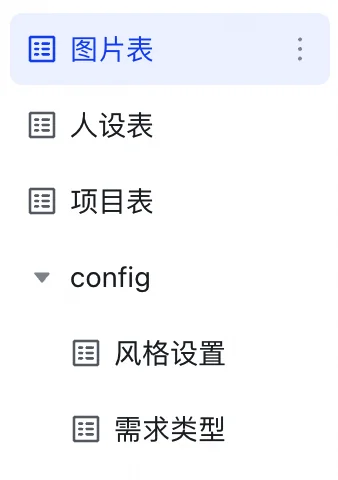
My table structure is layered: Image Table, Character Profile Table, and Project Table, plus two dimension tables for style/complexity prompts (complexity affects price). Upper tables read from lower ones; lower tables summarize upper ones for image counts and revenue estimates.
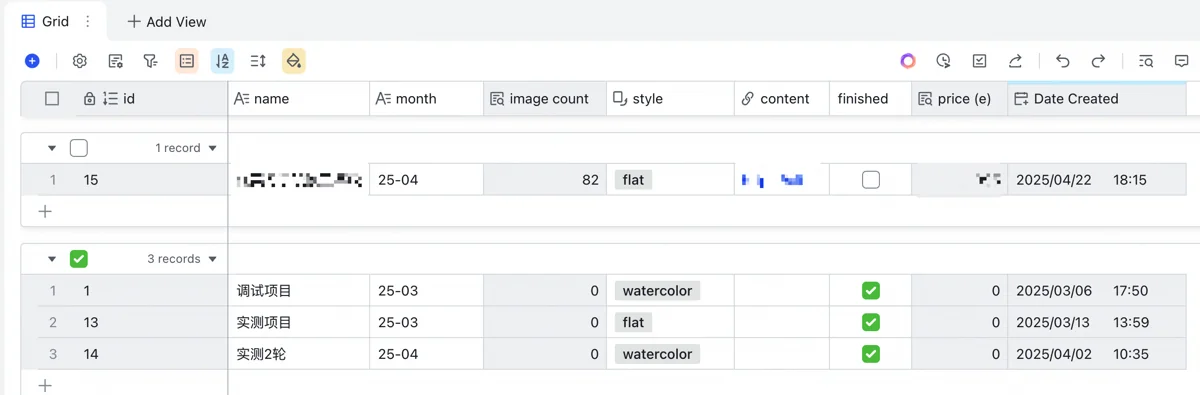
Bottom-up: The Project Table defines project name, month, style, calculates image counts, looks up prices by complexity to estimate revenue, and stores notes.
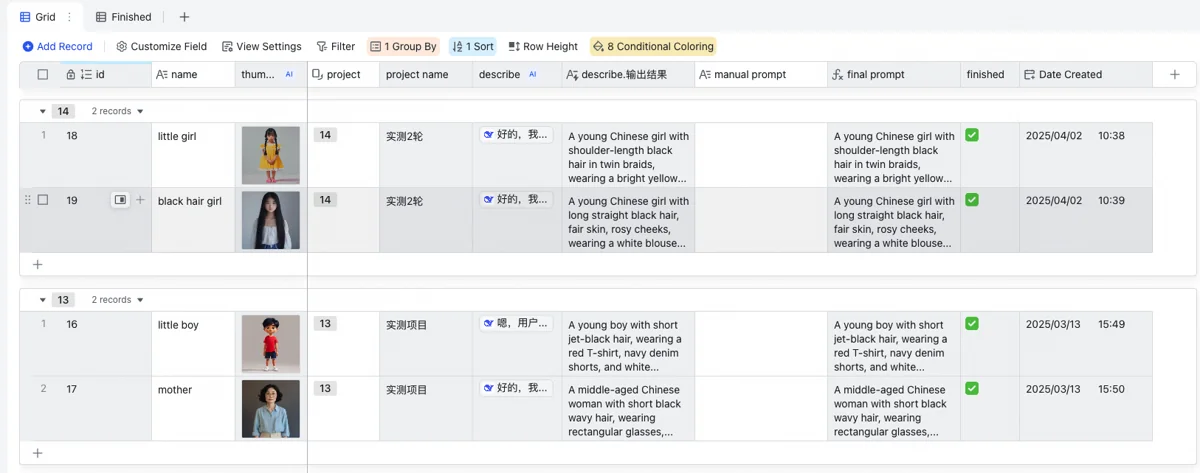
Next, the Character Profile Table ensures consistency. For picture books, main characters need consistent appearance. This table defines character name, project, and uses DeepSeek for detailed appearance descriptions (focusing on appearance, not actions/environment; specifying features like hairstyle, hair/clothing color, Chinese nationality). For convenience, I use StepFun (阶跃星辰) API for cheap thumbnail generation.
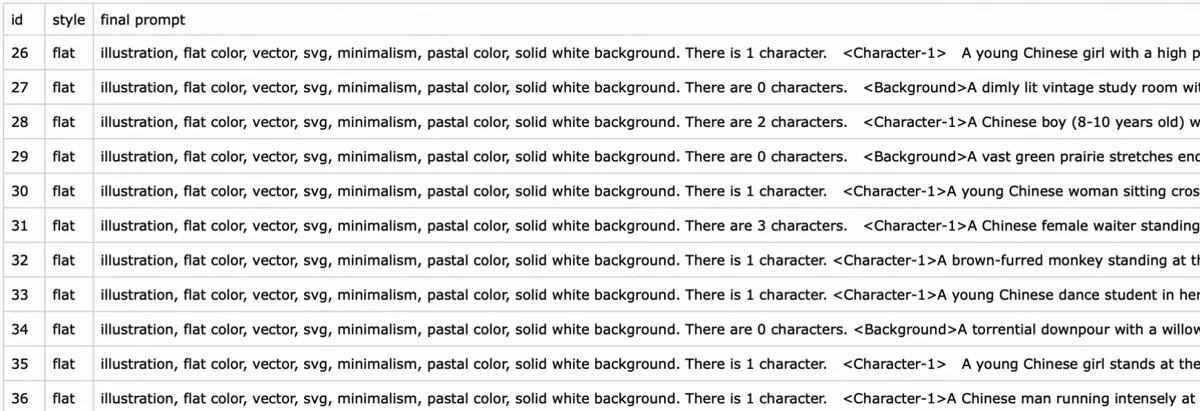
The top-level Image Table is most varied. Each row is an illustration. Pasting client requirements into the “scene” column triggers Base’s free Doubao model to create a concise (<10 char) title for searching and filenames.
For each illustration, assign its project (can copy-paste). A column reads the style from the Project Table and prefixes it to the drawing prompt.

If a main character is present, select them in one of the 3 character columns (supports up to 3 main characters). This column pulls appearance details from the Character Profile Table for the prompt.
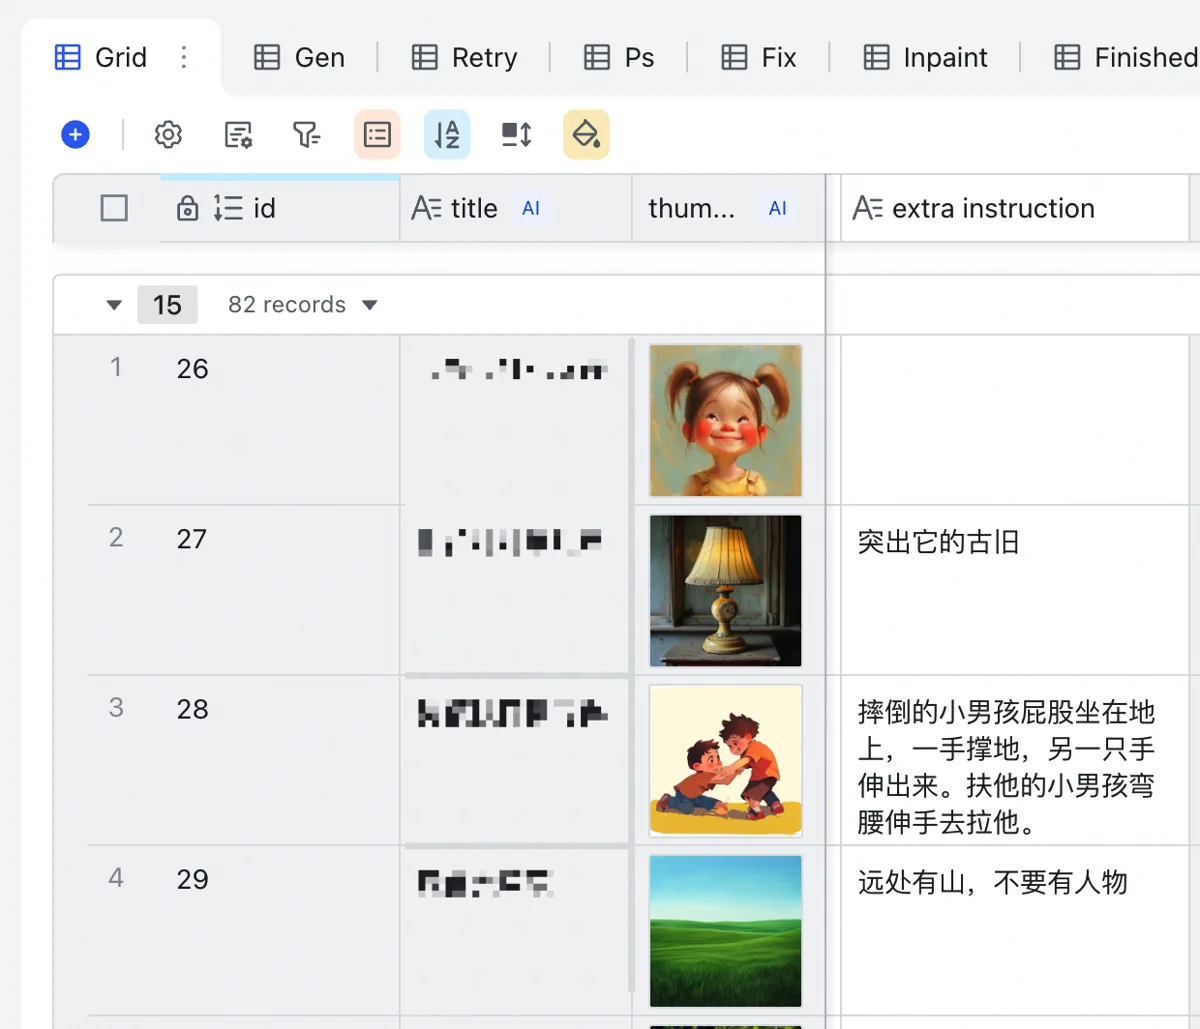
A manual instruction column allows direct input for specific needs (e.g., night scene, outdoor environment), also feeding into the prompt.
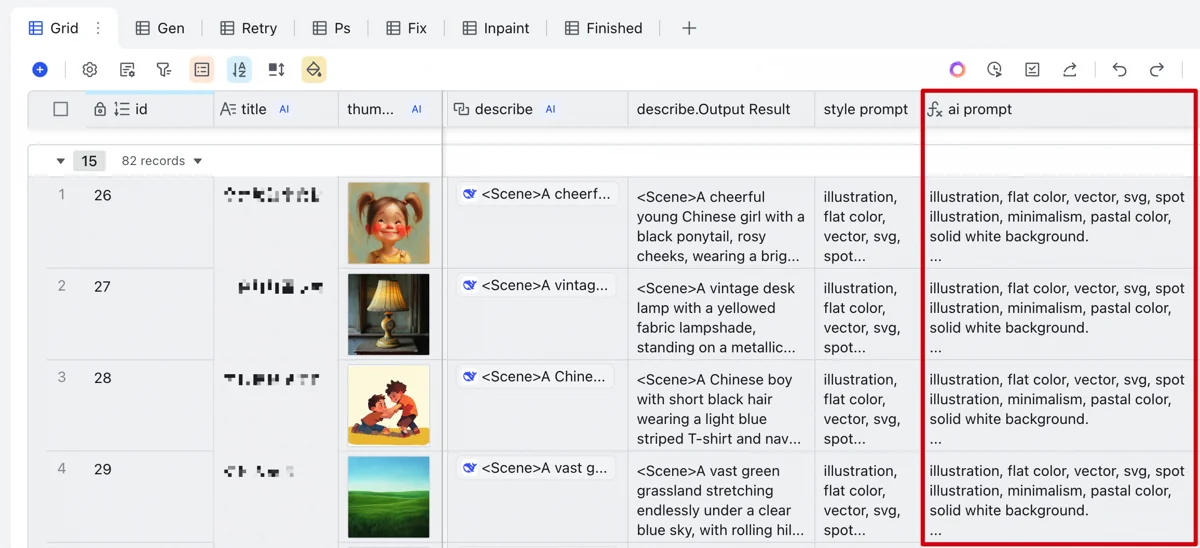
DeepSeek then generates English drawing prompts based on the requirement column, prioritizing manual instructions and fulfilling general needs:
- Count characters.
- Detail each person’s actions (orientation, angle, gaze).
- Prioritize verbatim main character appearance; allow flexibility for others.
- Specify details like Chinese nationality, period-appropriate clothing.
- Briefly describe the environment.
- Specify output format with examples.
DeepSeek R1 excels at this, usually generating usable, accurate, detailed prompts. It’s not free (via Volcano Engine’s (火山方舟) API), but costs far less than Runcomfy.
If this layered table structure seems complex, understanding [Link to other records] and [Lookup] column types in multi-dimensional tables simplifies it.
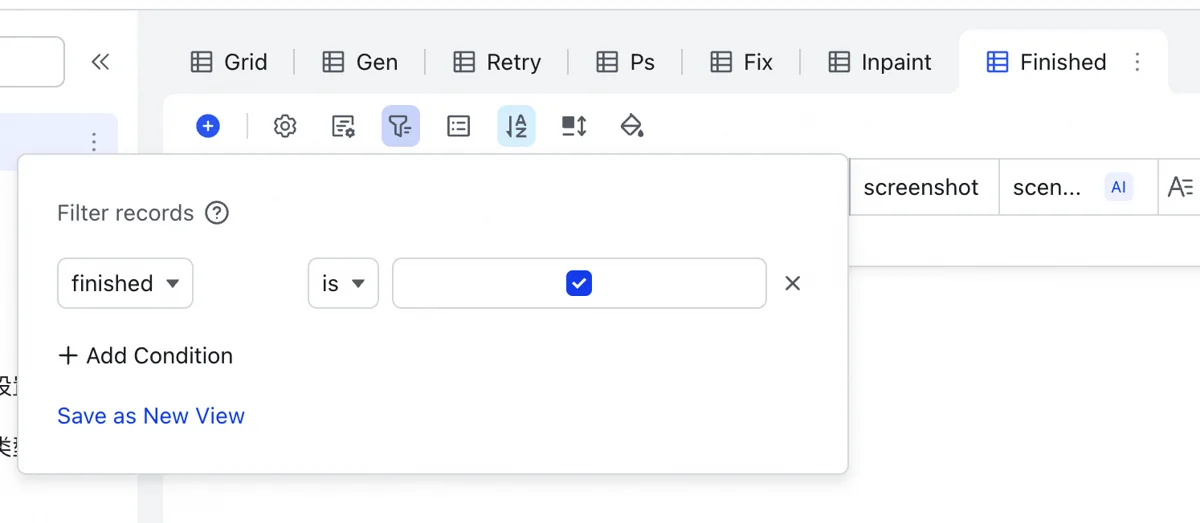
Feishu Base free accounts have a 2000-record limit per table, insufficient for this project. The Image Table needs periodic cleaning. A “completion status” in the Project Table, when checked, marks projects complete. The Image Table reads this, allowing bulk deletion of finalized images to free space.
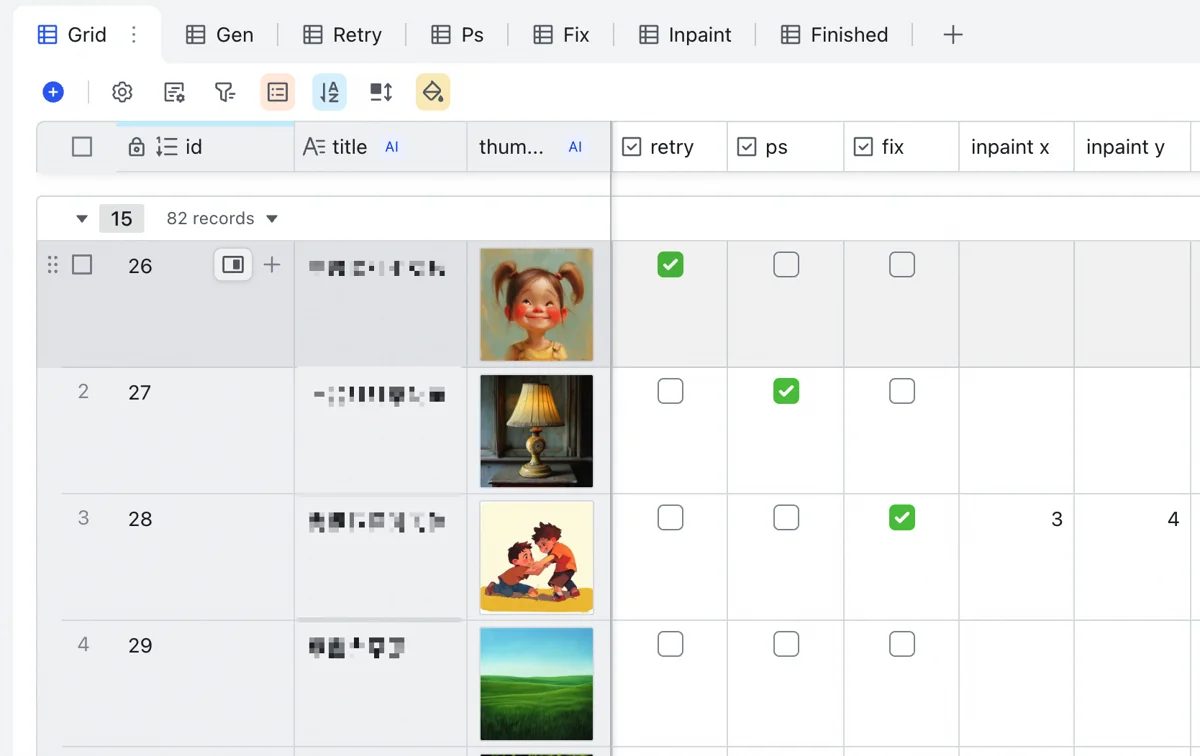
These were configurations for initial generation. I also added columns for modifications:
- Retry: check for regeneration.
- PS: check for manual Photoshop fix.
- Fix: check for illustrator fix.
- X, Y coordinates: for cropping, AI inpainting (e.g., hands), and pasting back (details in “Kicking Off”).
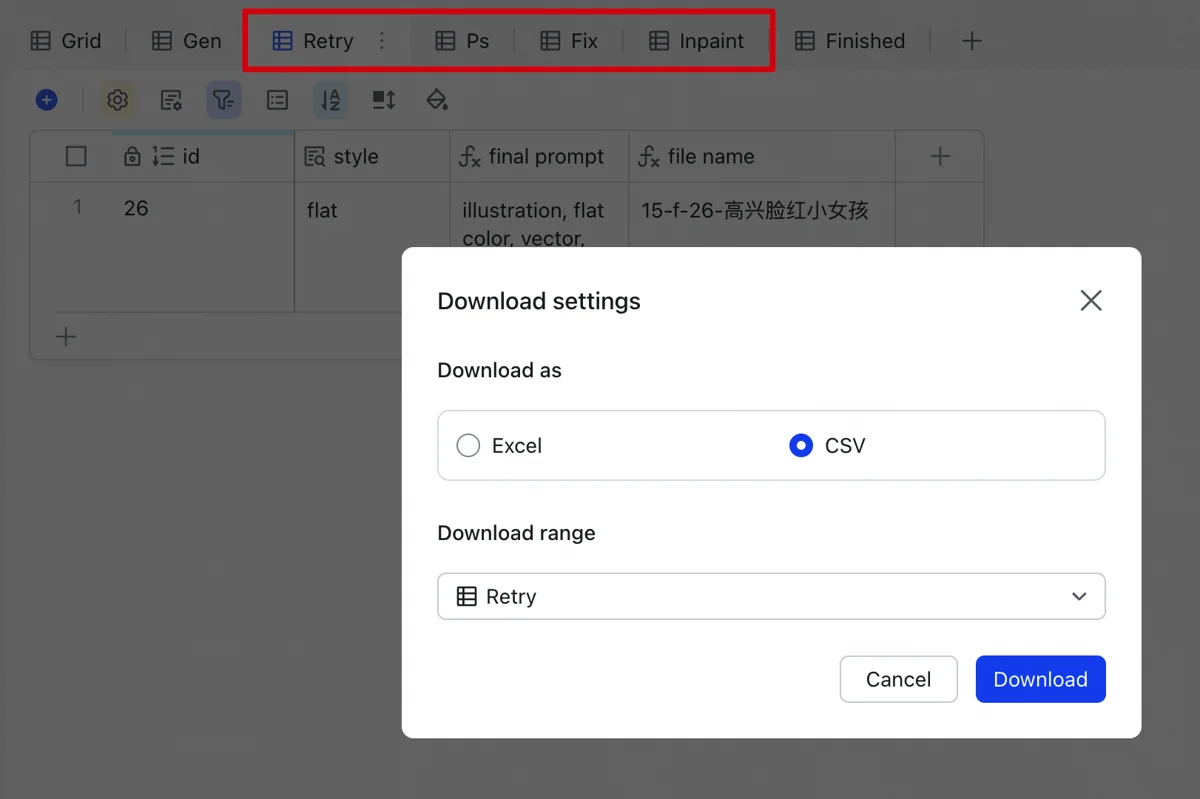
These columns are markers. Reviewing client requests, I check boxes here. Sub-views in the Image Table list images by these statuses. Exporting as CSV allows a program to find and copy these images to a dedicated directory, avoiding manual searches.
This table system centralizes image management, prompt generation, and modification handling.
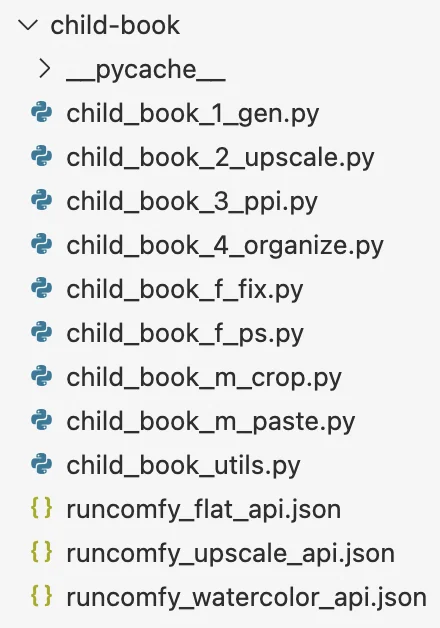
Python for Image Generation and Upscaling
Programs #1 and #2 cover the mid-workflow: from prompts to HD images.
Program #1 takes the CSV, reads drawing prompts, and sends them to Runcomfy, calling the style-specific workflow for bulk image generation.
After output, images are manually selected; retries are marked in the table. Rerunning Program #1 prioritizes these retries.
Once all illustrations are usable, Program #2 sends them to Runcomfy for high-res upscaling to print quality.
Supporting Programs #1 and #2 requires significant underlying code.
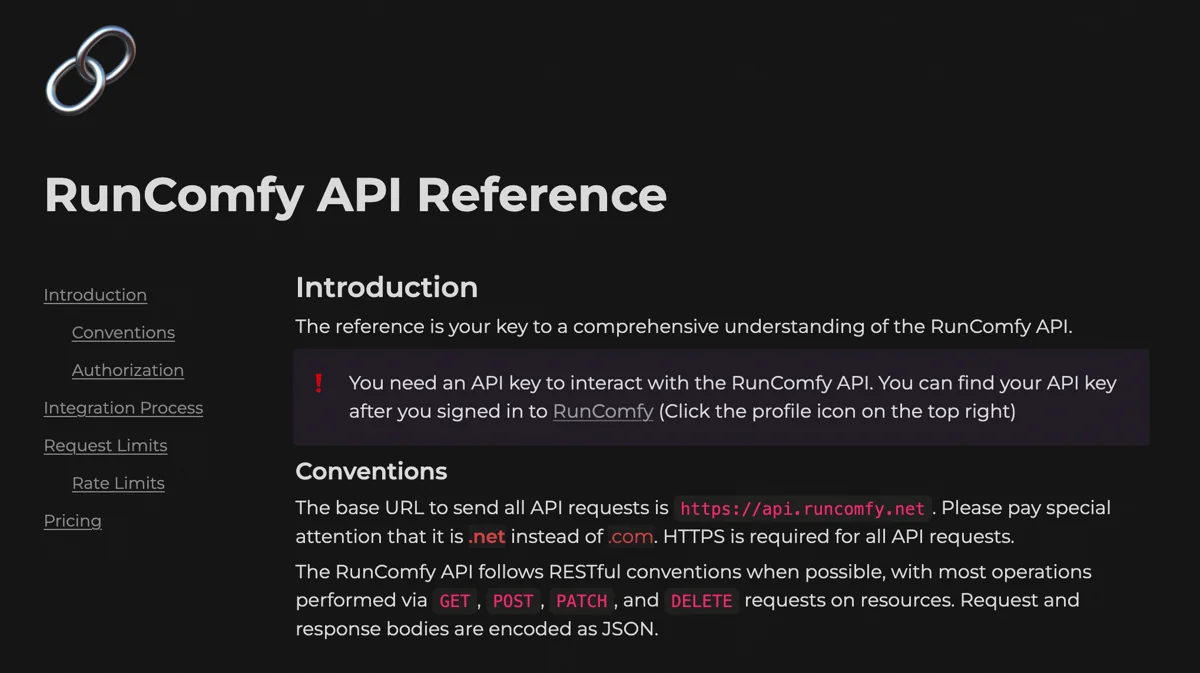
Runcomfy API integration is crucial for programmatic generation. This can be tough for non-programmers, but a capable AI model can help troubleshoot if you’re patient and guide it with the API docs:
https://comfyui-guides.runcomfy.com/api-reference

Once working, it’s a reusable utility function for AI image generation: input workflow, machine type, etc., and get an image from the cloud.
For stability, robust code is essential. API calls need retries with exponential backoff for network errors, preventing program crashes.
This function also needs the cloud machine to be running, so a machine management toolkit (start, check availability, shutdown) is necessary.
runcomfy_utils.py
├── Constants
│   ├── RUNCOMFY_USER_ID
│   ├── RUNCOMFY_API_TOKEN
│   └── RUNCOMFY_MACHINE_PRICES
│
├── Helper Functions
│   ├── generate_seed()
│   └── calculate_billable_minutes()
│
├── RunComfyService (Class)
│   ├── __init__()
│   ├── File Operations
│   │   ├── get_url_from_file()
│   │   ├── save_url_to_file()
│   │   └── remove_instance_file()
│   ├── API Interaction Methods
│   │   ├── get_instance_info()
│   │   ├── create_instance()
│   │   └── stop_instance()
│   └── get_or_create_instance()
│
├── runcomfy_service (Global Instance of RunComfyService)
│
└── Workflow & Download Functions
    ├── runcomfy_workflow()
    └── runcomfy_download_outputs()
The complete utility function file, with its code structure shown above.
For the children’s book project, I added a business logic layer to the base Runcomfy functions. We standardized on two main workflows: one for image generation and one for upscaling.
This new utility function takes specific parameters—like the prompt, image to upscale, or denoising value—instead of an entire workflow. However, it still processes illustrations one by one.
    """Generates flat-style images via a RunComfy workflow.

    Args:
        prompt (str): Text prompt for image generation.
        instance_url (str): ComfyUI instance URL.
        batch_size (int): Images per batch.
        save_dir (str): Save directory for generated images.
        output_name (str, optional): Output filename prefix.
            Defaults to a timestamp if not provided.
        max_retries (int): Max retries for the operation.

    Returns:
        list[str]: List of file paths to generated images.
    """
Image generation function docstring.
    """Upscales an image using a RunComfy workflow.

    Args:
        image_path (str): Path to the image to upscale.
        instance_url (str): URL of the ComfyUI instance.
        save_dir (str): Directory for the upscaled image.
        max_retries (int): Max retries.

    Returns:
        str: Path to the upscaled image.
    """
Docstring for the upscaling function.
Programs 1 and 2, the higher-level applications, also incorporate instance management. They check for an active compute instance before generating images—using it if available, or starting a new one. The instance then automatically shuts down after use to control costs.
Additionally, I built a statistics feature into these programs to calculate run costs based on instance type, price, and runtime. Run logs are consistently written to a spreadsheet. Data on instance costs and revenue from the multi-dimensional table are imported into a dedicated financial sheet. Adding other expenses—illustrator fees, Volcano Engine DeepSeek, and StepFun API costs—allows for easy profit calculation.
My programming skills are average, but with AI’s help, building this system was surprisingly straightforward.
Adjusting Resolution and Dimensions with Python

Program 3 automated handling resolution and image dimensions.
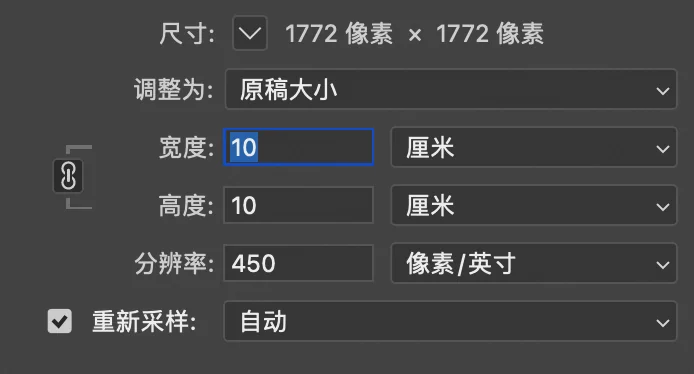
The client required final images at 10×10cm with 450 PPI (pixels per inch).
This was a straightforward task using Python and the PIL package. Based on the required dimensions and resolution, I calculated the final pixel size and used PIL’s built-in methods to adjust the resolution.
This program ran locally, incurring no cloud costs and taking minimal time.
Adding Stylistic Textures with PS Batch Processing
This step addressed the client’s specific style requirements.
For instance, with the watercolor style, the trained model produced backgrounds with distinct watercolor brushstrokes, but character clothing sometimes appeared as flat, solid colors. The client wanted the clothing to also feature random light and dark variations, mimicking watercolor brushstrokes.
An example of the desired uneven light and dark variation on the pants.
For the “flat” style, the client envisioned something very specific, not typical commercial vector art made of solid color blocks. Close inspection of reference images revealed that the flat color areas had white, grainy brushstrokes, creating a colored pencil texture. However, the model-generated images had completely solid colors.
 Subtle smearing marks.
These subtle stylistic features were beyond Lora’s training capabilities but achievable through Photoshop post-processing. The traditional approach involves finding watercolor or pencil-textured PS brushes and lightly brushing over the image with semi-transparent white. However, I aimed for automation, which meant standardizing the process, even at the cost of some quality.
Essentially, this involved overlaying a texture. Textures are inherently random—some parts more transparent, others more opaque, like viewing the ground through patchy clouds from an airplane. Different random patterns in the texture create different brushstroke effects. I just needed to create these two textures to automate their application across all images.
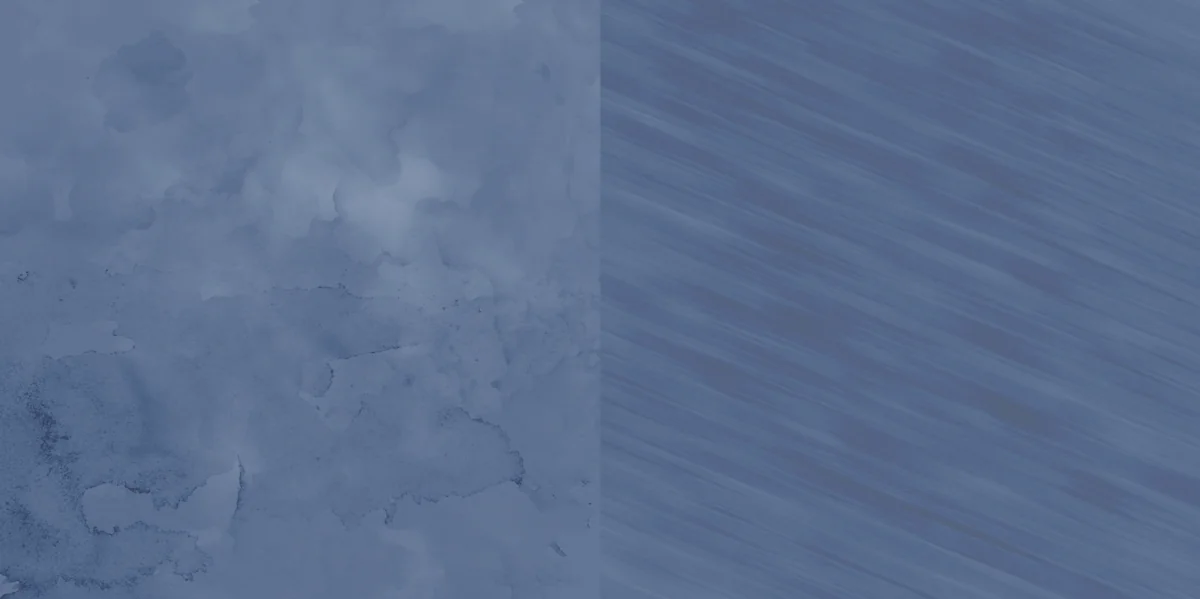
As a designer, this was no issue. I found suitable materials and layered them onto test images. By setting layer modes to Screen and Color Dodge, I eliminated the texture’s original color, making it affect only the image’s light and dark areas. I quickly finalized these two textures and saved them as PSD files.
Next, I created a Photoshop batch processing action. For those unfamiliar, it’s like this: I hit “record,” and Photoshop logs all my actions. I perform the image processing workflow manually once, then stop recording. This creates a batch action that Photoshop can then apply to an entire folder of images, automating the texture addition.
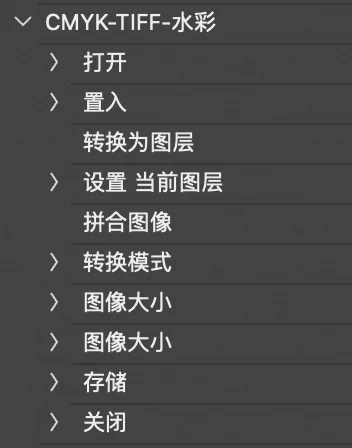
The action’s steps were:
- Open an image.
- Place the pre-prepared texture PSD file.
- Convert the texture to a layer, change its blending mode from Normal to Pass Through (allowing the Screen and Color Dodge effects within the PSD to apply).
- Merge all layers to bake the texture into the image.
- Convert to CMYK color mode (for printing).
- Save As TIFF format (for printing).
- Close the image.
When running this batch action, the “Open image” and “Save As” steps are overridden by new settings, allowing different images to be processed each time.
The CMYK conversion could have been done in the earlier Python step, which I initially tried. However, PIL’s color profile files aren’t professional grade and yield much poorer results than dedicated image processing software, often causing a yellowish tint across the image. Color-sensitive tasks are best left to Photoshop.
PS batch processing is incredibly powerful. For advanced uses, check out my article:
Turning Photoshop into a Machine Gun with Excel
△ △ △ 🔮 Tech Talk Ends 🔮 △ △ △
Let’s Get to Work
With everything set up, it was time to take orders.
Hit Start, and Images Flow
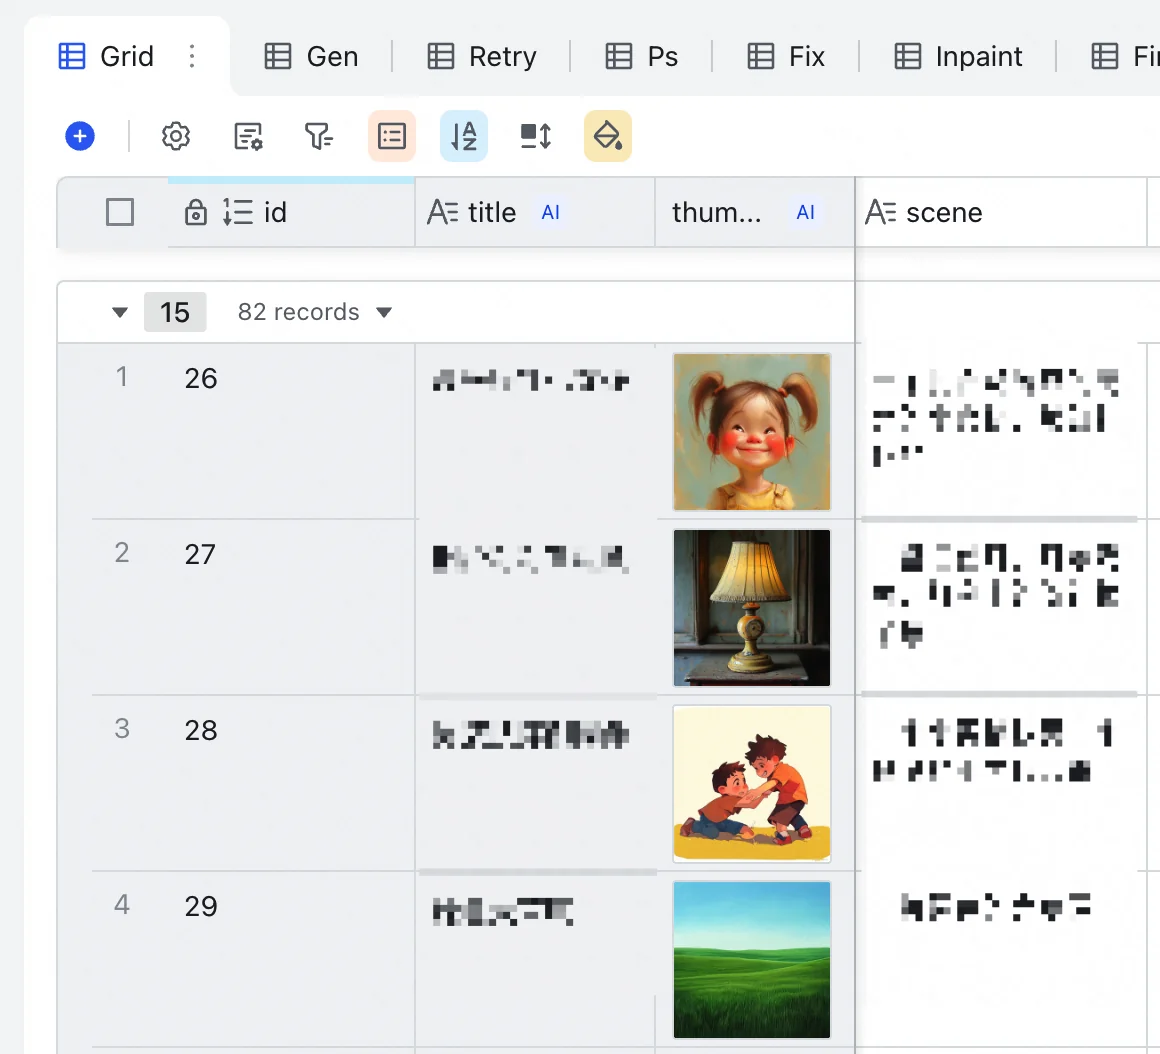
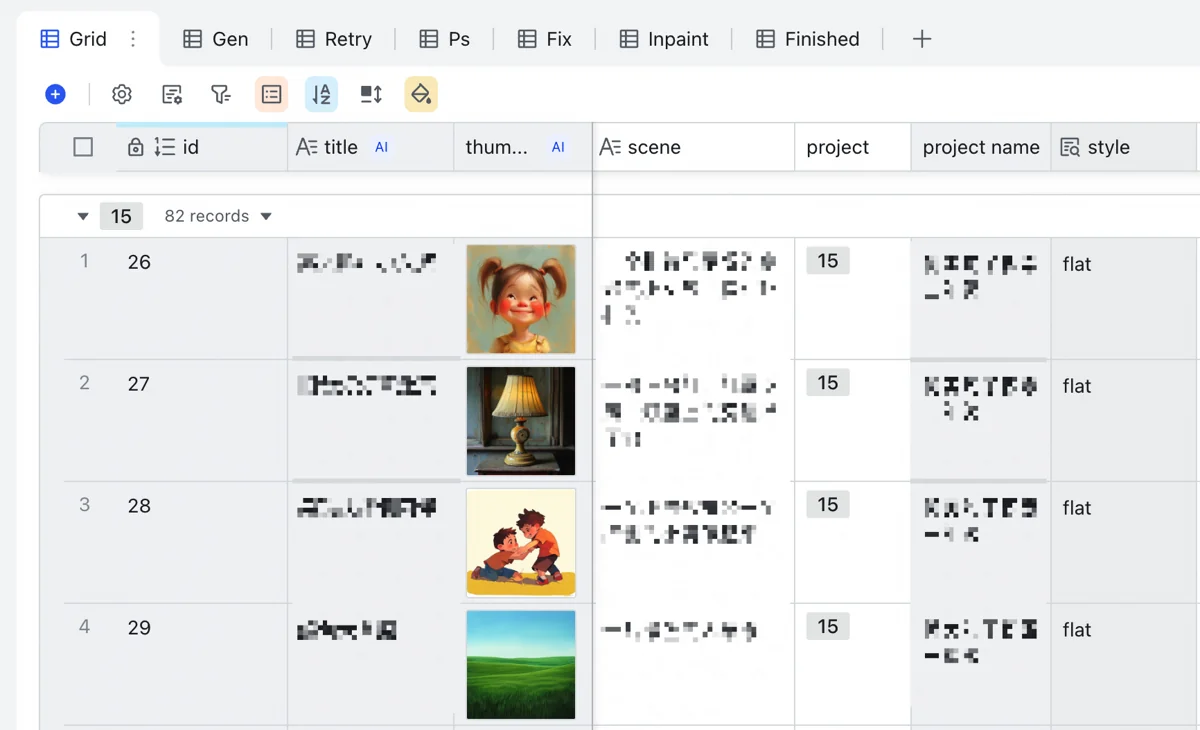
The first real project was small: 1 book, 82 illustrations, 7-day deadline.
Time-wise, I felt no pressure. It was all done in half a day, like running a photo printer (if not a money printer).
About half of the 82 illustrations didn’t feature characters. These types of images are less prone to errors and often usable on the first attempt. Fewer than 20 images needed retries, mostly for incorrect character interactions rather than hand issues.
Three images featured many characters. For such group scenes, expecting AI to nail it on the first try is unrealistic. I regenerated them a few times, picked the ones with the fewest problems, and earmarked them for the illustrator.
I submitted the first draft, explaining that the illustrator hadn’t started, so they should ignore hand issues for now, as those would be fixed later. This prevented wasted illustrator effort, as every revision costs.
Sudden Twist: The Illustrator Quits
Tech-obsessed people like me often underestimate the human element.
The client’s feedback on the first draft was, frankly, a shock. The revision requests were incredibly detailed, generally falling into these categories:
- Logical inconsistencies: Desks or chairs missing legs or having too many.
- Missing elements: A desk lamp drawn without a knob.
- Style changes: Character hair, originally shown with highlight/shadow lines in training images, now needed these lines removed.
- Potential legal risks: Police uniforms in a foreign style.
- Printing requirements: Night and thunderstorm skies needed to be light-colored to avoid poor printing of dark areas.
- Aesthetic preferences: Character clothing styles were too monotonous and needed more variety.
- Peculiar requests: Children couldn’t wear overalls, long pants couldn’t show ankles, pants couldn’t be cuffed, and smiles couldn’t show teeth. (Perhaps past buyer complaints?)
In the first review round, 71 out of 82 images needed revisions. The issues went far beyond just hands, jeopardizing the illustrator’s remaining 6-day schedule.
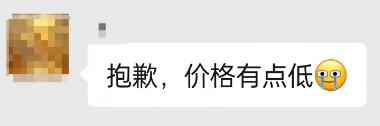
When I spoke with the illustrator, they asked to reconfirm the price. Upon reconfirmation, they abruptly decided the price was too low and quit without attempting to negotiate.
To be fair, the rate I offered wasn’t very attractive. Plus, cleaning up AI’s messes probably isn’t appealing work for illustrators.
My friend started looking for another illustrator, and I asked around too. The outlook was bleak. Current market rates for illustrators were much higher than my offer; some from big companies quoted up to 100 yuan per image. Given the client’s meticulous reviews, I had no idea how extensive future revisions would be. Even if I sacrificed most of my profit for an expensive illustrator, costs could easily spiral out of control.
Gritting My Teeth and Doing It Myself, Testing AI’s Limits
At this point, I decided to tackle the revisions myself. I wanted to gauge the extent of the client’s detailed requests to set standards for future illustrator searches. I also wanted to test my own AI capabilities. Though I’m a designer, I can’t draw. Could my AI and Photoshop skills compensate, freeing me from complete reliance on illustrators? My strong PS skills gave me the confidence to press on.
I revised intensely for a week. After 6 rounds, I’d revised 71 + 60 + 33 + 11 + 3 + 13 = 191 images. “Oh my god” was all I could think. Some images had too many issues, so I discarded them and generated new ones. This reduced problems, but local adjustments were still needed. Regenerating other images was too risky, as it could introduce new flaws. Patching existing images was the safer bet. All these fixes were manual.
This created a massive bottleneck in the automated pipeline. Manual retouching replaced the previously simple selection process between image generation and upscaling.
Surprisingly, after a week of revisions, despite the tight schedule making my hands tremble, progress was smooth. I’d planned to meet most requests and negotiate on unmanageable ones, explaining my lack of an illustrator. But ultimately, I met all requests by combining various techniques; nothing proved impossible. The numerous revision rounds were just the client’s workflow; each round brought up new points, indicating incomplete initial reviews rather than poorly executed revisions.
All requirements were met, yet I can’t draw. How? Relying solely on AI for revisions is unrealistic; AI art is hard to control precisely. Fortunately, my PS skills allowed me to wrangle AI:
- Minor erasures: Handled with PS alone.
- Major erasures: Doubao’s local inpainting was quick and effective.
- Moving/transforming elements: Traditional PS strengths.
- Creative tasks (no precise requirements): AI workflow local inpainting maintained style consistency.
- Creative tasks (precise object requirements): Found images online, then used AI local inpainting or style transfer to match the style while preserving the main subject.
I’ll detail these techniques in the tech section below.
🔮 Tech Share
▽ ▽ ▽ 🔮 Tech Talk Begins 🔮 ▽ ▽ ▽
This section covers the manual editing challenges and solutions, which are beyond automation.
Techniques and Their Uses
First, an overview of the techniques and their capabilities:
- 【Flux】Text-to-image local inpainting (high denoising): Completely replace an image element.
- 【Flux】Text-to-image local inpainting (low denoising): Refine elements, often for fixing hands.
- 【Flux】Image-to-image local inpainting: Insert a specified object into the image.
- 【Flux】Style transfer: Redraw an image based on a reference image’s elements and style (e.g., turning photos into illustrations, merging different styles).
- 【Doubao】Conversational editing: Quickly change colors or erase large areas (style consistency can be unstable).
- 【Doubao】Local inpainting: Precise local erasure. Advantage: can directly modify upscaled high-res images, which Flux would process very slowly.
- 【PS】Quick Selection Tool: Roughly paint to select an object; similarly colored areas are auto-selected for easy isolation.
- 【PS】Magic Wand Tool: Selects based purely on color; adjustable tolerance, good for complex shapes like branches.
- 【PS】Spot Healing Brush: Simpler local inpainting, performs as well as Doubao on simple backgrounds.
- 【PS】Content-Aware Fill: Better results than Spot Healing Brush, but requires selecting an area first, then filling; creates a new layer (less convenient).
- 【PS】Clone Stamp Tool: Paints one part of an image onto another; often used to fix color boundaries by smearing along them.
- 【PS】Smudge Tool: Blurs unwanted boundary lines, making them less obvious (opposite of Clone Stamp).
- 【PS】Puppet Warp: Pin parts of an object and drag the rest; the object bends like rubber (e.g., make characters look up/down, bend arms, straighten legs).
- 【PS】Levels & Hue/Saturation Adjustment Layers: Change brightness and color. With clipping masks, can target specific parts (e.g., easily modify clothing colors).
- 【PS】Cutout Filter: Reduces image colors to a few; best filter gallery tool for flat-style processing.
Now, let’s see how combining these tackles tricky problems.
Challenge 1: Traffic Police Directing Traffic
Key Techniques: Doubao local inpainting, Content-Aware Fill, Cutout Filter

This illustration’s difficulty stemmed from cultural differences. Flux, trained by a German team, clearly lacks Chinese clothing elements in its data. Prompting for a traffic officer directing traffic yielded a foreign-style uniform—unacceptable for a children’s book.
Using text-to-image local inpainting (denoising 1) to request a blue short-sleeved Chinese traffic police shirt resulted in:

This is a Liblib restriction against generating content with potential legal risks. Prompts containing “police” or images resembling police uniforms trigger a block. While platforms without such restrictions exist, Liblib’s affordability makes it a good choice if you lack a powerful graphics card.
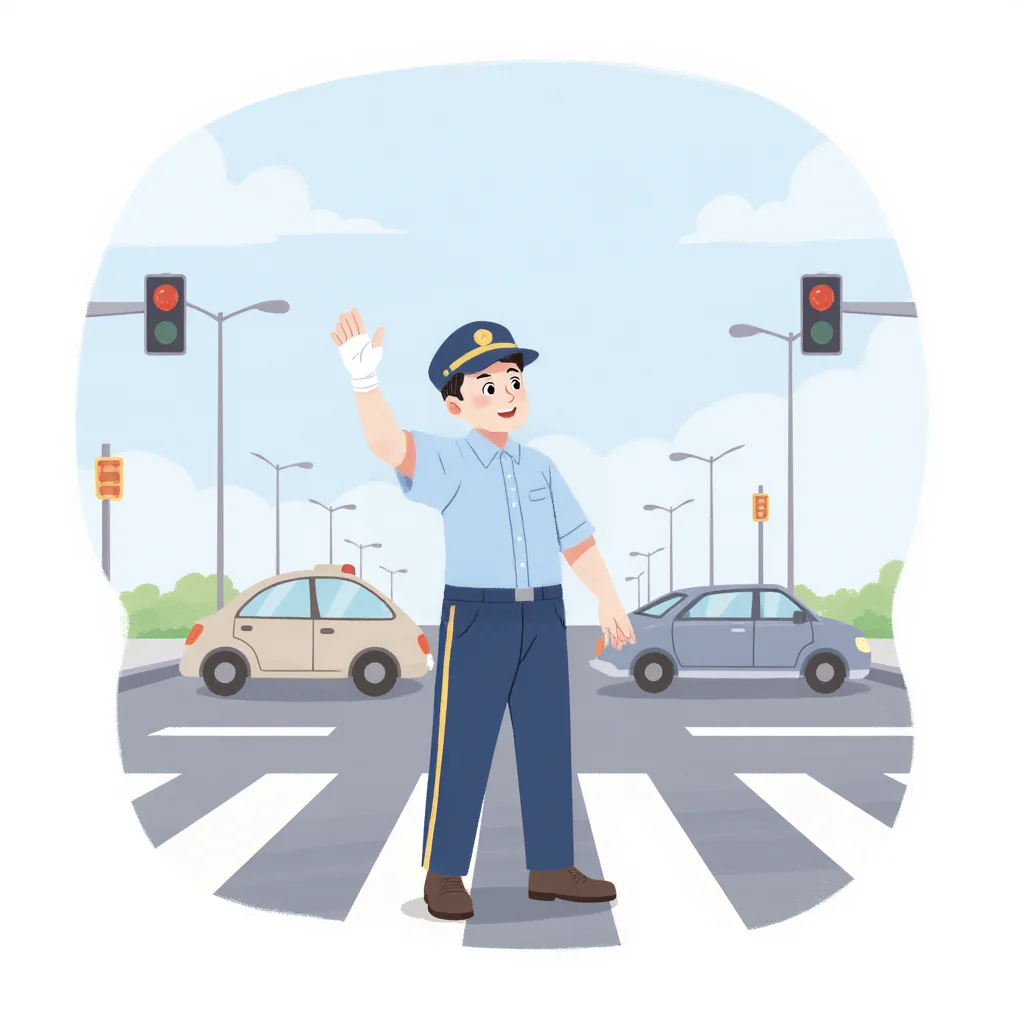
Removing police-related terms, however, just produced an ordinary blue shirt, not a police uniform—a catch-22.

Since Flux on Liblib was problematic, I tried other tools. Doubao’s Jimeng model lacks this restriction, and the results were decent, capturing the general look.
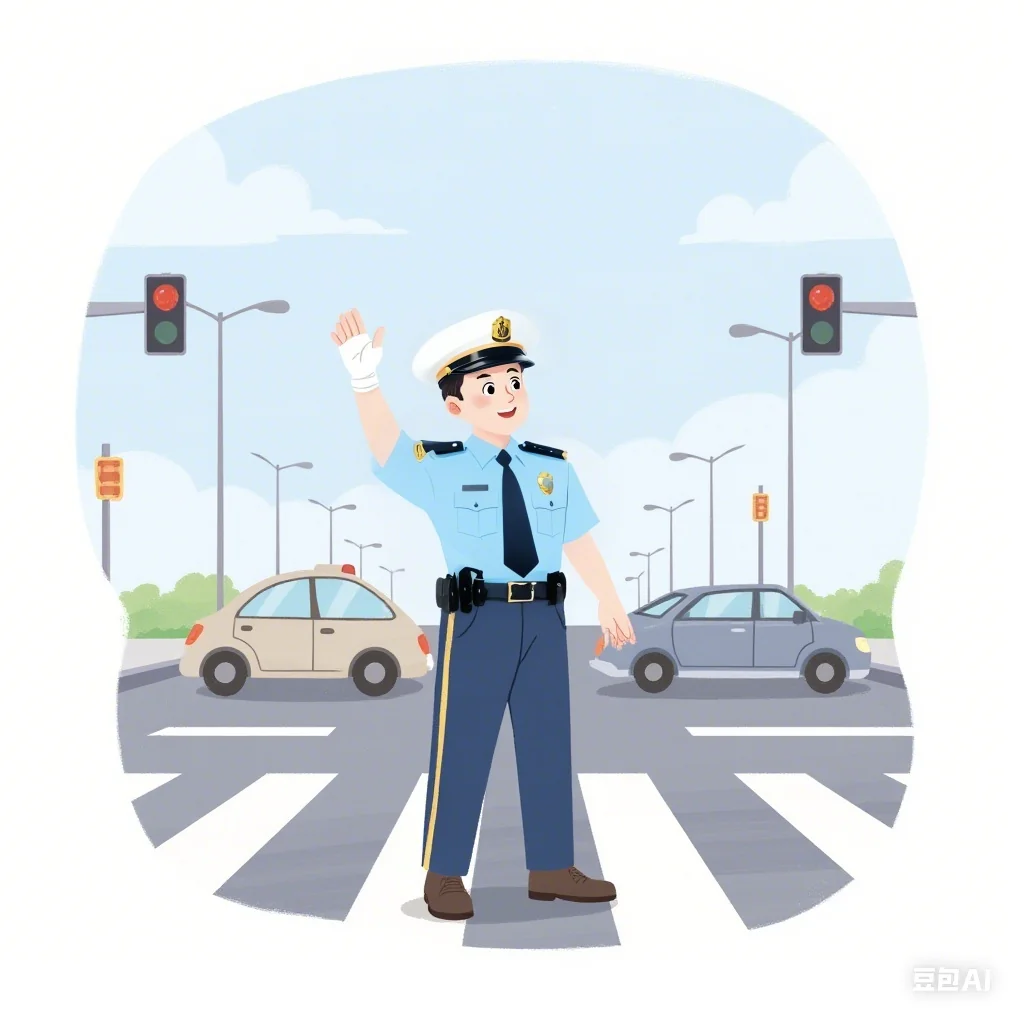
The white police cap was even trickier. Doubao couldn’t render it correctly either; it resembled something a high-end hotel parking attendant might wear. The distinct features of a white police cap were missing, significantly reducing resemblance.
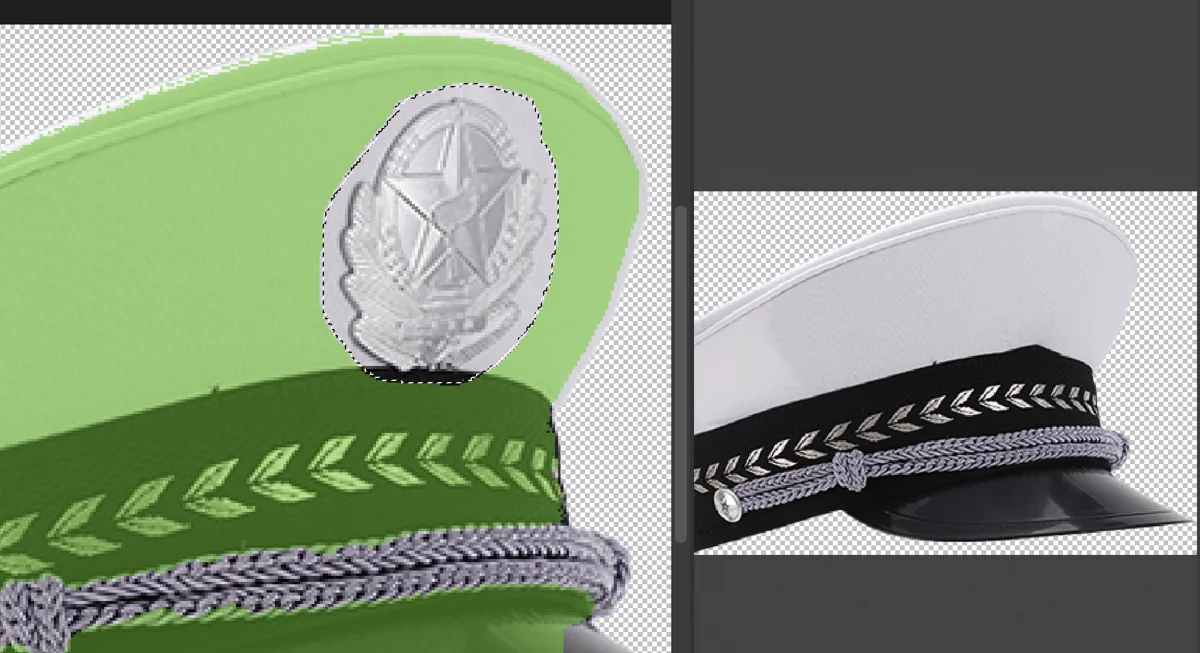
I found a police cap image at a roughly matching angle and Photoshopped it in. (Note: To avoid blocks, I first used PS to erase the police emblem, adding it back once AI processing was complete.) PS Content-Aware Fill easily removed the emblem.

Positioned the hat correctly. It was still realistic at this stage.
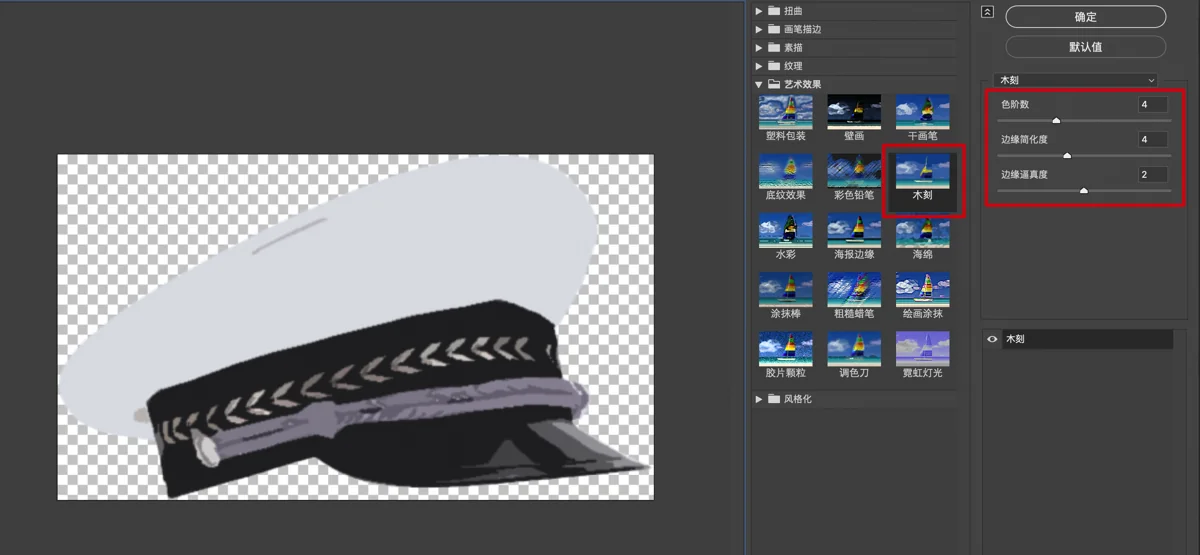
Applying the Cutout filter to the hat and reducing colors instantly gave it a flat style.
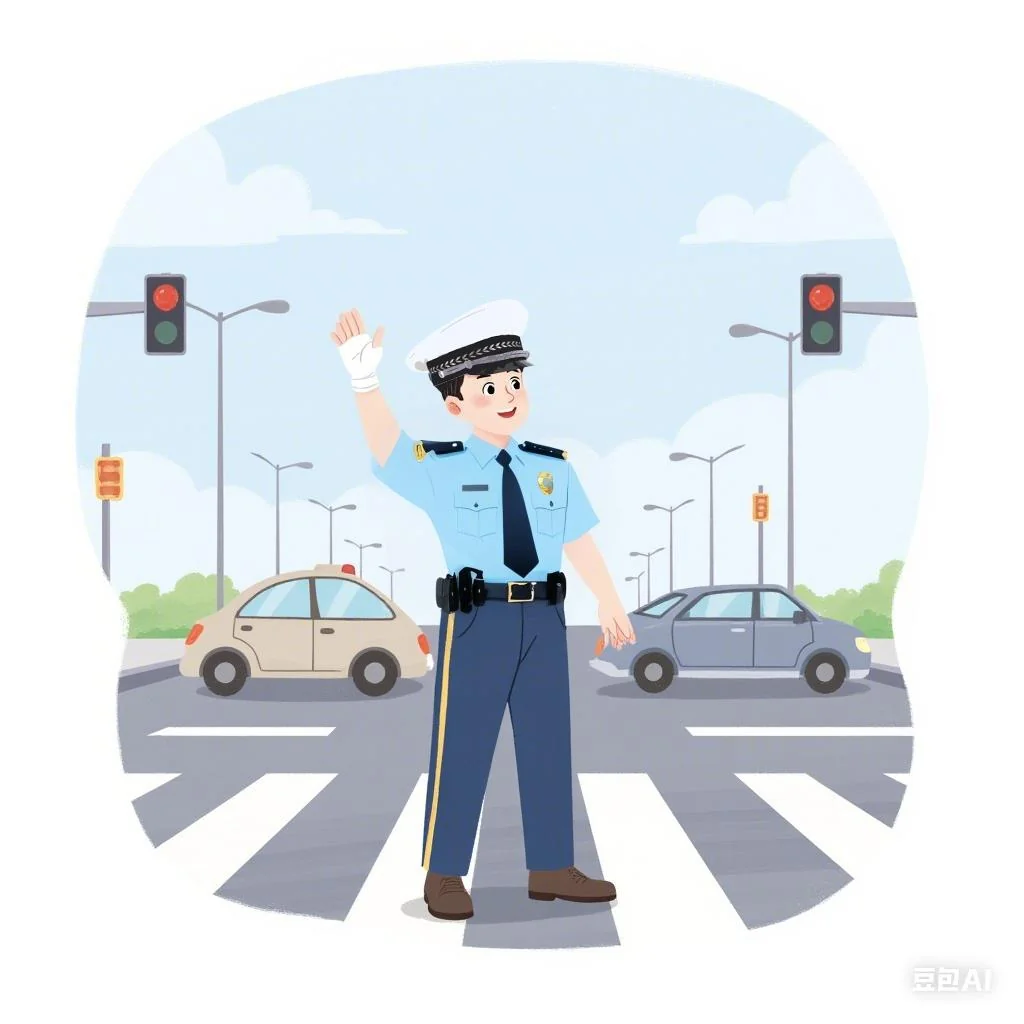
Much less out of place. Problem solved. Other image issues had relatively stable fixes, so I won’t detail them.
Challenge 2: Child Jumping Rope
Key Techniques: Text-to-image local inpainting (low denoising), Style transfer, Puppet Warp
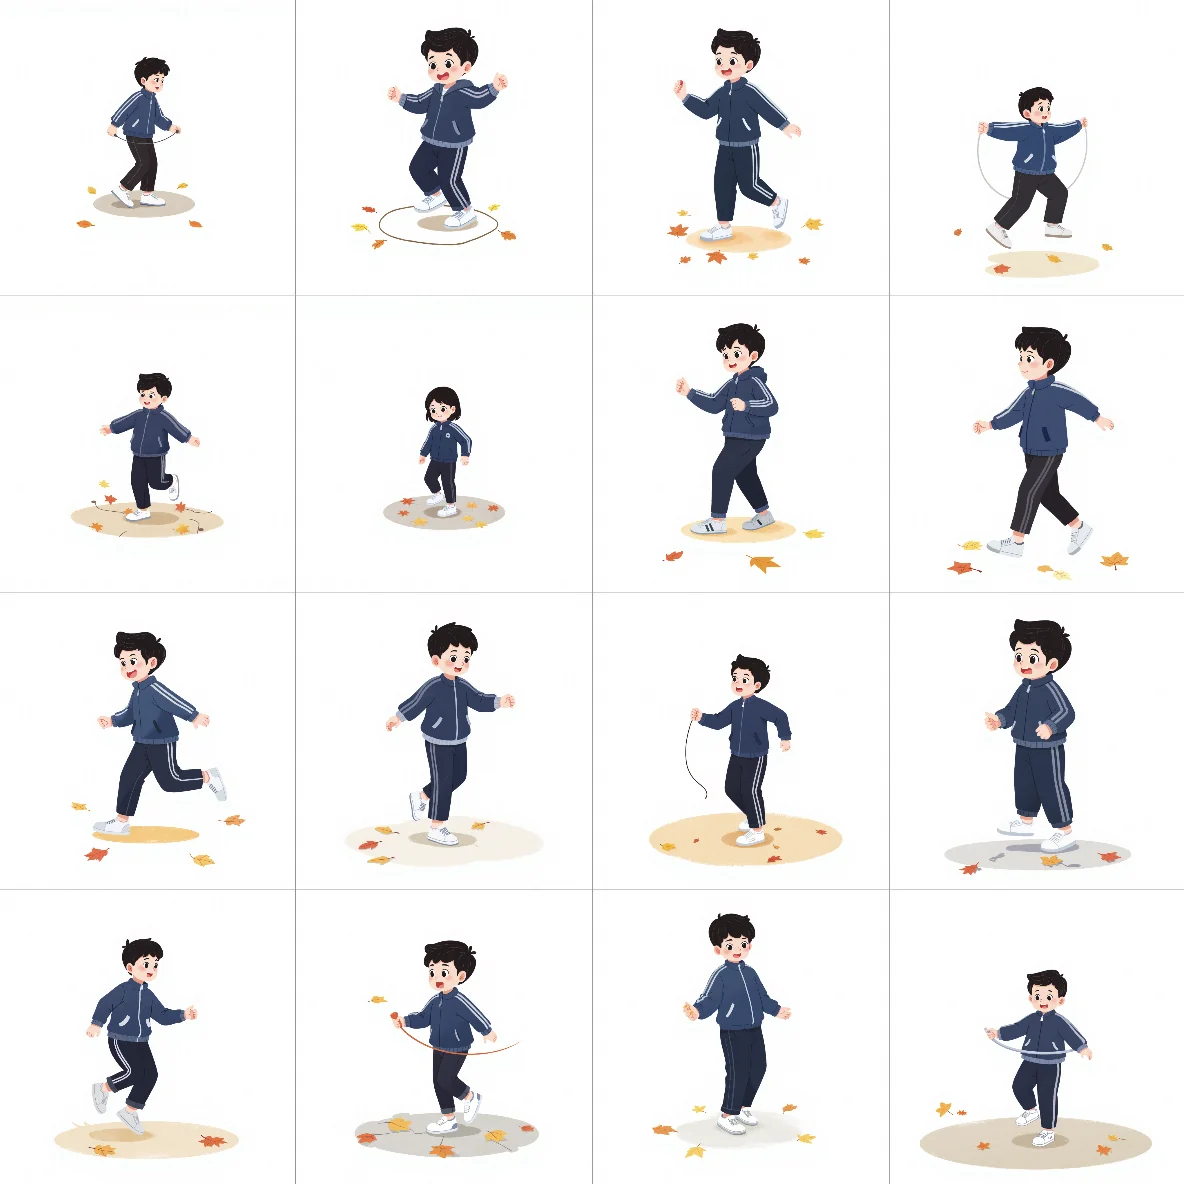
This illustration also pushed Flux’s limits. It clearly hadn’t seen many jump rope scenes, drawing children randomly waving ropes; even just having a rope was a good start. Brute-forcing 16 images yielded no usable results.
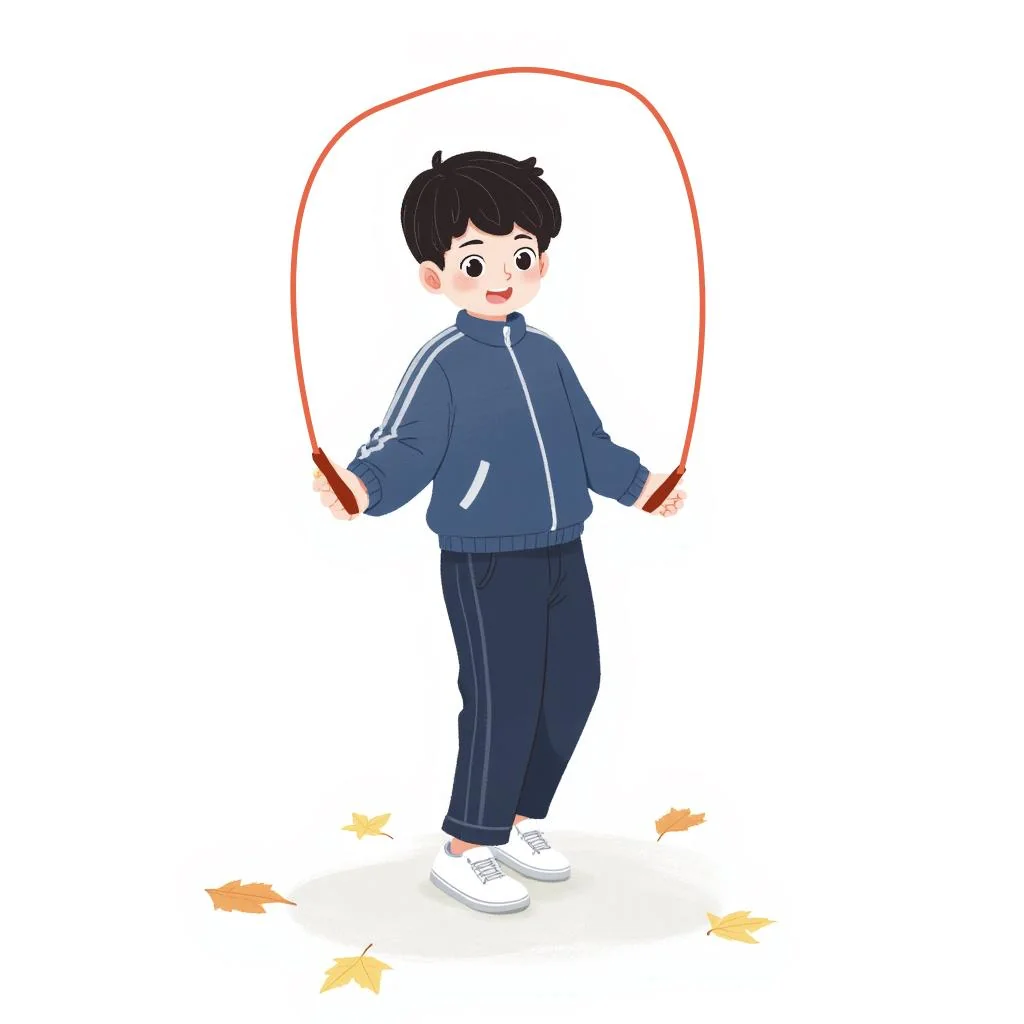
No worries—if the pose is right, the rope can be added. This image had the most potential. A quick PS sketch of a jump rope started to look plausible.
Using the style transfer workflow (denoising 0.7) largely preserved the original content, giving AI enough leeway to draw the rope more realistically.

Let’s discuss fixing hands. The child’s right hand is missing a thumb, or the thumb and index finger are merged. Direct inpainting here is tricky; AI often struggles with hands holding objects, and many retries might fail.
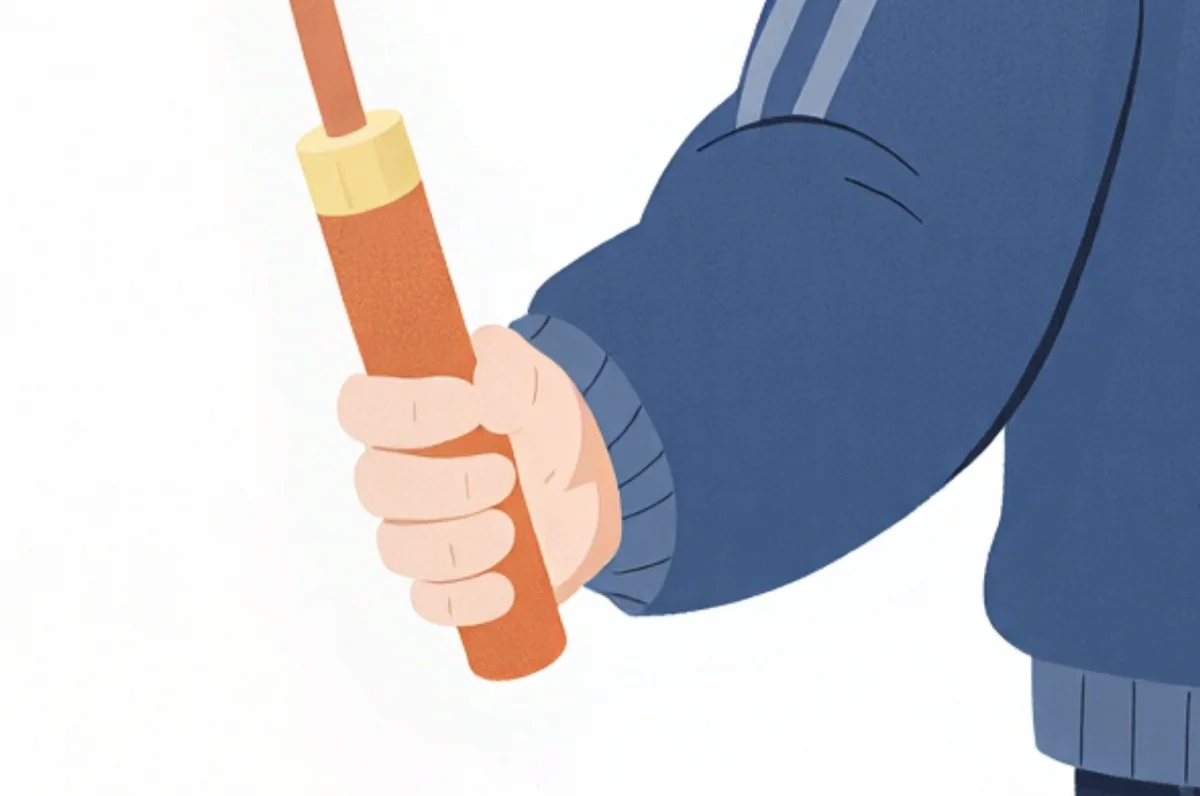
AI struggles with small hand areas due to insufficient attention allocation. The key isn’t just local inpainting, but magnification. Zooming in provides clarity and detail, significantly increasing the success rate of fixing even mangled hands.
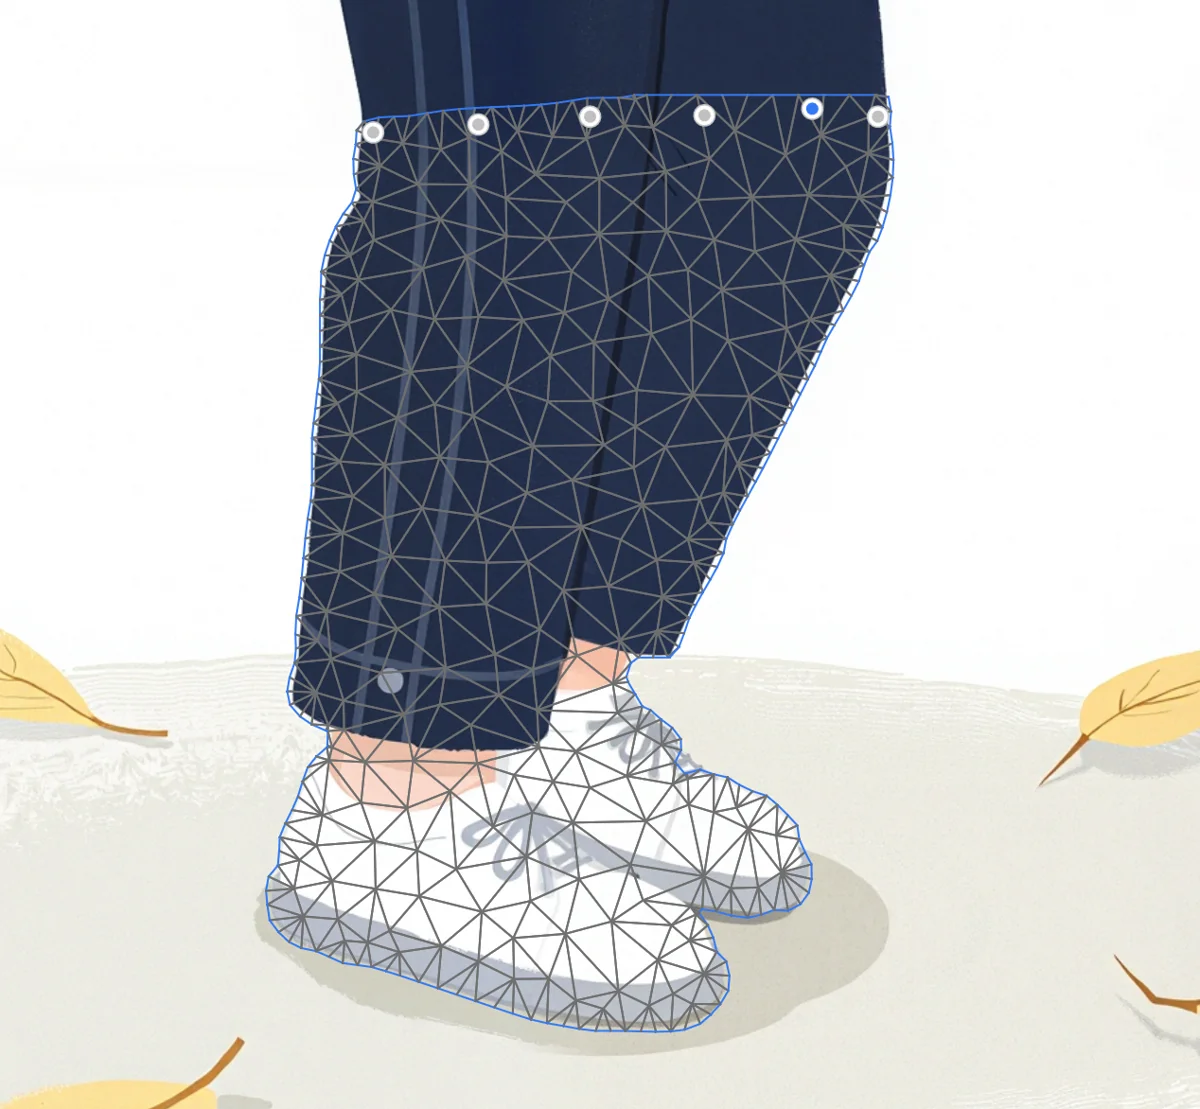
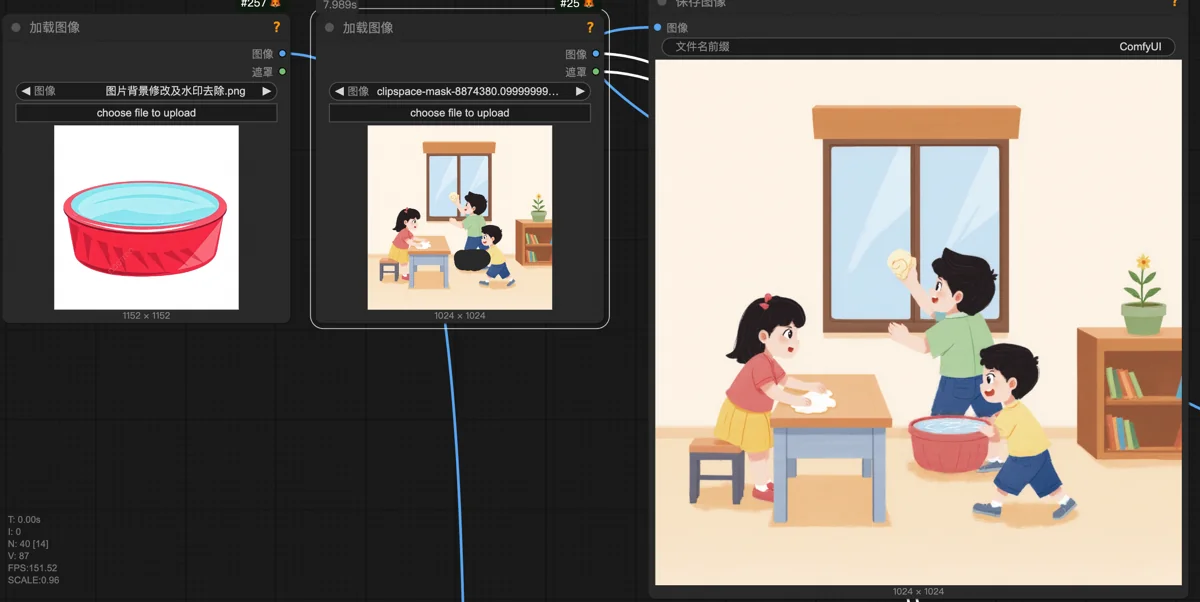
However, Flux inpainting directly on a full high-res image is slow and deviates from its preferred generation size, leading to errors. The solution: crop out a 1024×1024 section to be fixed. This is Flux’s optimal size, ensuring good results. After fixing, paste it back.
Accurate pasting is a pain. This is where a program for precise handling helps.
Recall the x/y coordinate columns in the Feishu table; they’re part of my zoom, crop, and paste program. My cropping program divides an image into 5×5=25 overlapping 1024×1024 slices. I input the slice’s row/column numbers into the table. For example, here I took the slice from column 2 (x=2), row 3 (y=3), determined by eye. Running the program saves this slice.
Local inpainting on the sliced image succeeded on the first try. Adjust denoising as needed: higher for major issues, lower (as here, where posture was mostly correct) to avoid new problems.
The accompanying pasting program accurately pastes the slice back onto the original image using the cropping stage’s row/column numbers.
However, the character’s posture was still unnatural. The client felt the character standing on the ground didn’t look like they were jumping.
PS Puppet Warp to the rescue. First, Quick Select the lower leg and foot, copy to a new layer.
Activate Puppet Warp, pin the joints.
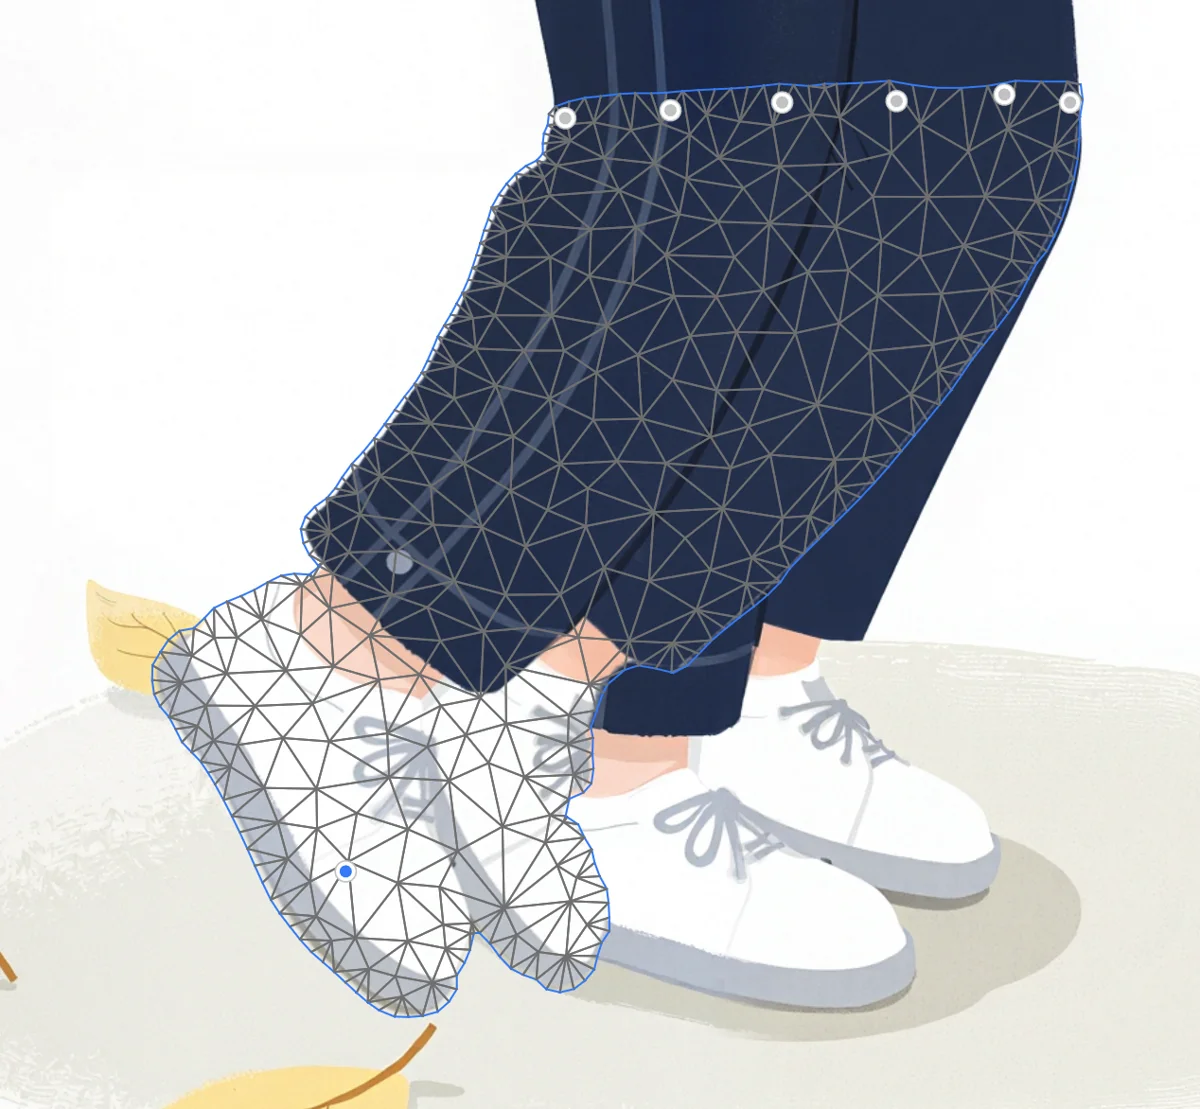
Pull the shoe back; the leg bends.
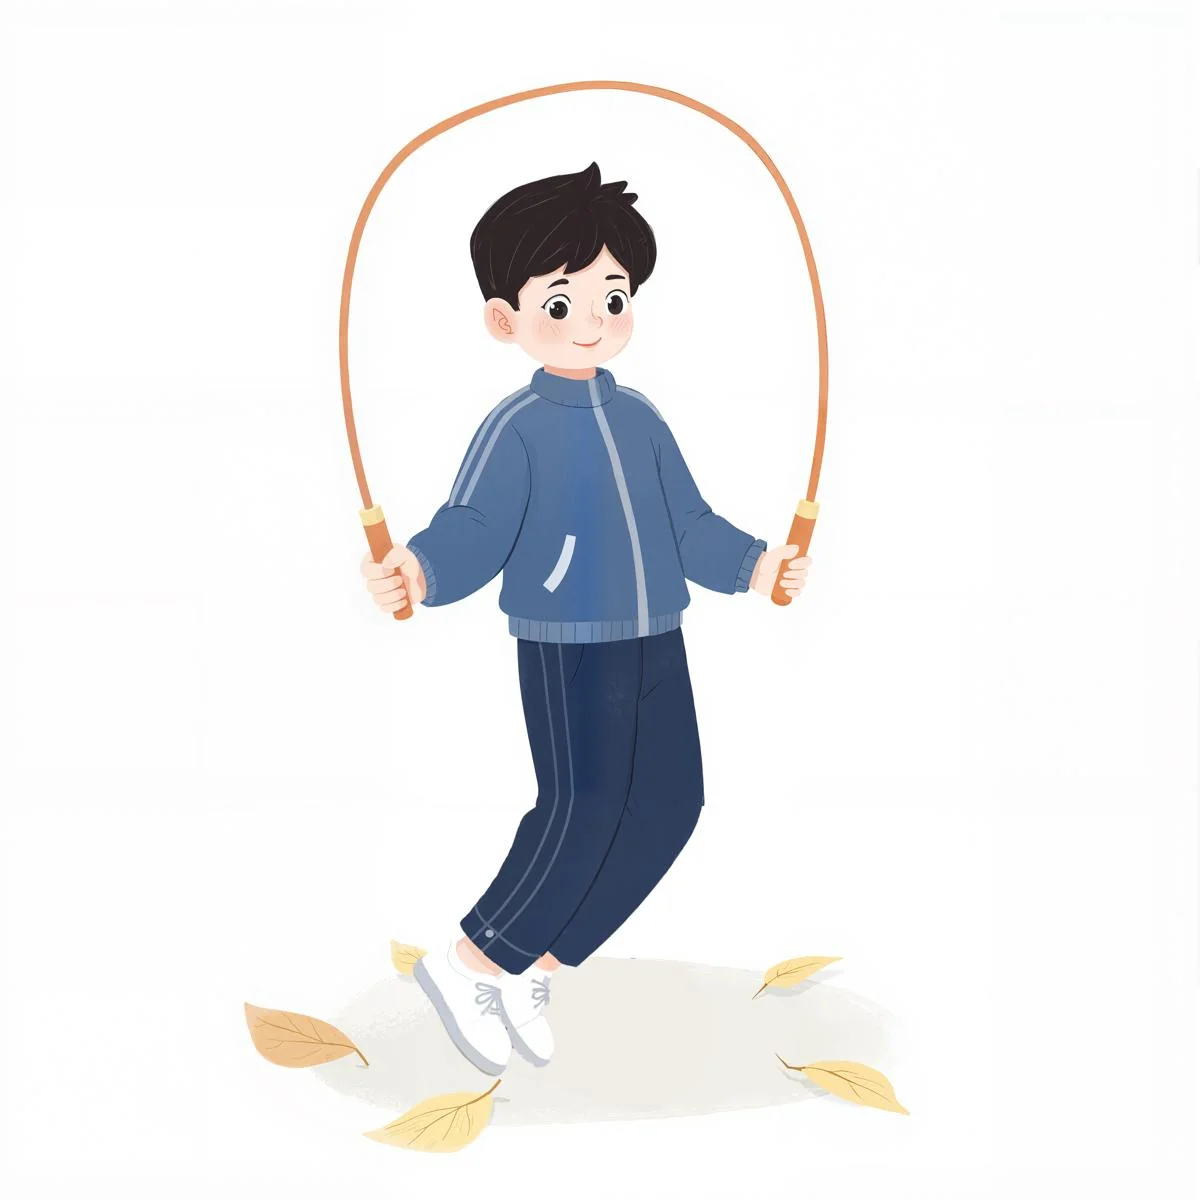
Erase the original leg. Bent. (A small knee joint artifact and missing ground shadow remain; this is a tech demo, so minor issues are ignored.)
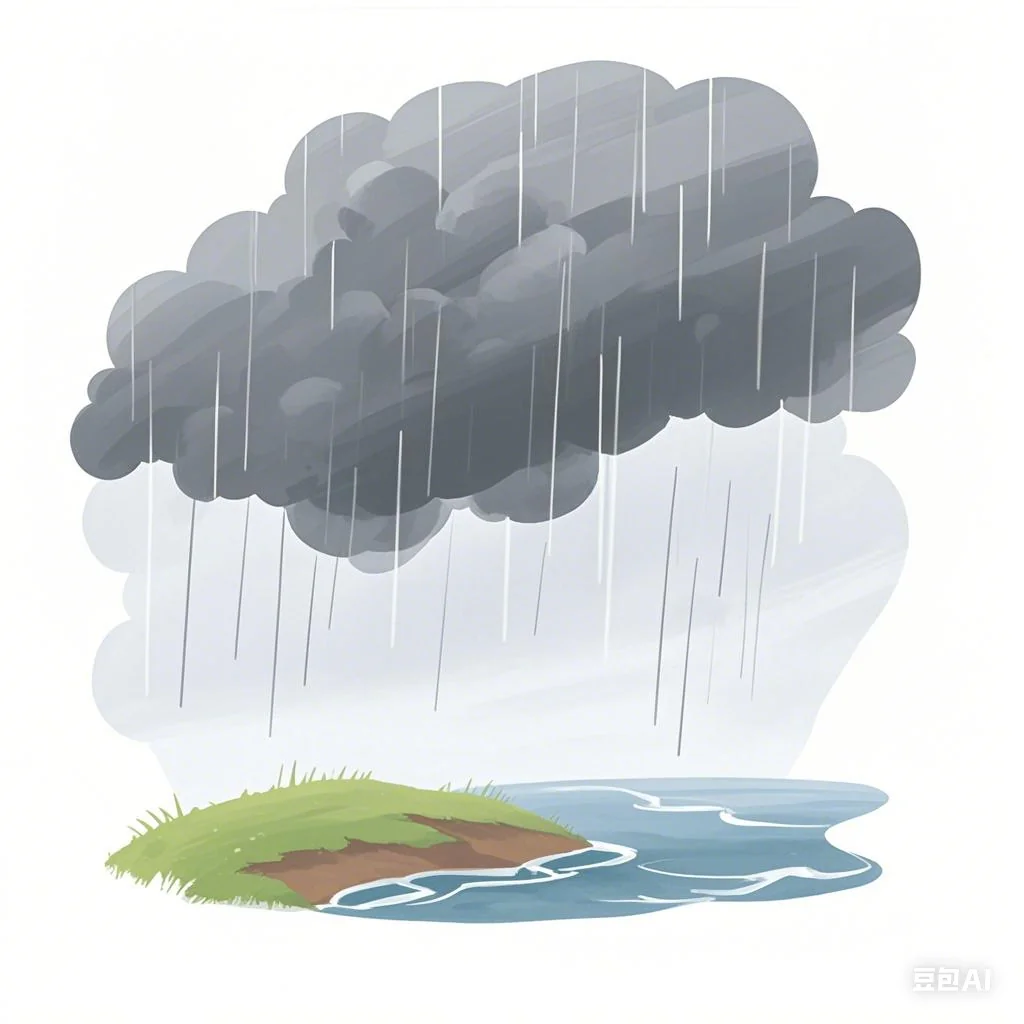
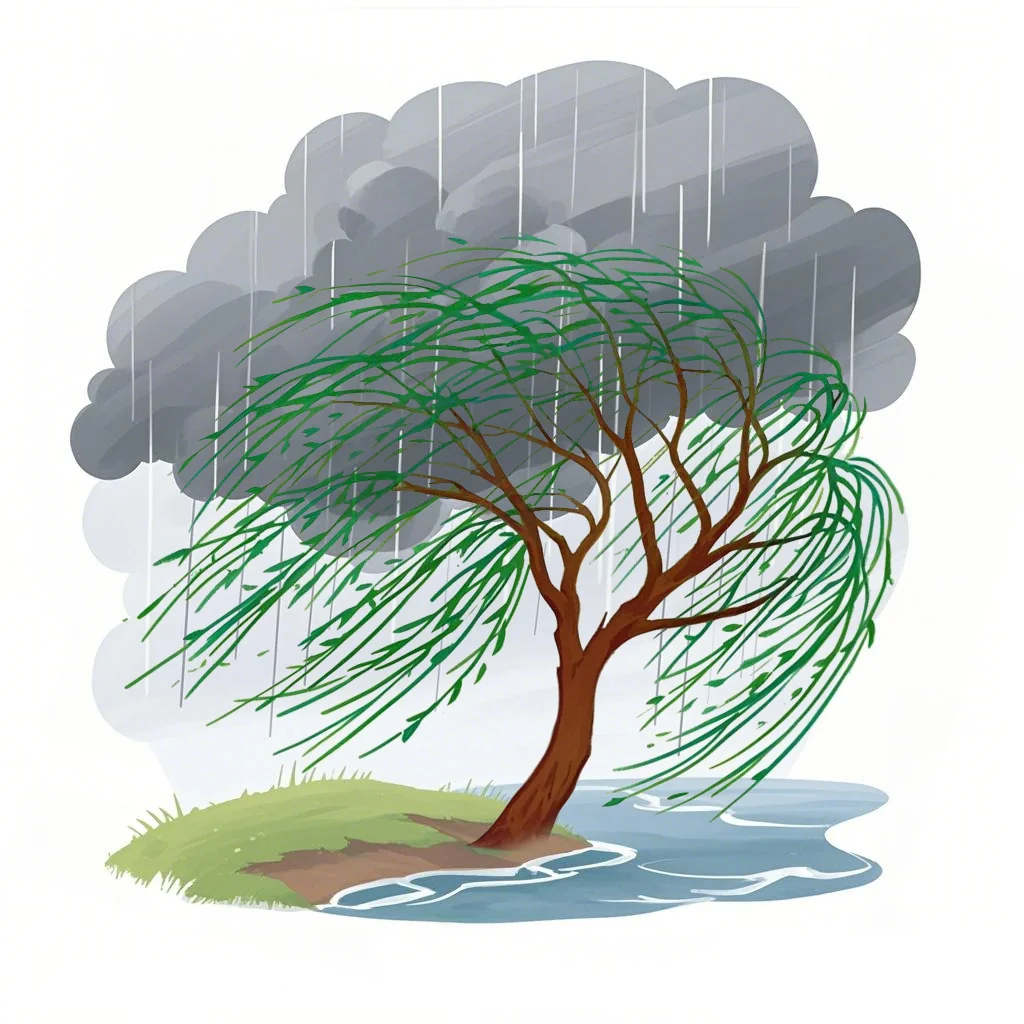
Challenge 3: Willow Tree in a Storm
Key Techniques: Style transfer, Doubao conversational editing
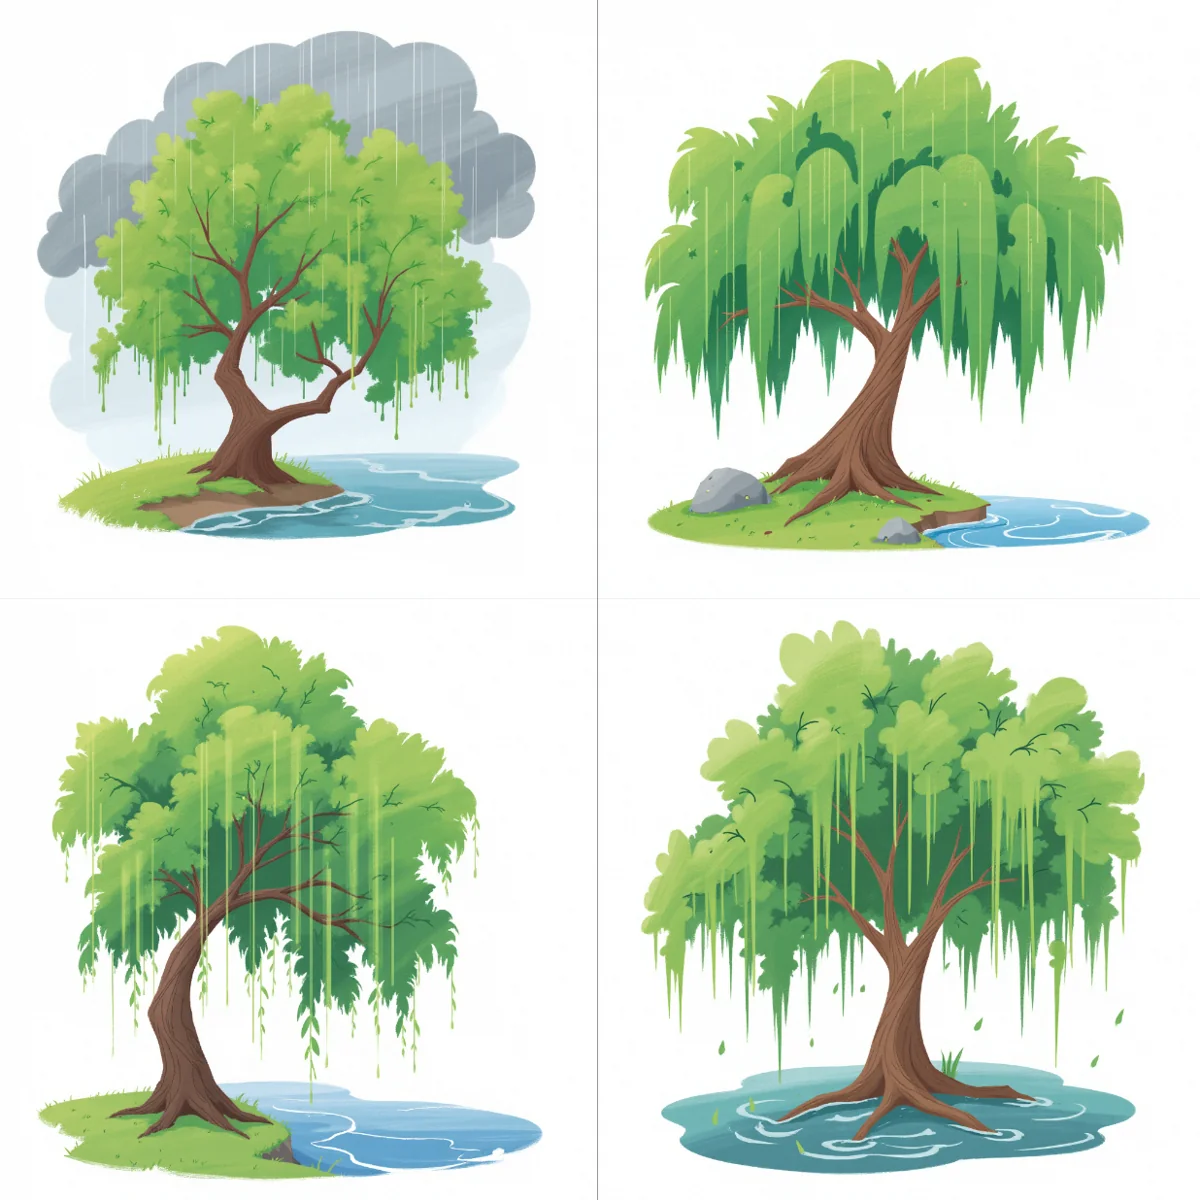
It drew a lush, leafy tree with straight, drooping branches, almost like banyan aerial roots.
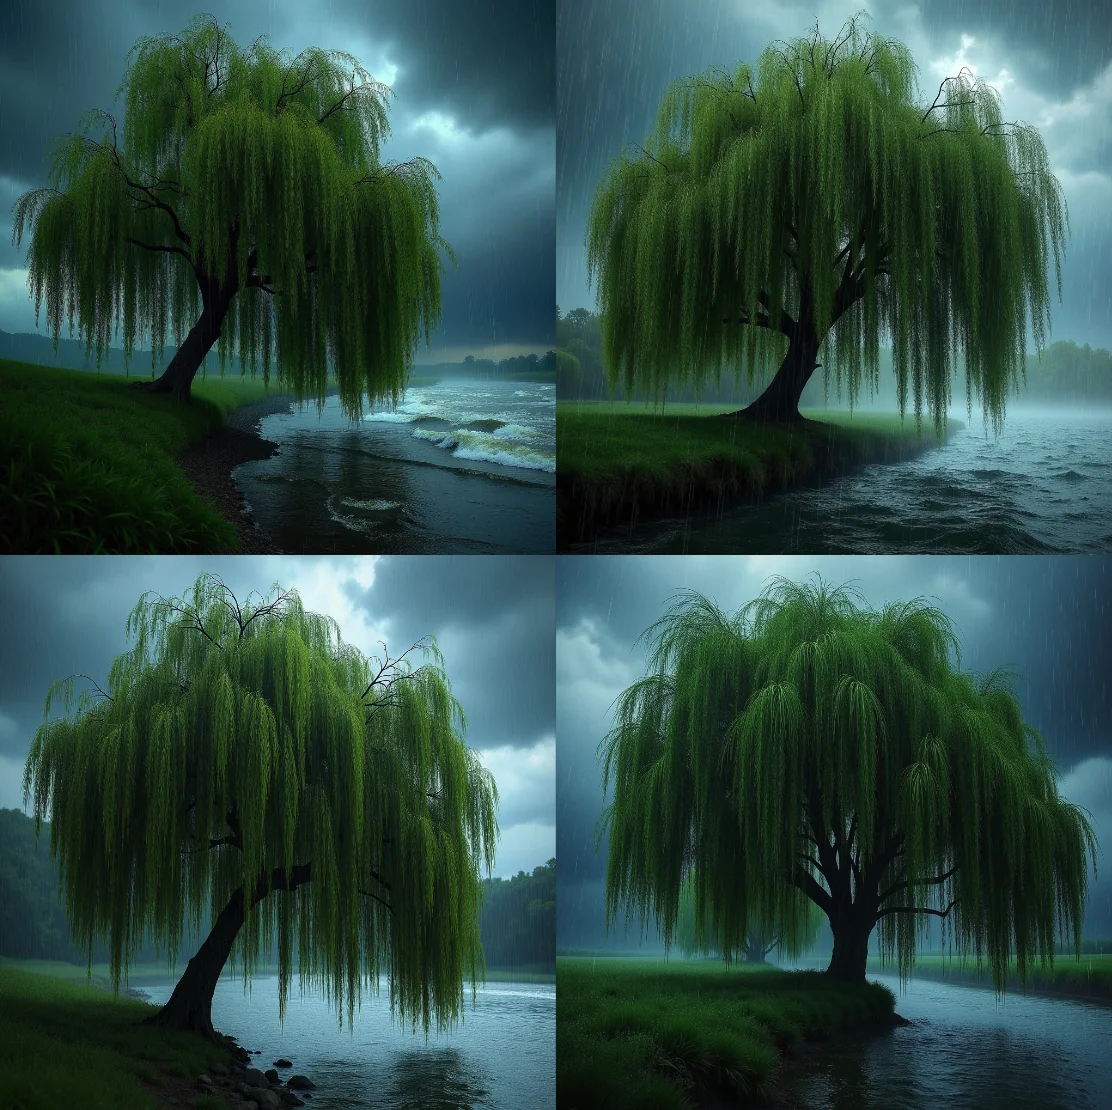
To check if Flux didn’t recognize willows or if my style Lora was the culprit, I turned off Lora, removed style prompts, and generated a realistic photo. Flux genuinely didn’t recognize willow trees.
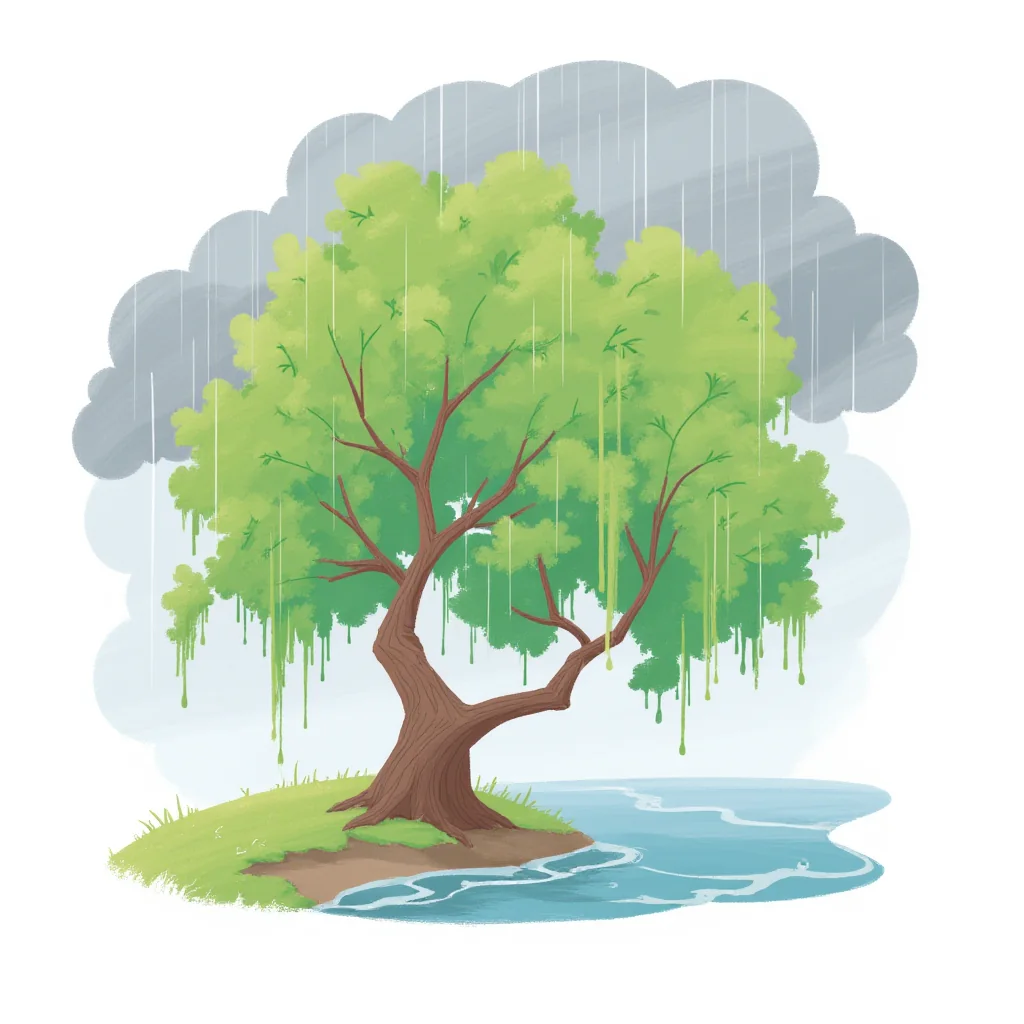
Alright, let’s modify this one.
First, Doubao conversational editing to remove the tree, leaving the background.
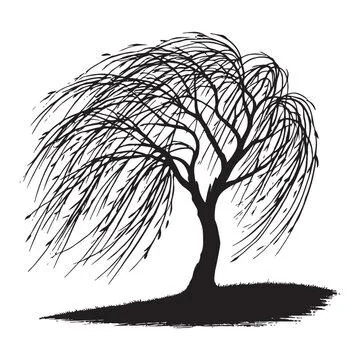
Next, create an illustrative-style willow with distinct branches. Quickest way: find online materials.
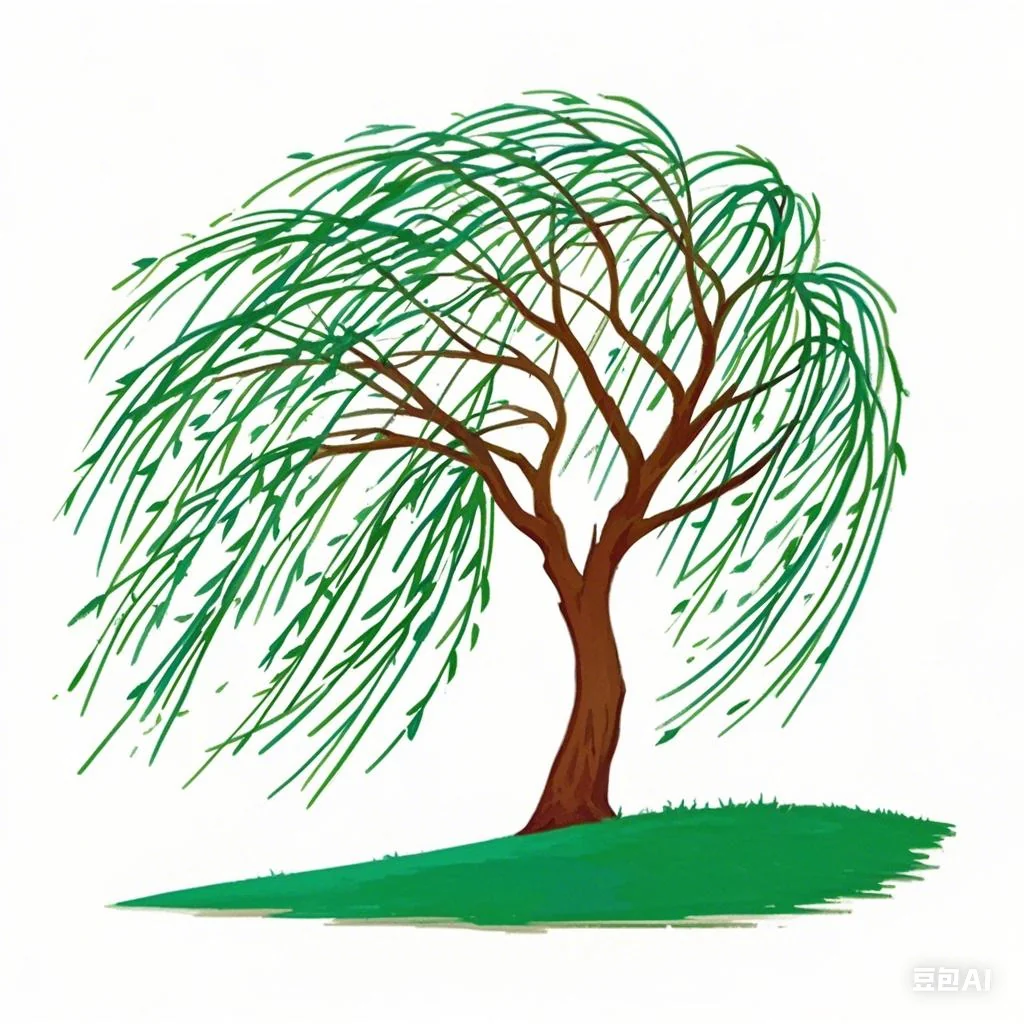
Doubao conversational editing to colorize the willow.
Roughly composite in PS.
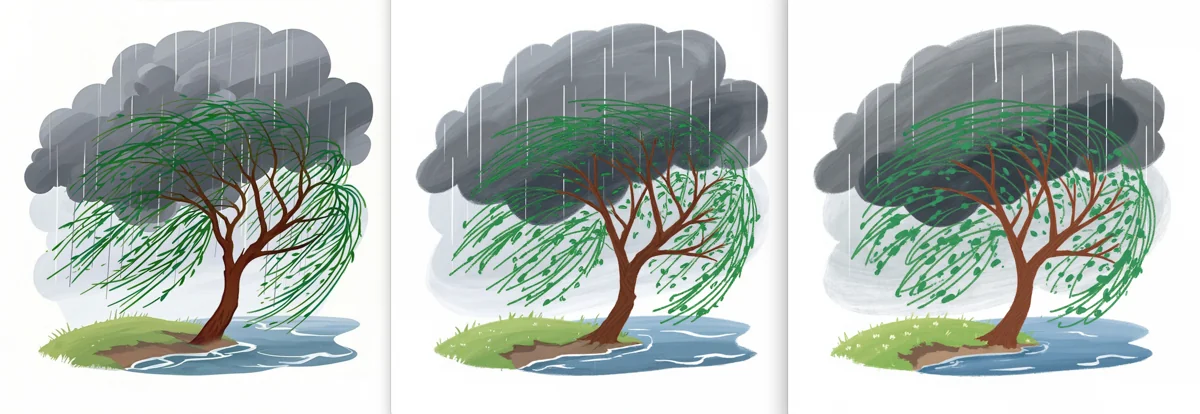
A few rounds of low denoising style transfer (0.3) made it look quite natural.
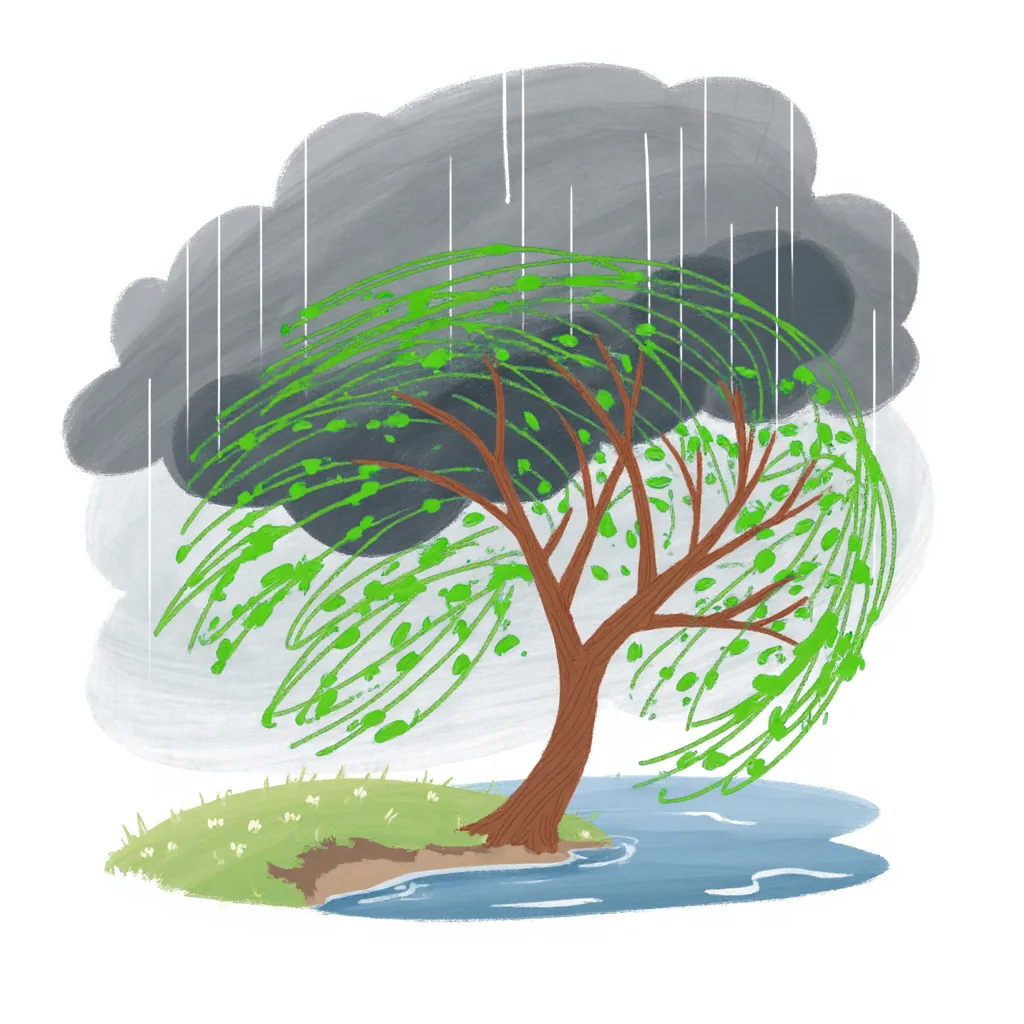
Finally, lighten the willow leaves to prevent blending with dark clouds. (Raindrop direction is still wrong; should follow wind. This should’ve been removed during background separation and replaced with stock material. Ignored for now.)
Challenge 4: Classroom Cleanup
Key Techniques: Text-to-image local inpainting (high denoising), Image-to-image local inpainting, Style transfer
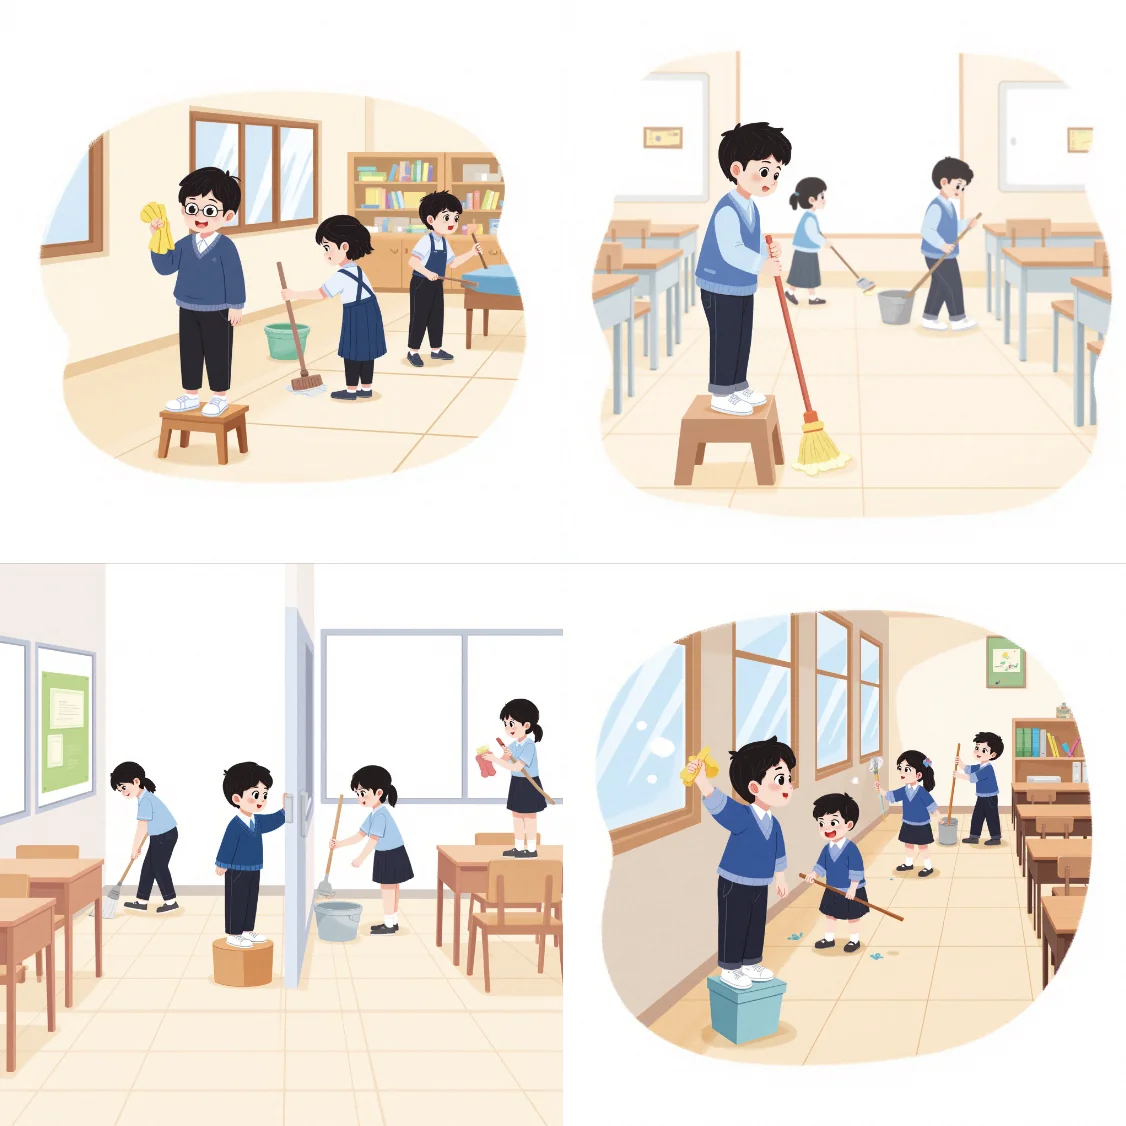
This scene needed one child cleaning a window while others cleaned elsewhere. AI struggles with such complex multi-character scenes: illogical actions, missing limbs on furniture, no usable images.
Instead of fixing problems individually, style transfer from a real photo or hand-drawn illustration is better. Their characters and environments are at least reasonable. Minor issues from style transfer are easier to fix than generating from scratch.
Denoising set to 1 corrected the style.
The basin was too old-fashioned; replaced with a modern one. (Basin too deep, hand missing—fixable later.) Other minor issues resolved with simple patching.
This image has fewer problems than the client’s version. A typical issue not present here was the rag’s shape.
In a client WIP, the rag looked like this. The prompt “rag” (meaning cleaning cloth) can also mean a tattered piece, so Flux drew this messy bundle, like a mop head.
Using text-to-image local inpainting with “a piece of cloth” yielded a more normal rag. Sometimes, it’s not that AI can’t draw it, but that the right prompt hasn’t been found.
Manual editing encountered more tricky problems than these, but combining the listed techniques eventually solved them all.
△ △ △ 🔮 Tech Talk Ends 🔮 △ △ △
Closing Shop
After this order, I assessed the revision volume and time spent, and decided to stop taking orders. The reason was simple: too many revisions, tight timeline. A single part-time illustrator wasn’t enough; a full-time one was needed. Even if I gave all profit to a full-time illustrator, their income might still be less than a regular job. Who’d do that? Multiple part-timers would mean excessive communication overhead and staff turnover issues.
All things considered, the business lacked sufficient leverage. Better to quit while ahead.
This complex image generation workflow—conception, building, debugging—took two weeks. But it wasn’t wasted. Minor modifications can adapt it for other uses, ready for reactivation.
Epilogue
This was an intensive experience using AI on a real project, highlighting its productivity boost and the gap to stable commercial use.
With the project done and some breathing room, I’m reflecting on the process. It’s still astounding, especially doing everything myself. I never imagined children’s illustrations could be (partially) mass-produced with AI, nor that AI could enable a non-drawer like me to do more than half an illustrator’s work.
Ultimately, AI is about solving problems, not using AI for its own sake. At this stage, AI isn’t a panacea. Traditional methods must reliably support areas AI can’t handle. AI is flexible and random; traditional methods are rigid and deterministic. Combining them is like sculpting with clay: all clay is soft and hard to shape, but clay molded around a wooden core is both stable and detailed.
I respect artisans creating lifelike clay sculptures, but I’d rather make money mass-producing wooden cores in a factory.