[Update: Simpler methods exist (see the end of the post). However, the techniques here are still valuable practice.]
I’ve been using After Effects for about a year. It’s fun, useful, and easy to learn, especially with prior Flash experience. Complex UI animations are combinations of basic movements, rotations, scaling, opacity, and color changes. Online resources abound; I learned from this video series.
This circular progress bar requires a bit more thought.

The Idea
Circular progress bars are unique. They rotate while selectively revealing parts of the circle, which isn’t immediately straightforward.
I drew inspiration from a CSS3 circular progress bar I created earlier. The core concept involves splitting the circle in half. The dark green (progress) is the background and remains static. Two light green semicircles cover it, rotating sequentially to reveal the progress.
To create a ring, add a smaller circle on top. AE layer masks achieve a similar effect (explained later).
AE can create a truly transparent circular progress bar, but the core principle remains: rotating two semicircles independently. See the diagram below:
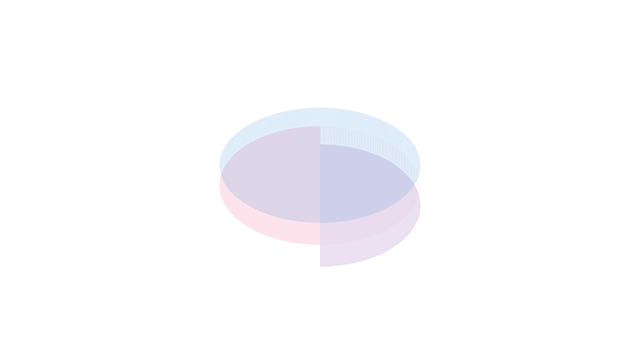
Divide the circle into left (red) and right (blue) semicircles, restricting their visibility to their respective halves. Add a static right semicircle (purple) underneath. Let’s break it down step by step.
Left, Right, and Background Semicircles
First, prepare the three semicircles.
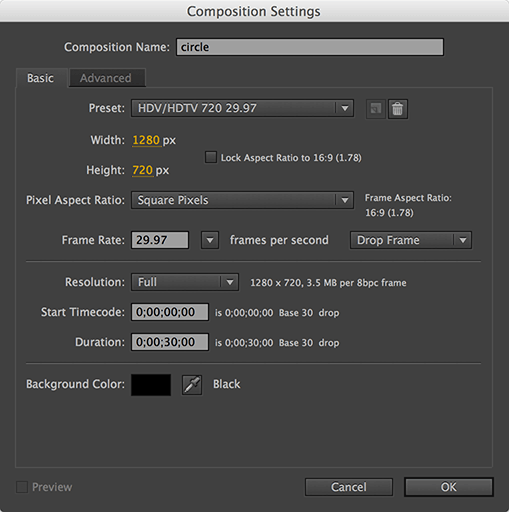
Create a 720p composition.
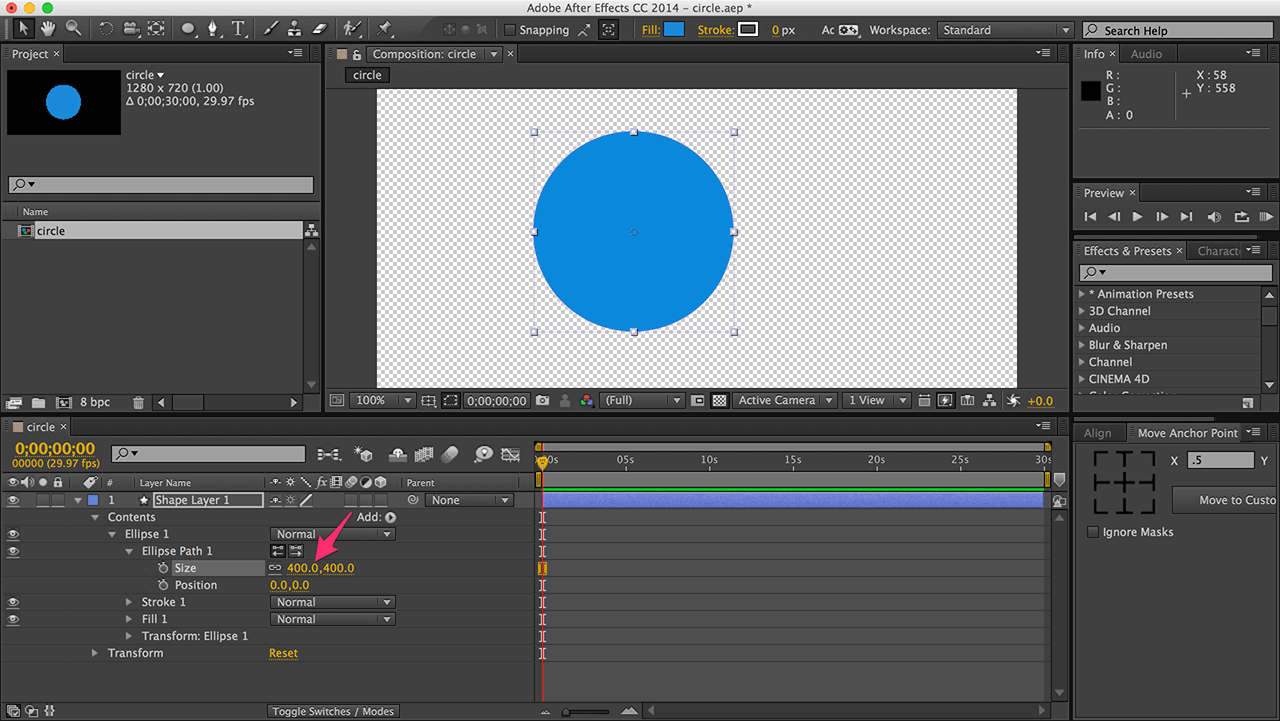
Draw a 400x400 circle.
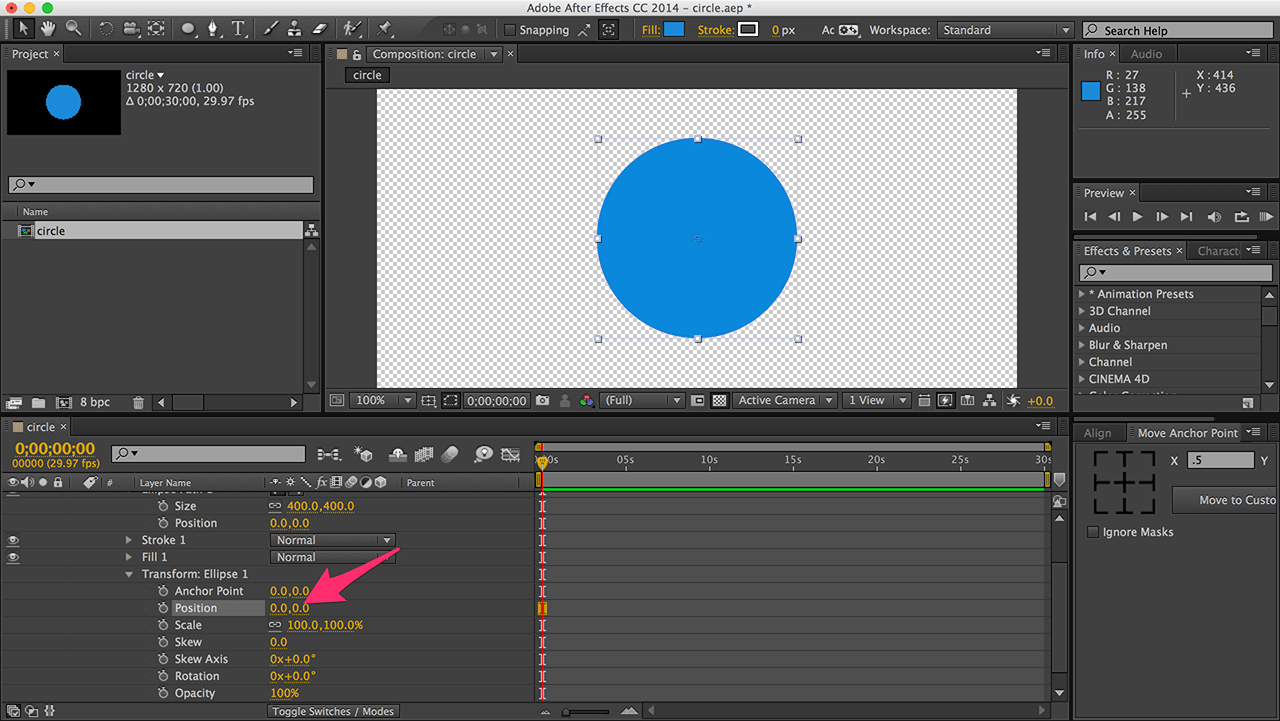
Set the circle’s position (not the shape layer’s) to 0, 0 for perfect centering.
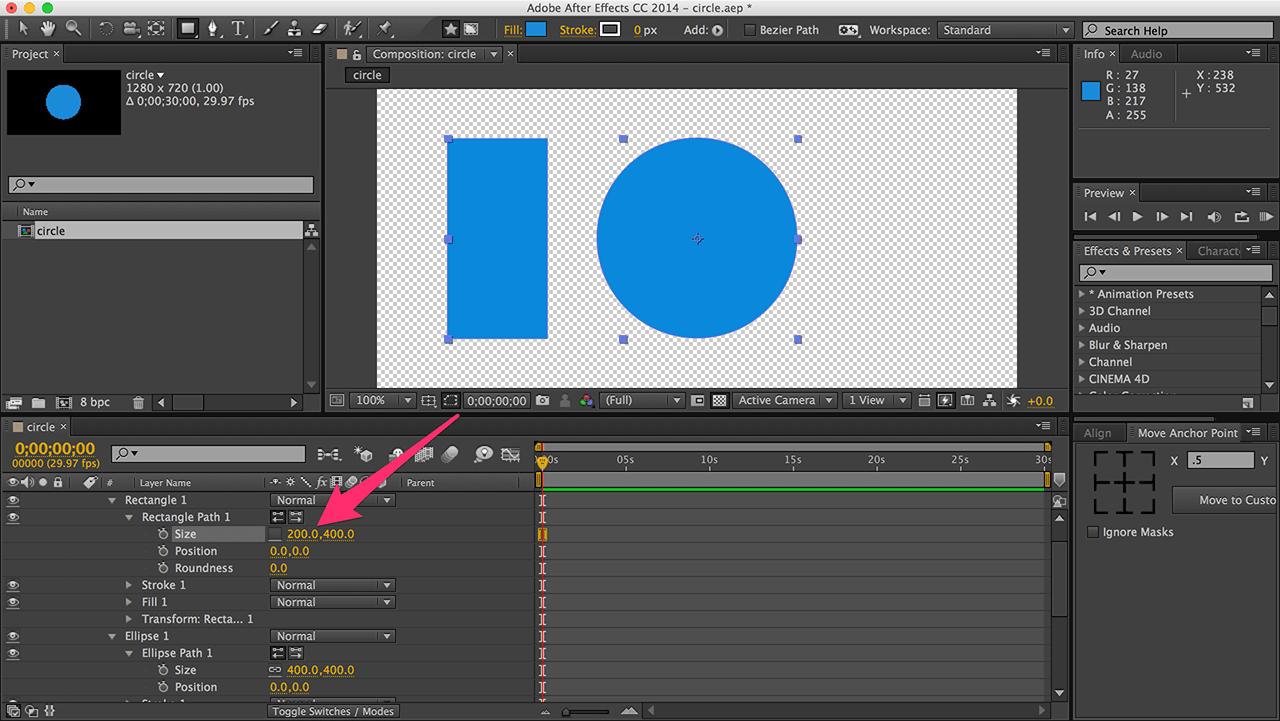
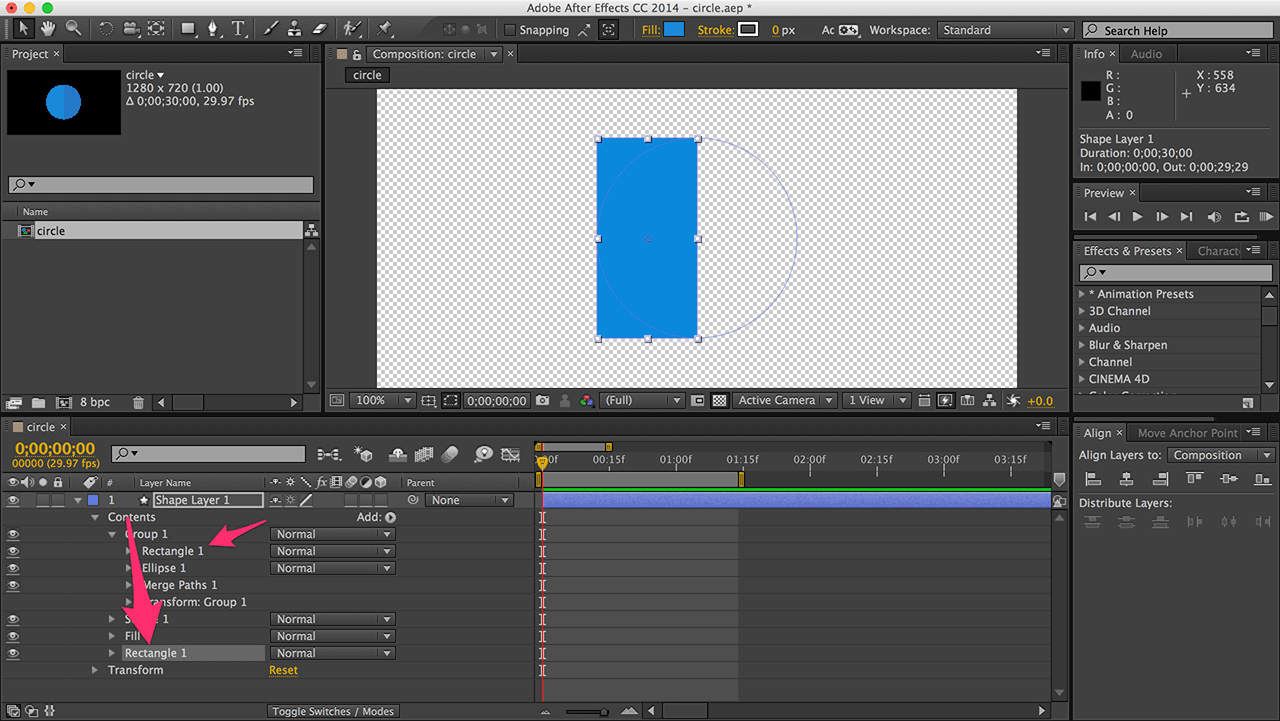
In the same shape layer, draw a 200x400 rectangle (half the circle’s size).
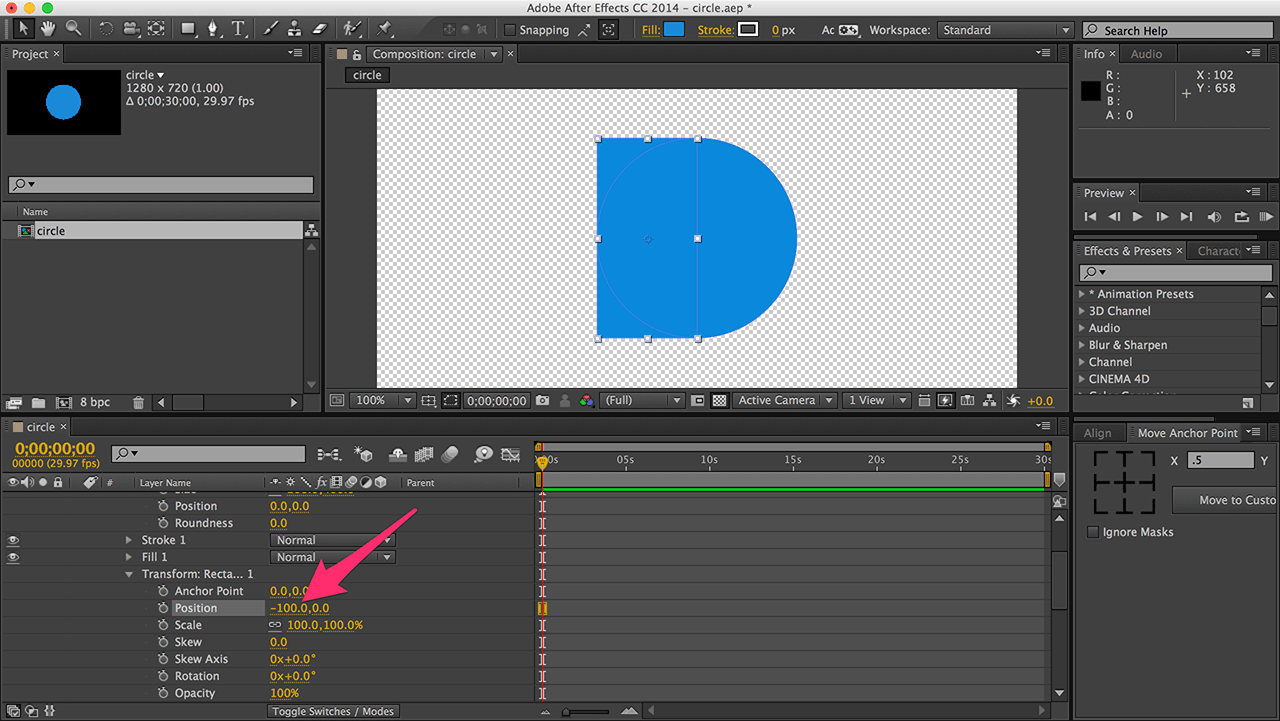
Set the rectangle’s position to -100, 0 to cover the circle’s left half. This rectangle will cut out the semicircle.

Click “Add” and choose “Merge Paths”.
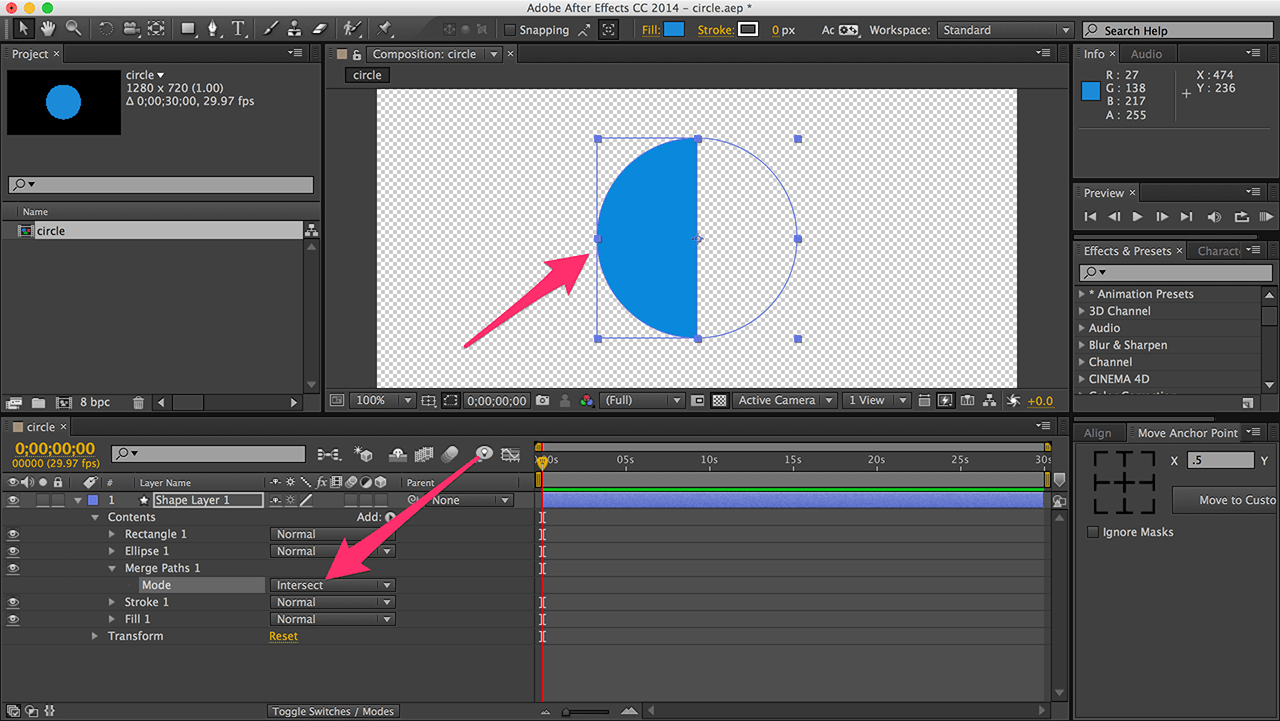
Set the mode to “Intersect” (like path operations in PS/AI).
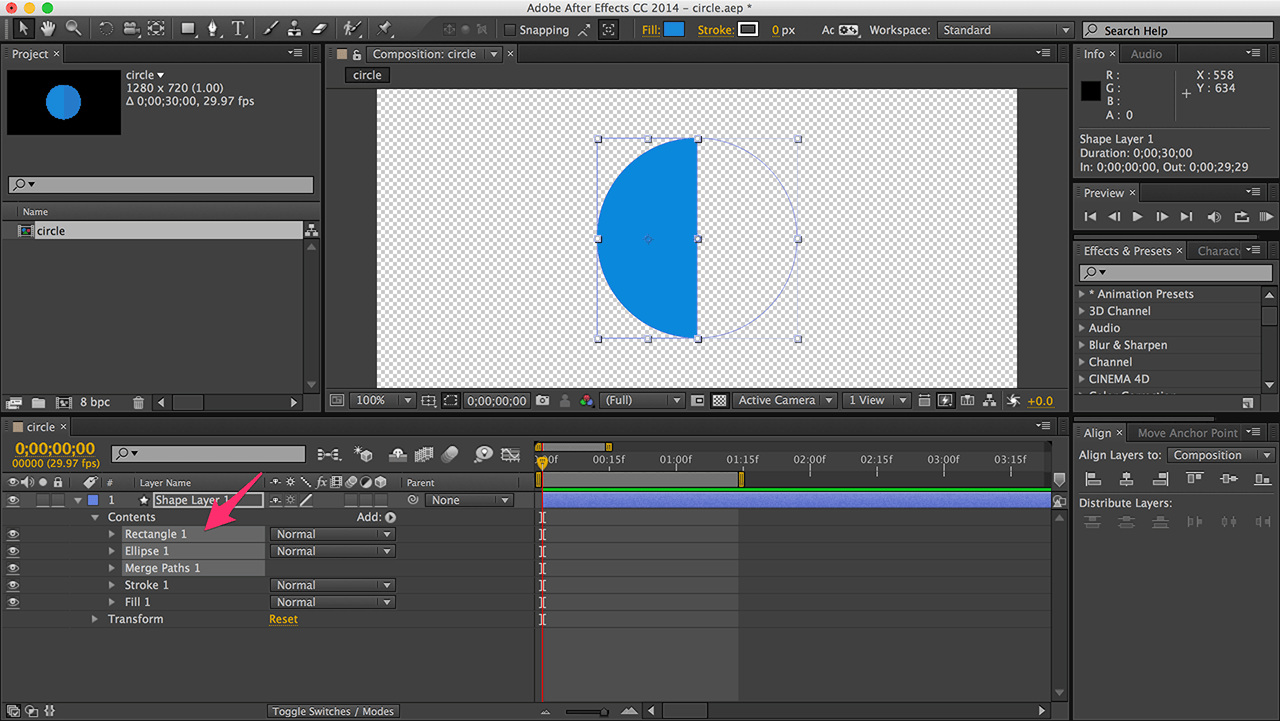
Group (Command/Ctrl + G) the circle, rectangle, and Merge Paths. This is our semicircle.
Expand the group, copy the inner rectangle, and paste it outside the group.
This new rectangle acts as a vector mask. AE’s built-in masks rotate with the layer, which we don’t want. We need a stationary mask and a rotating semicircle. So, we use “Merge Paths” again.
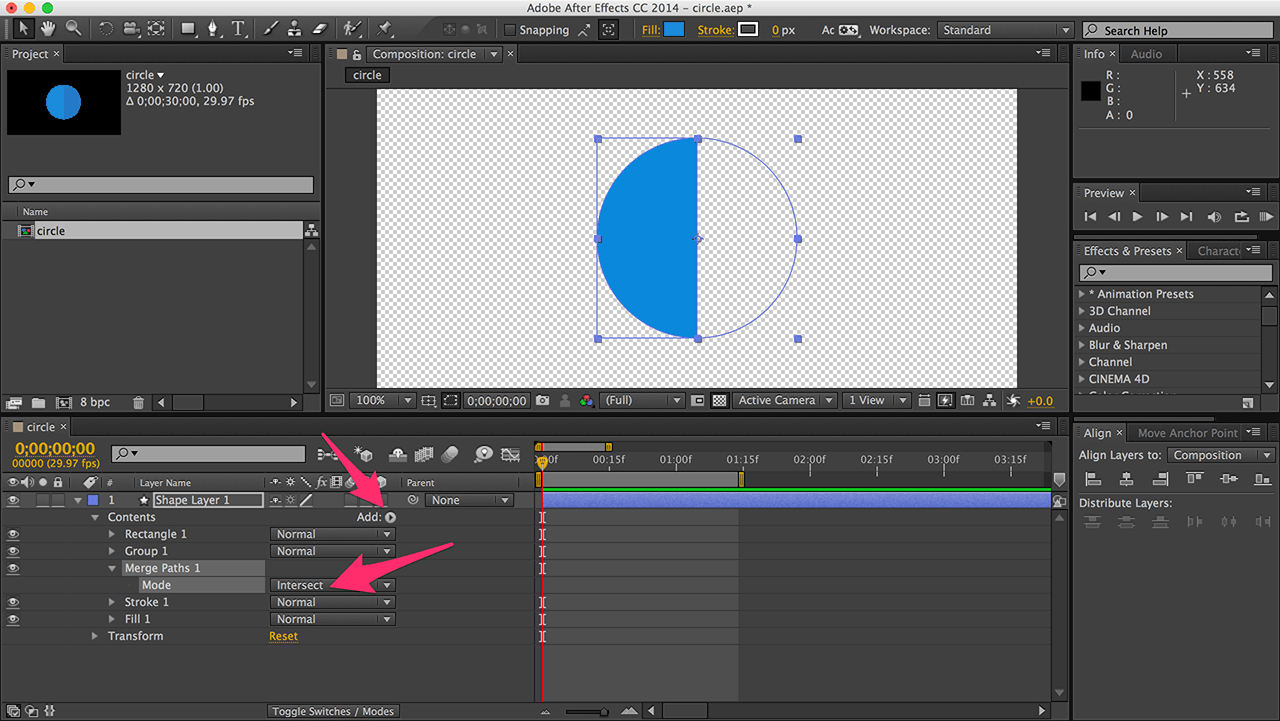
Add -> Merge Paths, setting the mode to “Intersect”. This creates the intersection of the new rectangle and the group.
Rotating the group now shows that the area outside the rectangle is hidden.
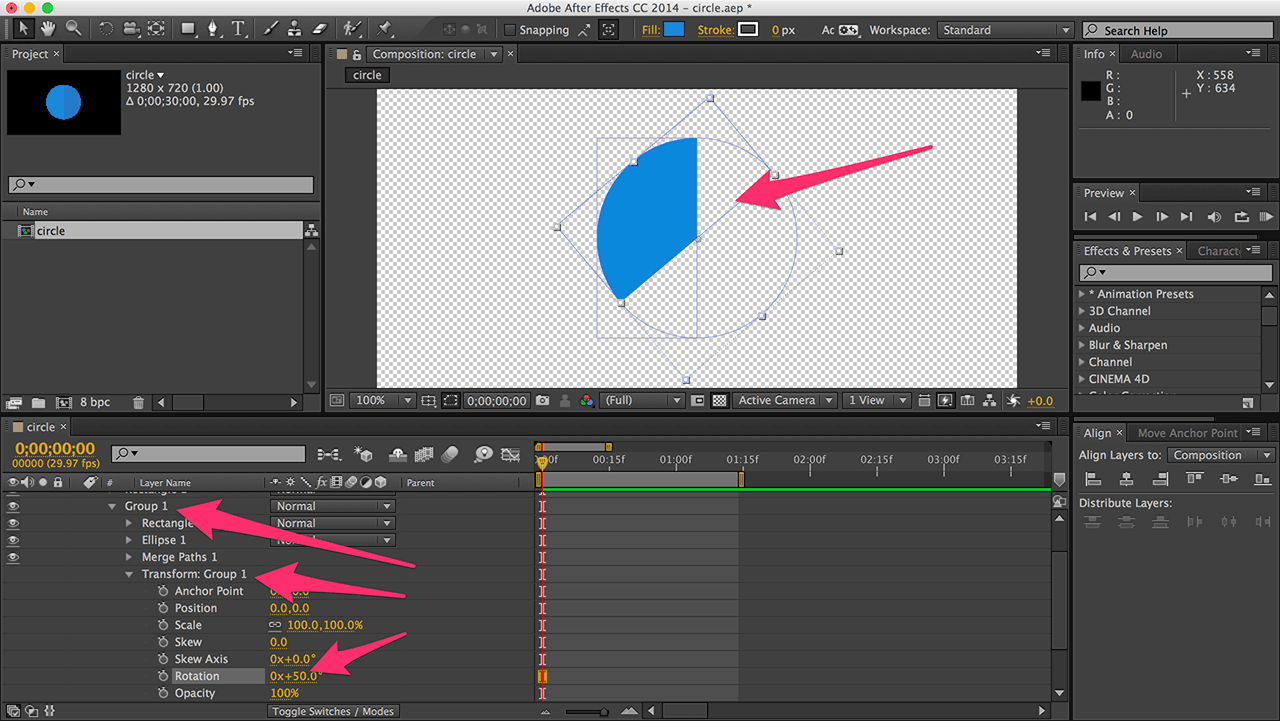
Reset the rotation and add a keyframe to the group’s rotation (for later use). Press “u” to quickly access keyframed properties.

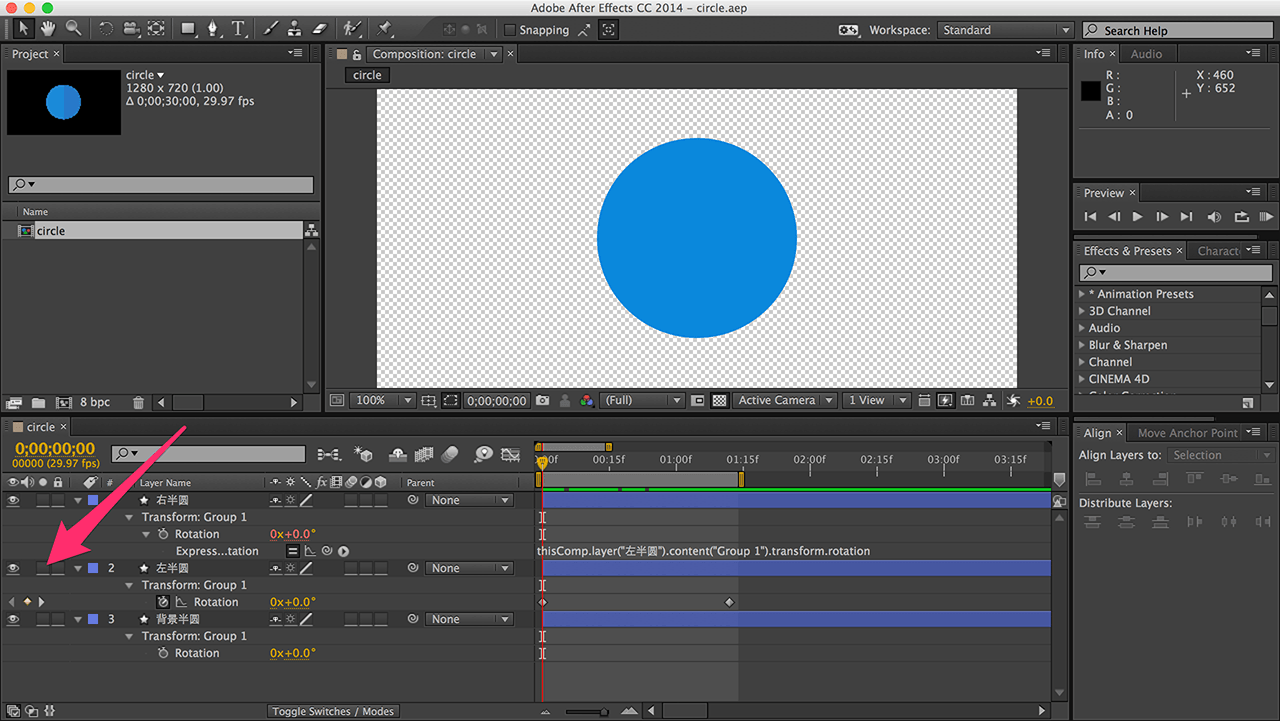
Name this layer “Left Semicircle”.
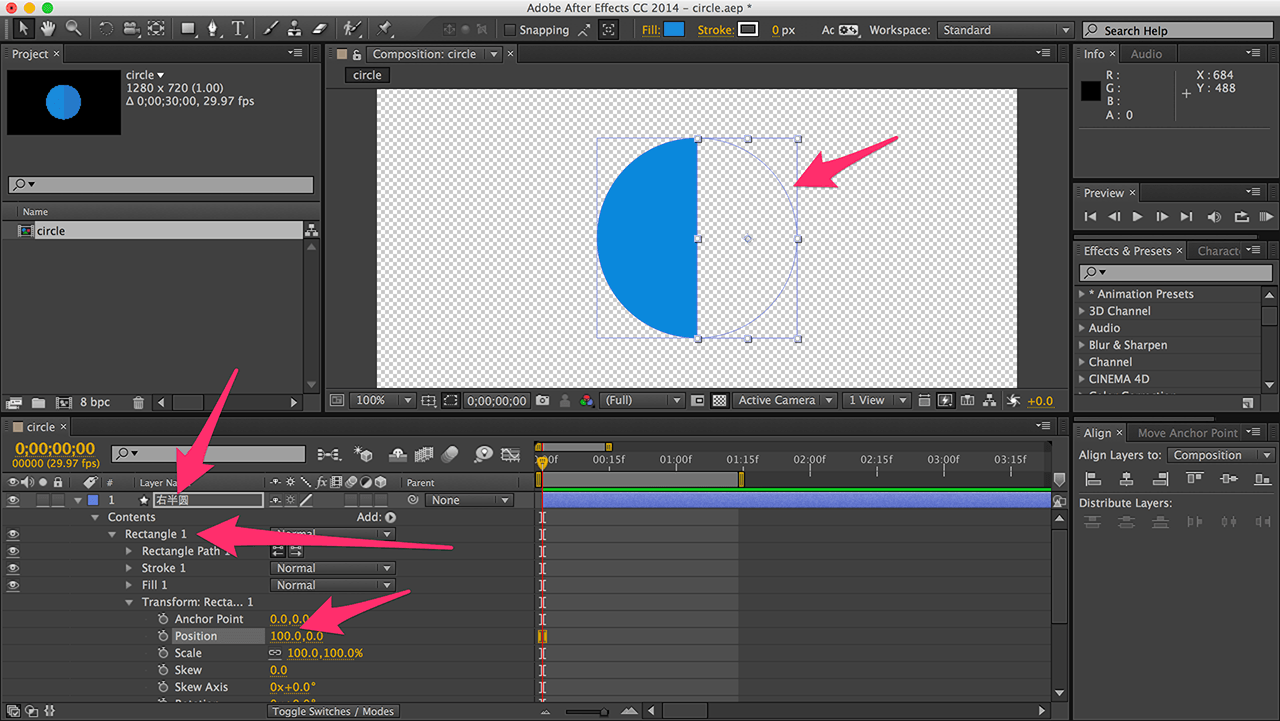
Duplicate the layer (Command/Ctrl + D) for the right semicircle. Set the outer rectangle’s position to 100, 0 (covering the right half). Nothing appears because the semicircle is still on the left.
To clarify: the inner circle and rectangle form the rotating semicircle. The outer rectangle is the mask. The left semicircle’s mask covers the left; the right semicircle’s mask covers the right. Together, they form a full circle.
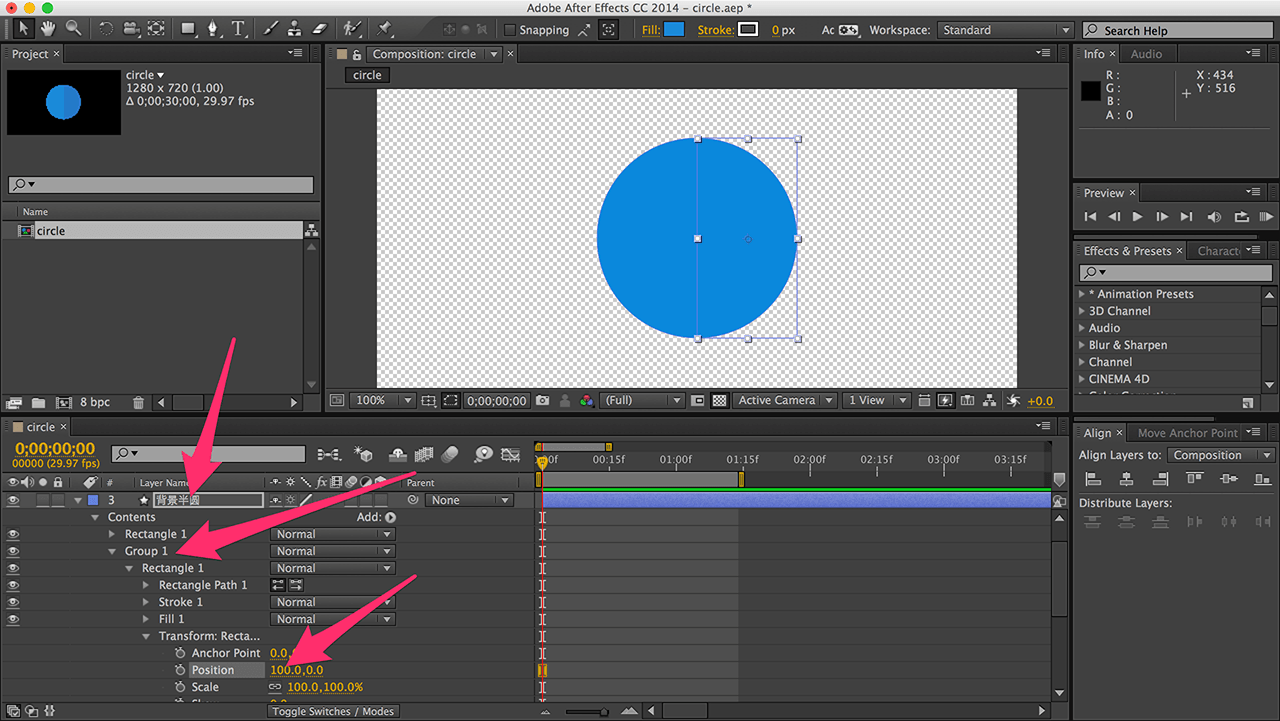
Duplicate the right semicircle, rename it “Background Semicircle,” and move it to the bottom. Set the inner rectangle’s position to 100, 0. The circle becomes whole again.
The static assets are now ready.
Creating the Rotation Animation
Let’s animate the semicircles.
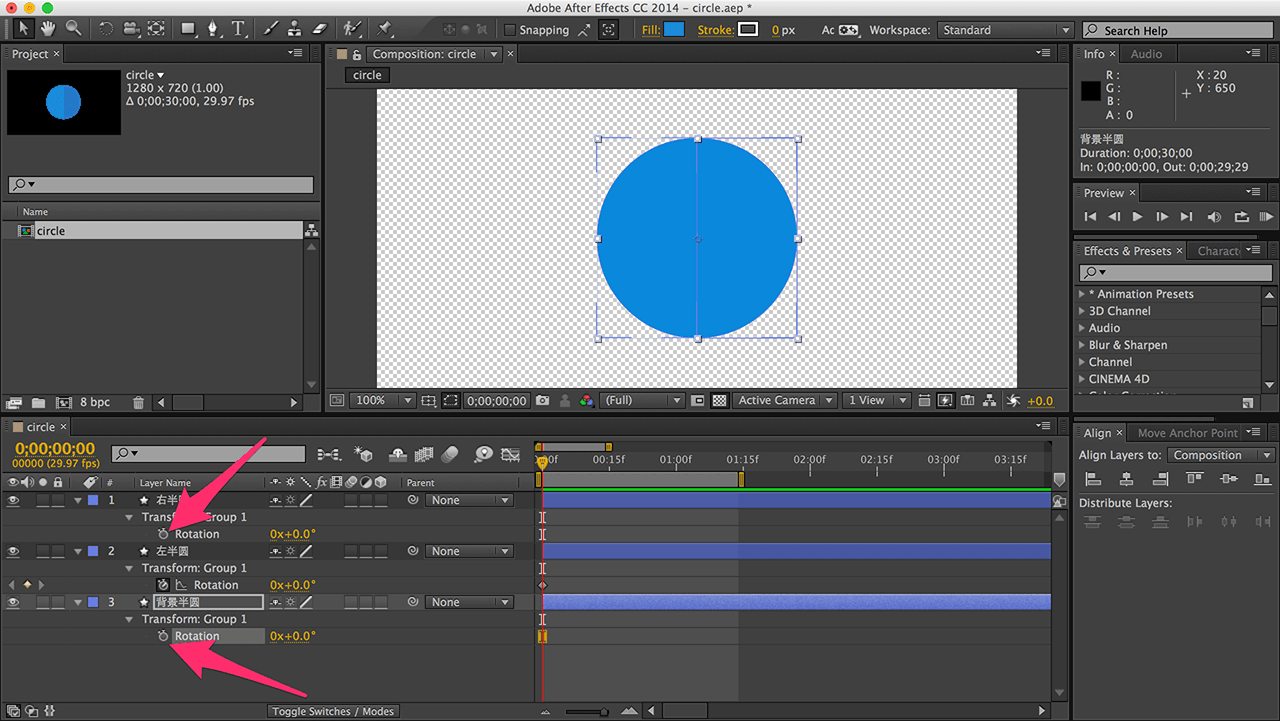
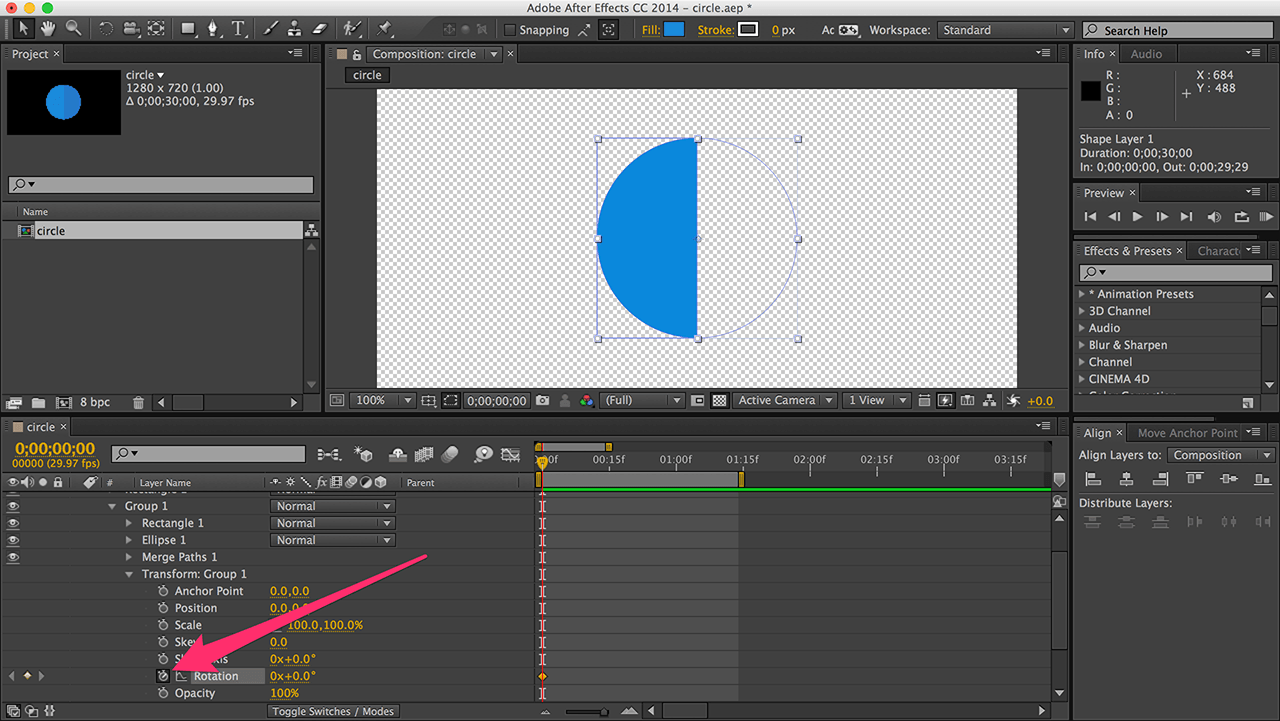
Press “u” to show only the rotation property with the keyframe. This is the group’s rotation, not the layer’s.
Remove keyframes from the right and background semicircles’ rotation. Keep the right semicircle’s rotation property visible.

Click the dot on the left semicircle layer to solo it (like Alt + clicking the layer eye in PS).

Create a simple animation: one full rotation.

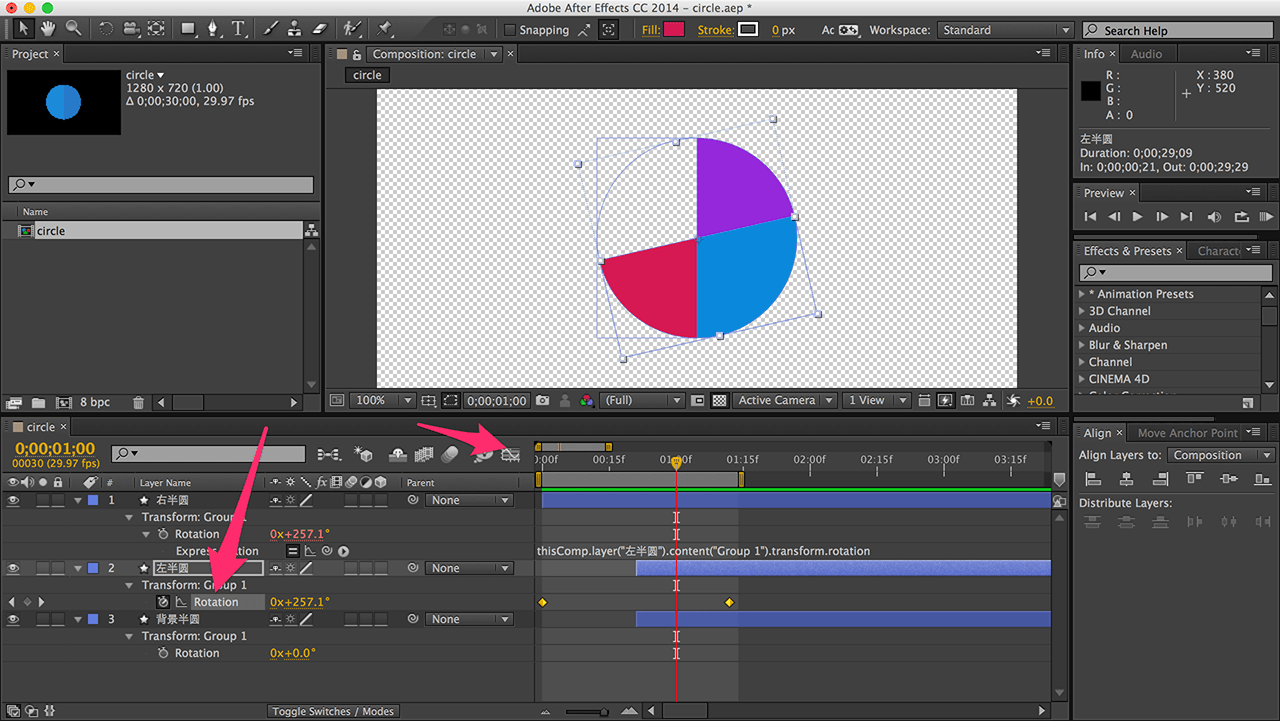
Important: Alt + click the right semicircle’s rotation property. An expression appears in the timeline.
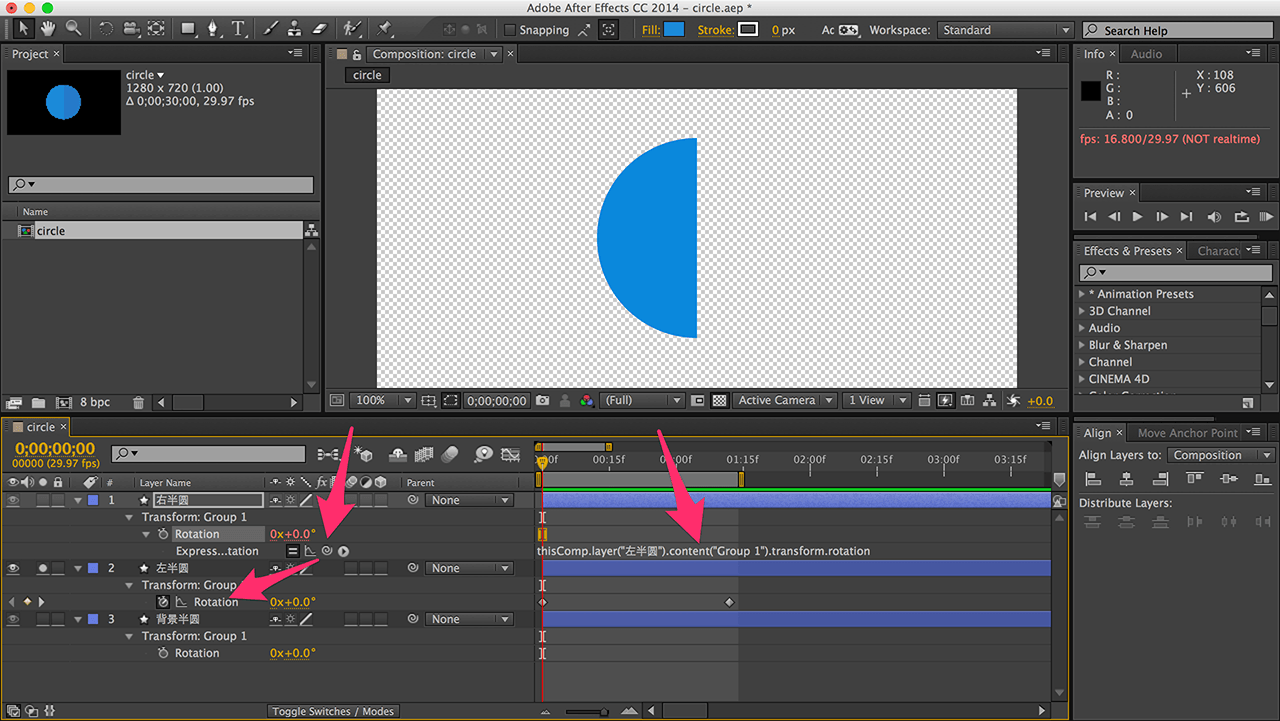
Drag the right semicircle’s rotation property’s pick whip (spiral icon) to the left semicircle’s rotation property. The expression updates.
Alt + clicking activated the expression. Dragging the pick whip links the right semicircle’s rotation to the left’s. Now, the right semicircle always follows the left.
Turn off solo display for the left semicircle.
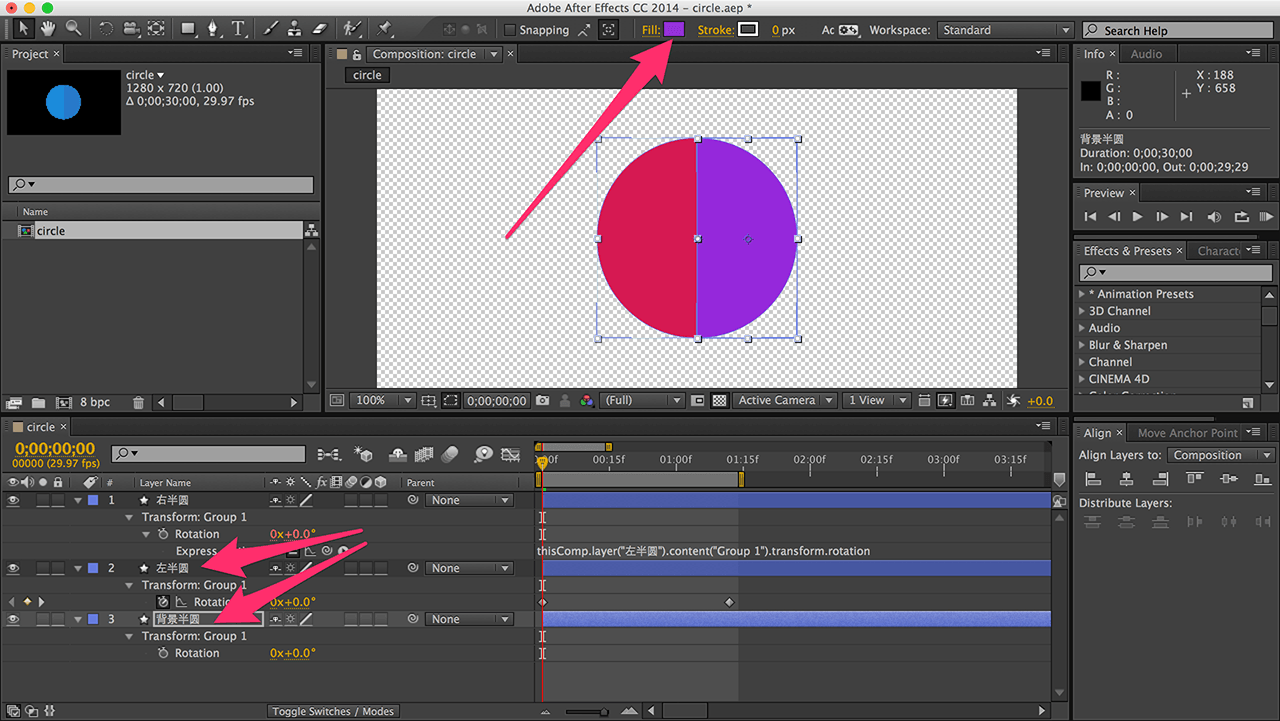
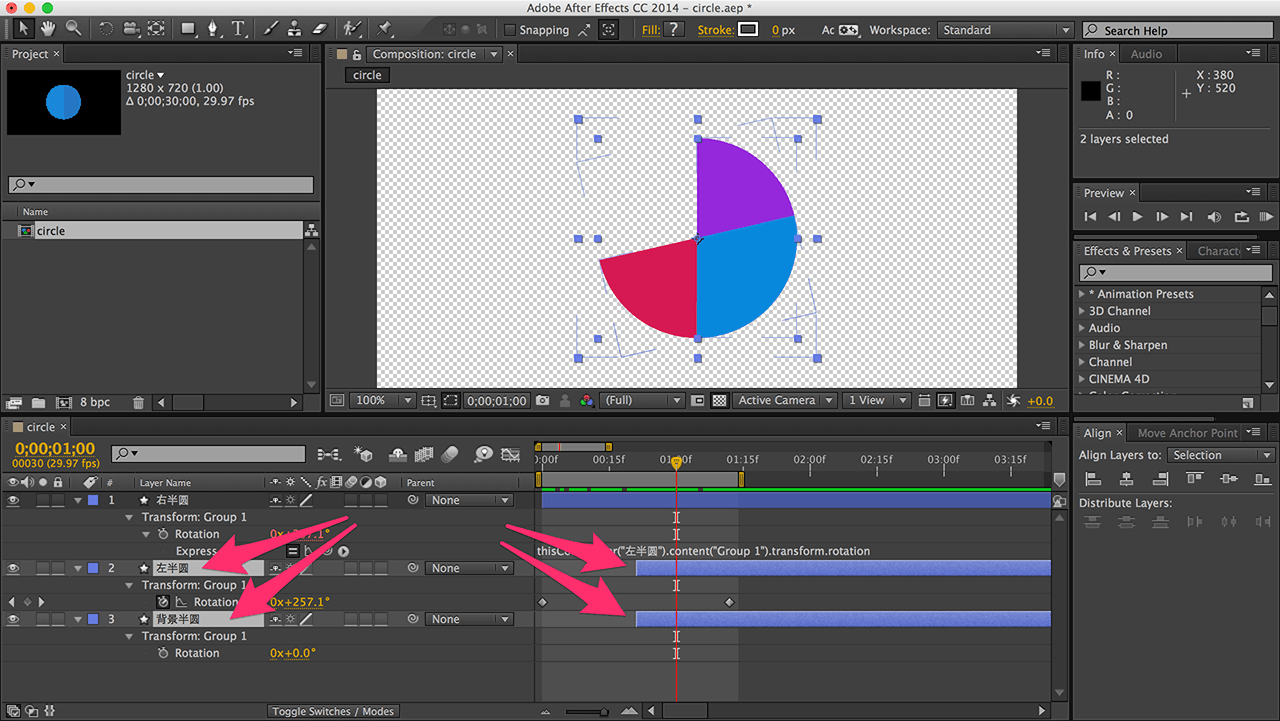
For clarity, fill the semicircles with different colors (for demonstration only).
Use red for the left, blue for the right, and purple for the background semicircle, matching the “Idea” section’s diagram.
Finding the Critical Frame
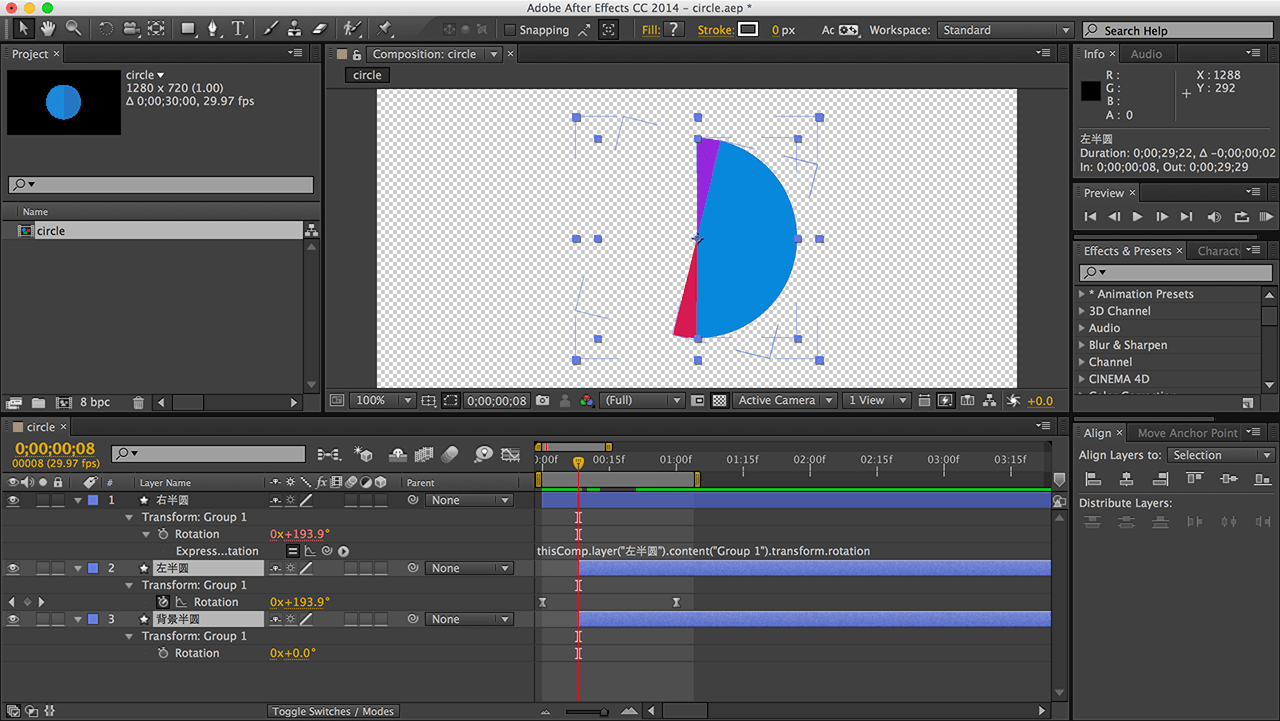
Play the animation. It’s incorrect: the left semicircle is visible initially. It should appear only after the right semicircle rotates halfway. The same applies to the background semicircle.
We need a specific frame where the left and background semicircles are hidden.
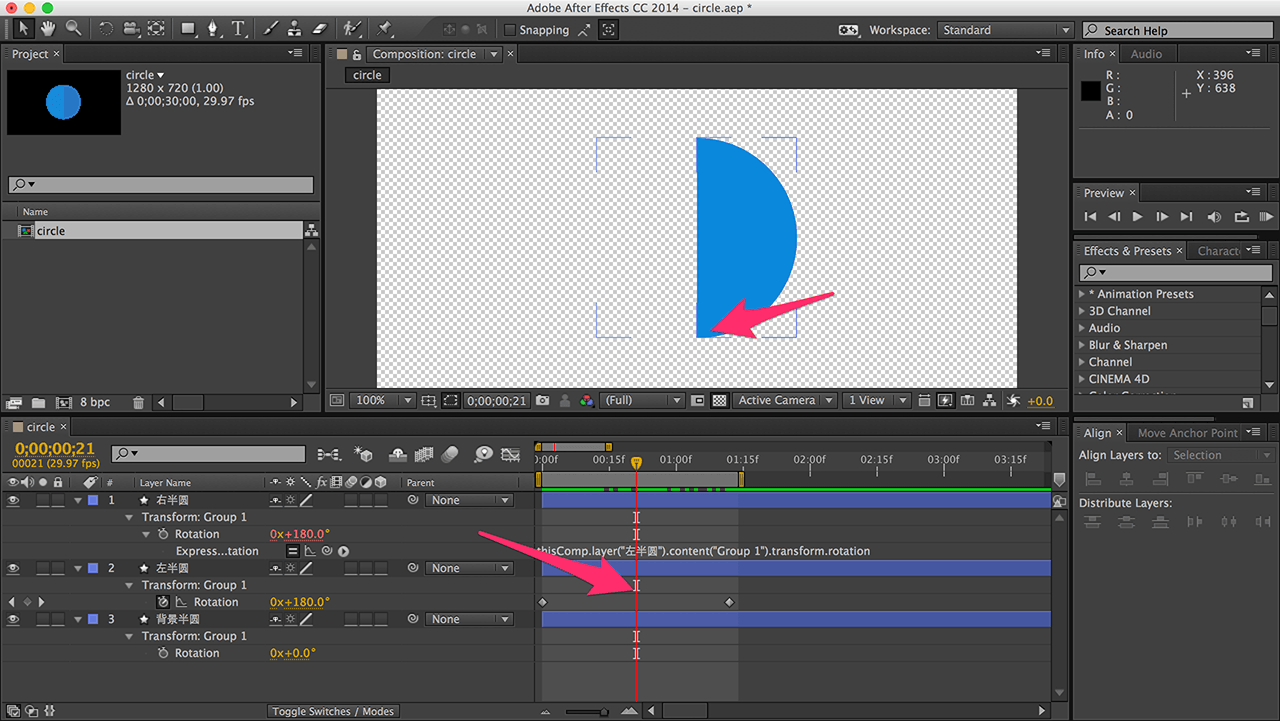
This critical frame is when the right semicircle reaches 180 degrees (or slightly more).
Select the left and background semicircles and trim their timelines’ left ends to this frame. They won’t appear too early now.
Playback is now correct!
The constant-speed rotation is unnatural. Open the Graph Editor (graph icon). Select the left semicircle’s rotation to see a straight line.
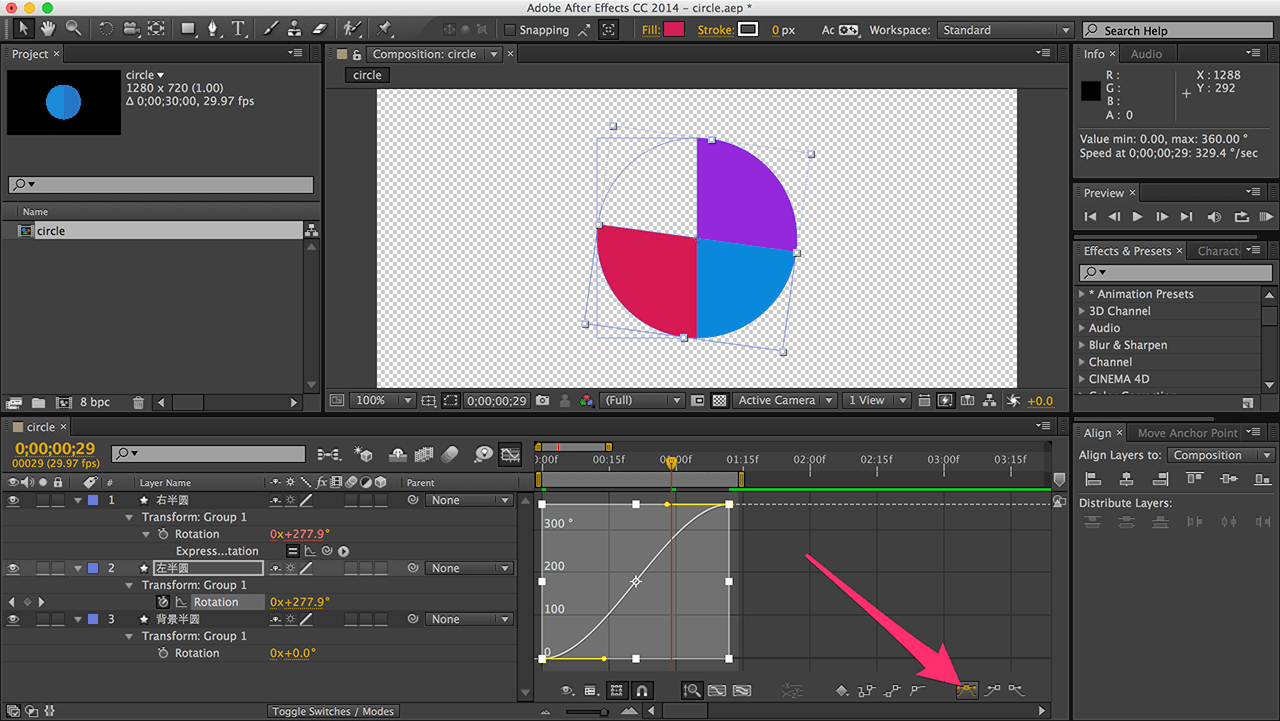
Select the line and click the two-handled icon. The line curves, and handles appear.
The Graph Editor is simple: the horizontal axis is time; the vertical is value change. A flat curve means slow change; a steep curve means fast change.
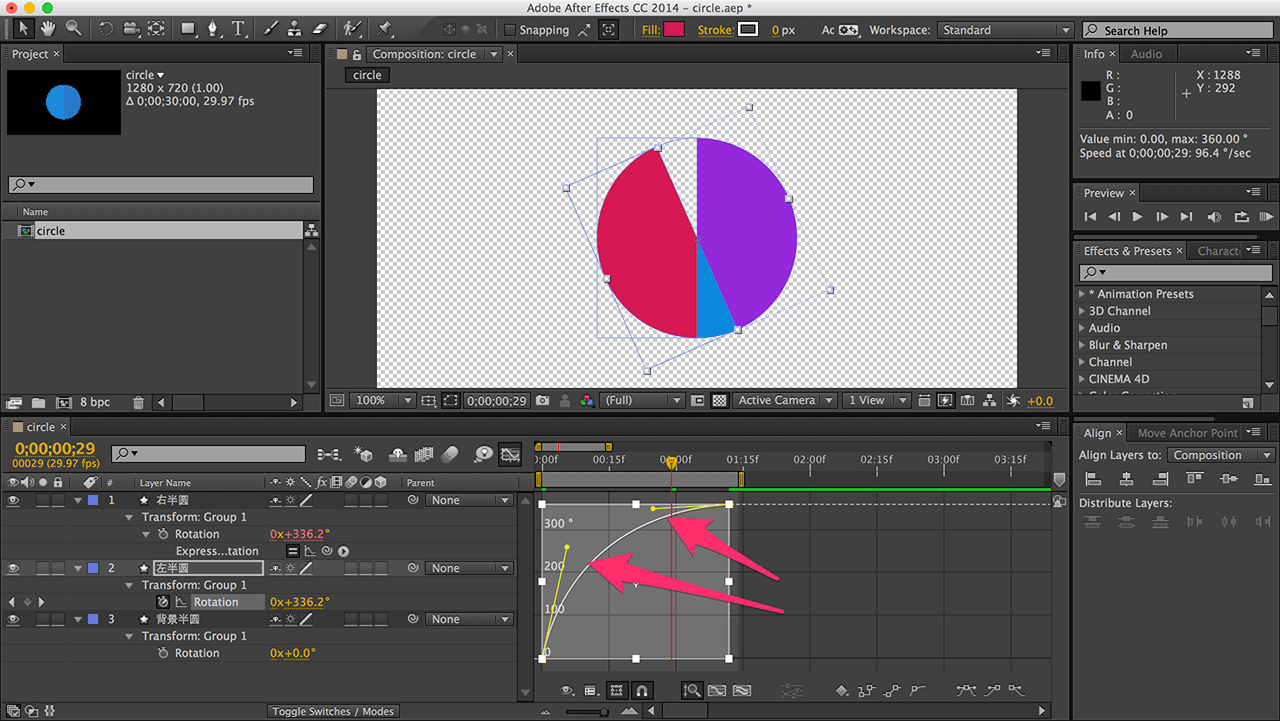
For a fast-start, slow-end animation, adjust the curve like this:
Find the critical frame again (right semicircle at 180 degrees or slightly beyond).
Adding a Mask
The circular progress bar is done; let’s make it a ring.

Select all layers and Pre-compose (right-click).
The three layers merge (like a Smart Object in PS or Movie Clip in Flash).
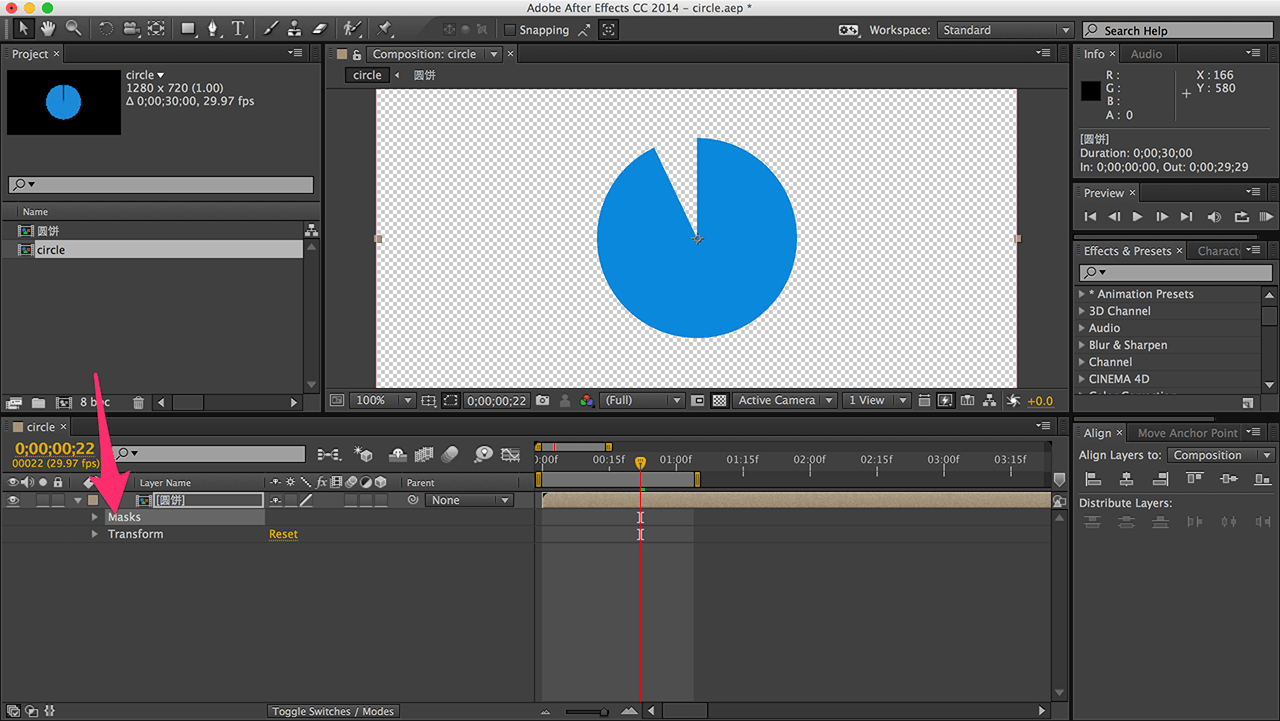
Create a mask (Command/Ctrl + Shift + N) - AE’s built-in layer mask.
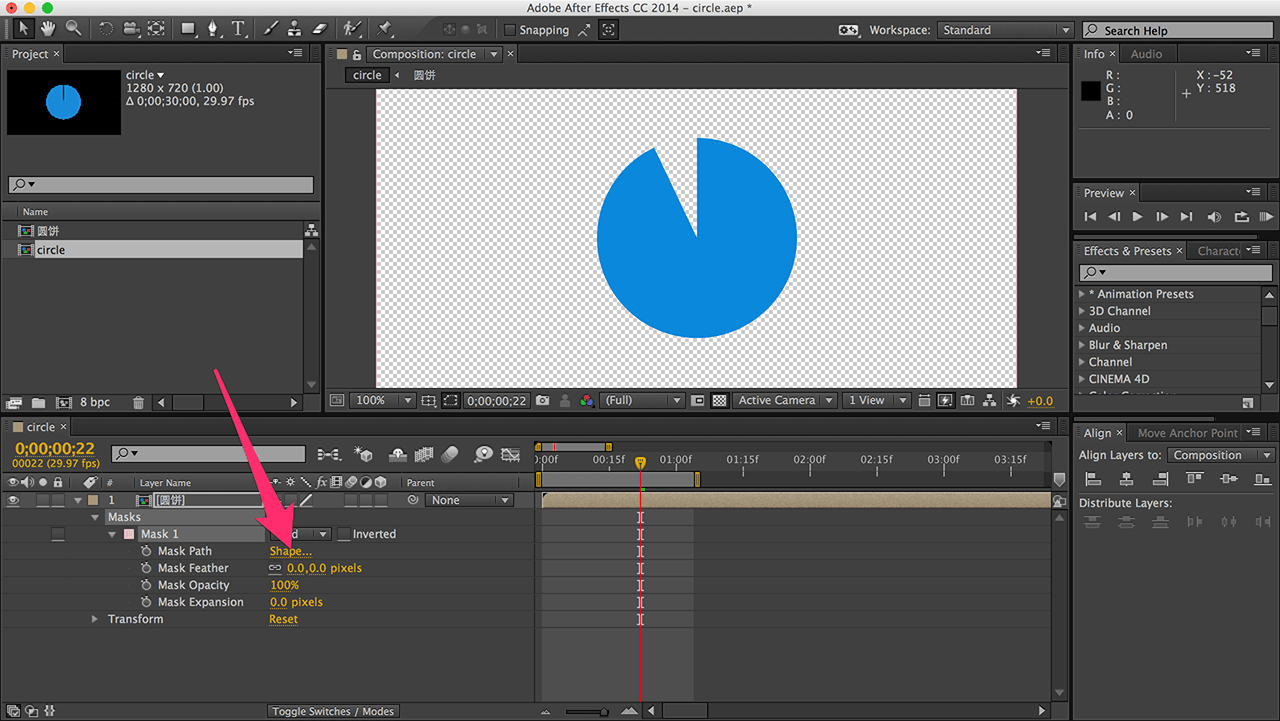
The mask is a rectangle. Expand the mask menu and click “Mask Path”.
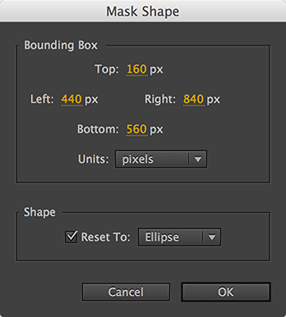
Set the four values (top, left, bottom, right) as shown, and check the box to make it a circle.
These numbers ensure the circular mask matches the progress bar’s size and position.
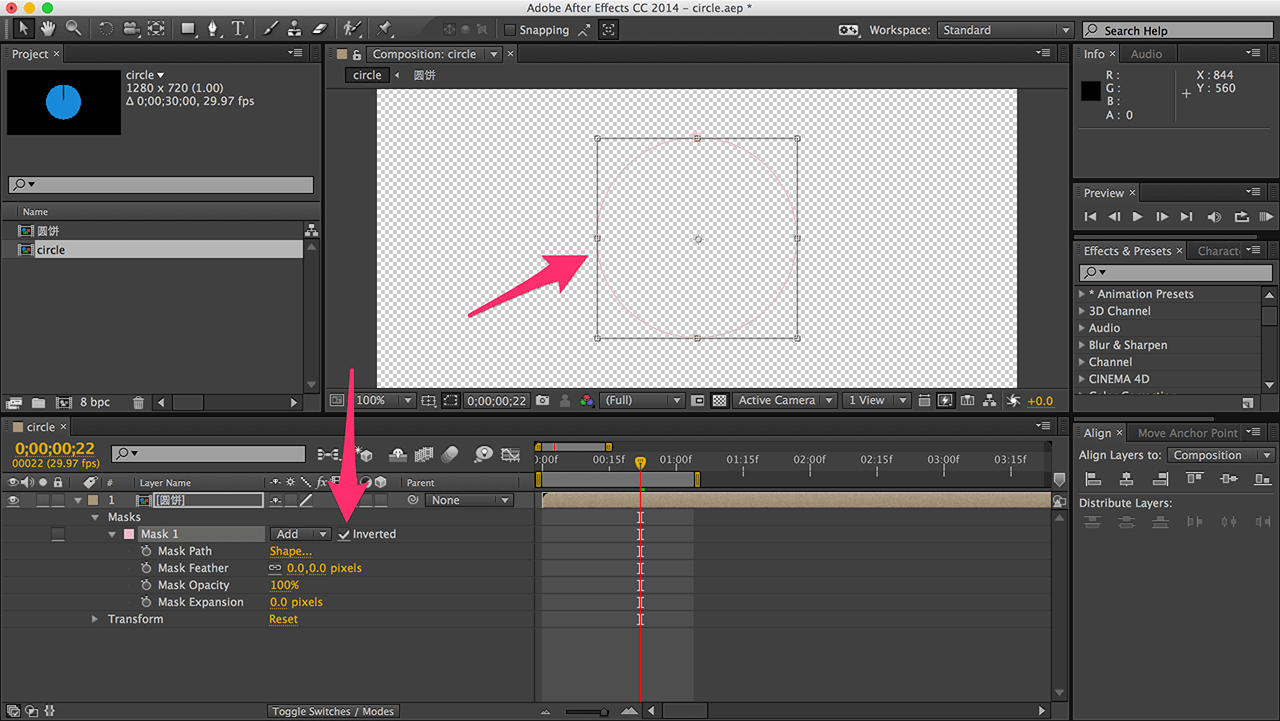
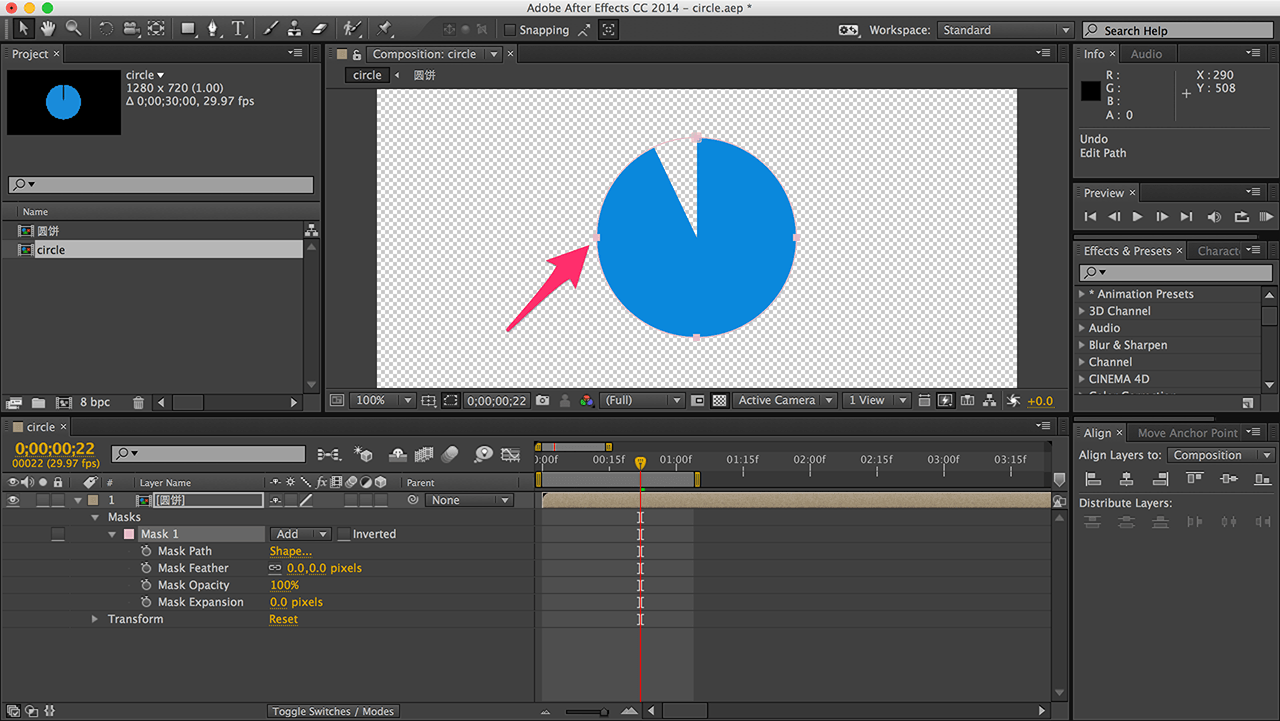
Check “Inverted”. The circle disappears because the mask now shows the area outside it.
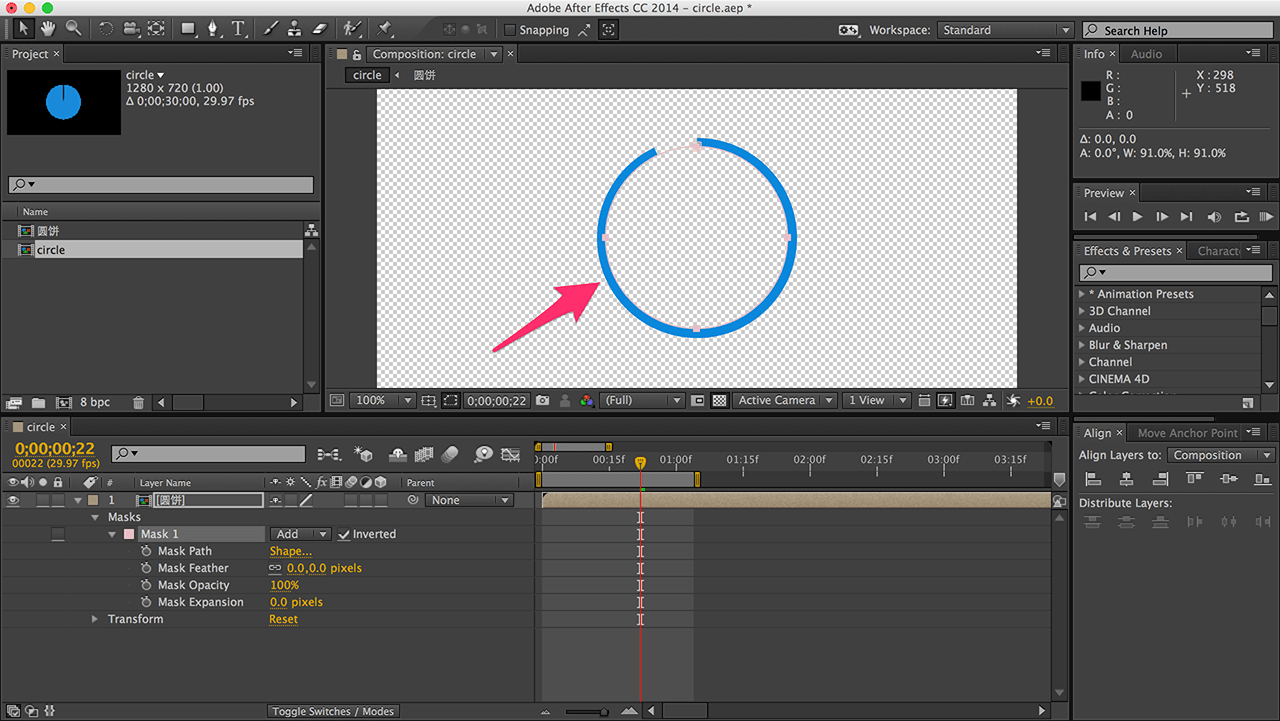
Select the mask and press Command/Ctrl + T.
Hold Command/Ctrl + Shift to scale from the center, making it slightly smaller. The ring appears.
Done! That’s the progress bar I wanted.
Conclusion
This tutorial is lengthy, focusing on the concepts. The actual process is simple and takes about 5 minutes with practice.
For the lazy, here’s the source file: Here’s the source file
I’m a beginner, so this might not be the best method, just a method. Path animations might offer a simpler solution.
Share if you have a better method!
[Update: I received immediate feedback. “Radial Wipe” and “Trim Paths” are easier. “Radial Wipe” is a one-step solution. See the “Growing Circle” section in this article.]