Home renovations present a dilemma: ventilating to remove formaldehyde requires open windows, but rain can damage your floors. I used to think you couldn’t have it both ways, resigning myself to constantly opening and closing windows.
But it’s a simple problem. There are many ways to get airflow and keep rain out. High-end options include smart windows (yes, remotely controlled windows exist!), but those are likely overkill. Cheaper solutions exist. A neighbor used a large truck tarp, costing just a few dollars per square meter. But tarps don’t protect walls.
I stumbled upon an article about car window rain guards, and it clicked. Rain guards are like shutters, using the fact that rain doesn’t fall upwards. Shutters solve this! No need for custom ones; these are temporary. Custom plastic shutters are also flimsy. Cardboard is ideal – a little cutting and crafting, and you have rainproof shutters. Here’s how:
Materials
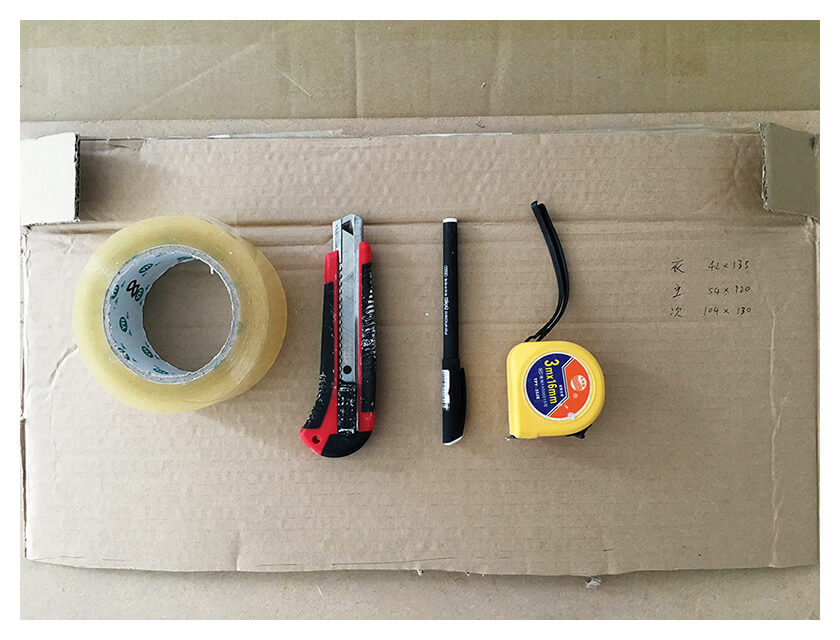
Basic stuff: wide, clear tape, a utility knife, a pen, and a measuring tape. And cardboard, of course. You probably have tons of boxes after renovating. Choose thicker, sturdier ones with few creases.
Step 1: Measure
Measure the window. The best way to install these is by wedging them into the window frame. So, make them slightly larger than the inner frame for a snug fit. Open the window fully, measure, and leave it open.
Step 2: Cut
Cut the cardboard to size, then cut out the louvers.
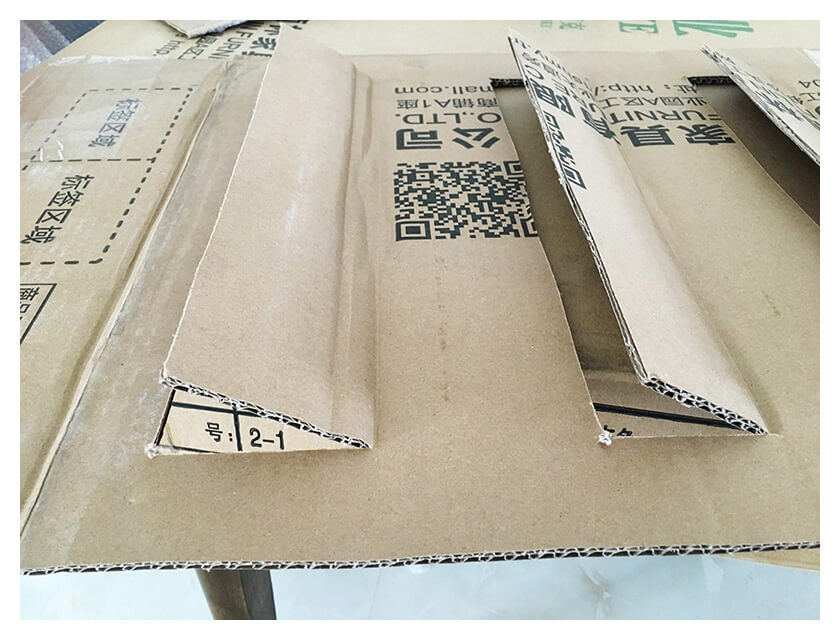
This was my first try, so I was conservative. Louvers can be bigger. Spacing can be smaller too – anything over 5cm is strong enough. Ventilation is key.
Leave a gap on each side of the louvers, about the width of the tape. This will help later.
Step 3: Set the Angle
Louvers need an angle, or they’ll flap in the wind.
First, decide which side faces out. I suggest the cleaner side for better tape adhesion, as we’ll cover the whole surface later.

Flip up a louver and clean its back (likely the dusty side). Cut a roughly 20cm piece of tape. Stick 1/3 of it on the back. Flip it to the front and stick it down at a 45-degree angle. Smooth the louver part first, then the panel. Seal the crease tightly.

Once both ends are taped, the louver is fixed. These two pieces of tape are key – they provide tension. Make the angle wider than you think you need, as it’ll get pressed down later.
Step 4: Reinforce
Reinforce those two key pieces of tape.
Apply a horizontal tape strip, its centerline roughly aligned with the crease. The tape should extend past the louver edges, sticking to the panel. Run your finger along the crease for a tight seal.

The horizontal tape will leave gaps at the louver ends. Add two short, vertical tape strips on each side. If you left a tape-width gap, this step is very precise.
Press firmly on the vertical strips, minimizing gaps. This slightly lowers the louver, hence the wider initial angle.
Step 5: Rainproof the Louvers
Louver surfaces are most exposed, so they need extra protection.

Apply a horizontal tape strip, its centerline aligned with the louver’s outer edge. The tape should be longer than the louver.
Fold the excess tape to the back, sticking it down firmly. Start from the middle, then the ends. Seal the louver edges completely.
One louver done. Repeat for all louvers.
Step 6: Rainproof the Rest
The remaining areas are simple. Cover any exposed cardboard with tape.
For extra protection, wrap the entire bottom edge, like the louver edges. This prevents water from soaking in from below.
Rain Test

I was confident, so I tested it. I blasted it with the showerhead for 30 seconds. The back was totally dry.
That’s sufficient. It would take a major storm to replicate that. Heavy rain isn’t a worry, but strong winds are. I’d check them in person during a typhoon.
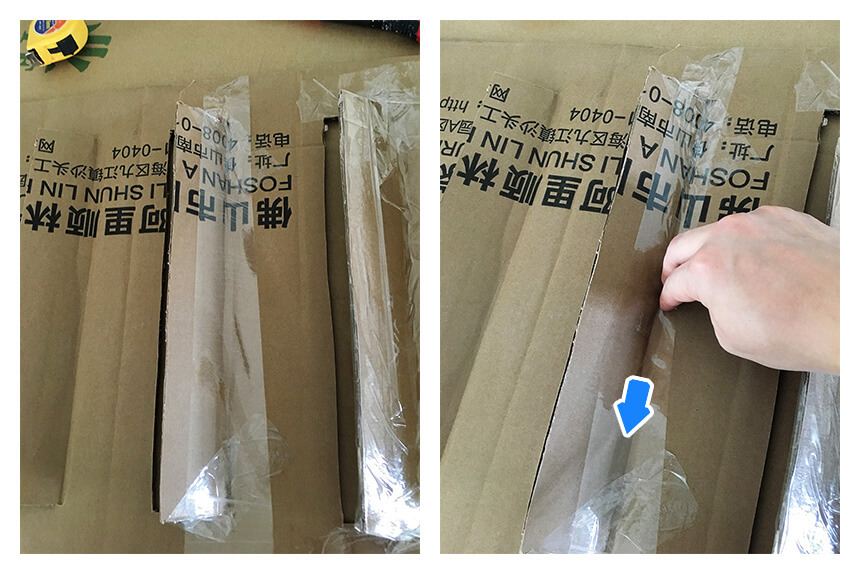
Installation
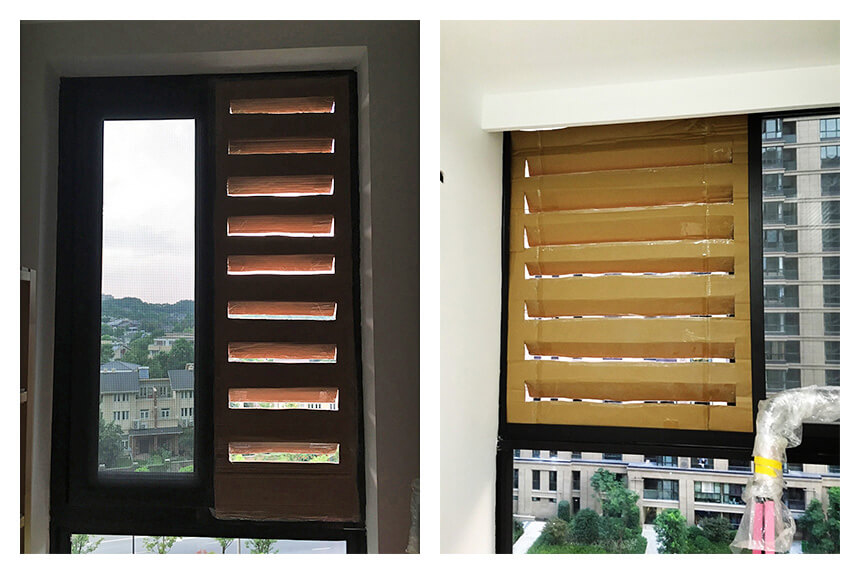
Screen windows make installation easy. See the right side of the picture? The frame secures the top, left, and bottom, while the open right edge tucks into the screen’s groove. Without screens, use tape, but it’ll be less wind-resistant.
Casement windows are even simpler – all four edges can be secured.
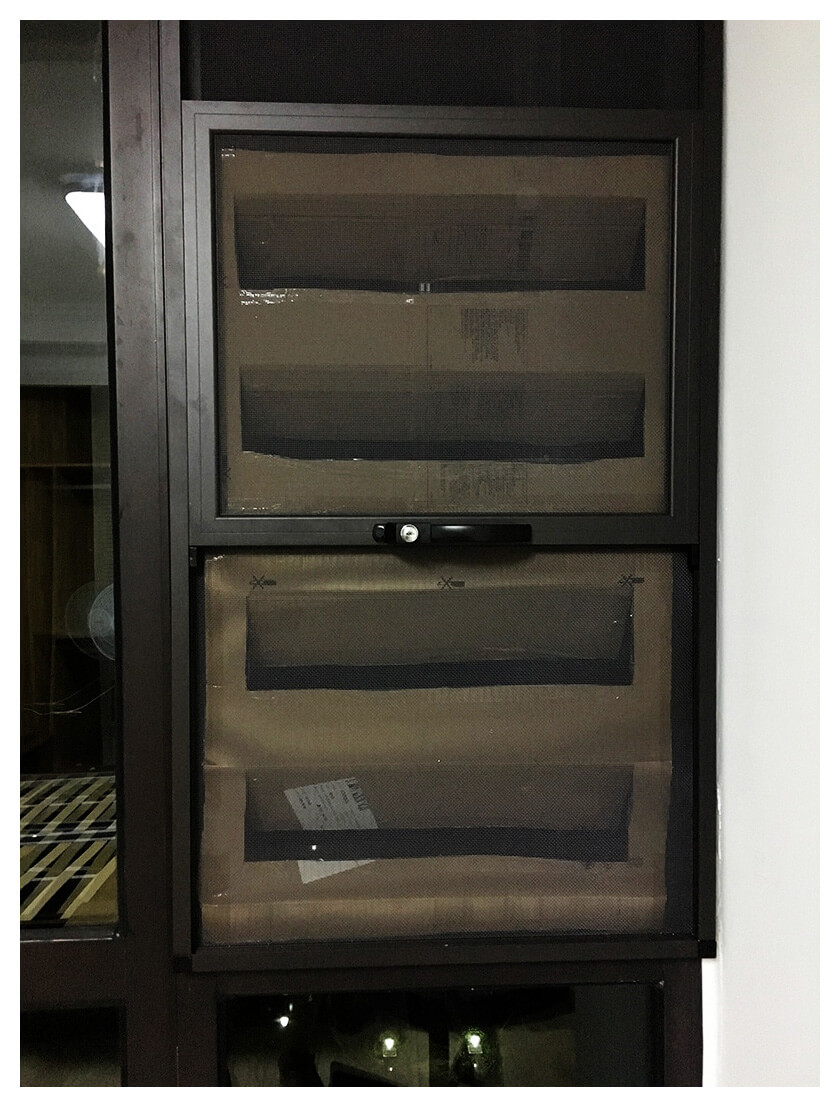
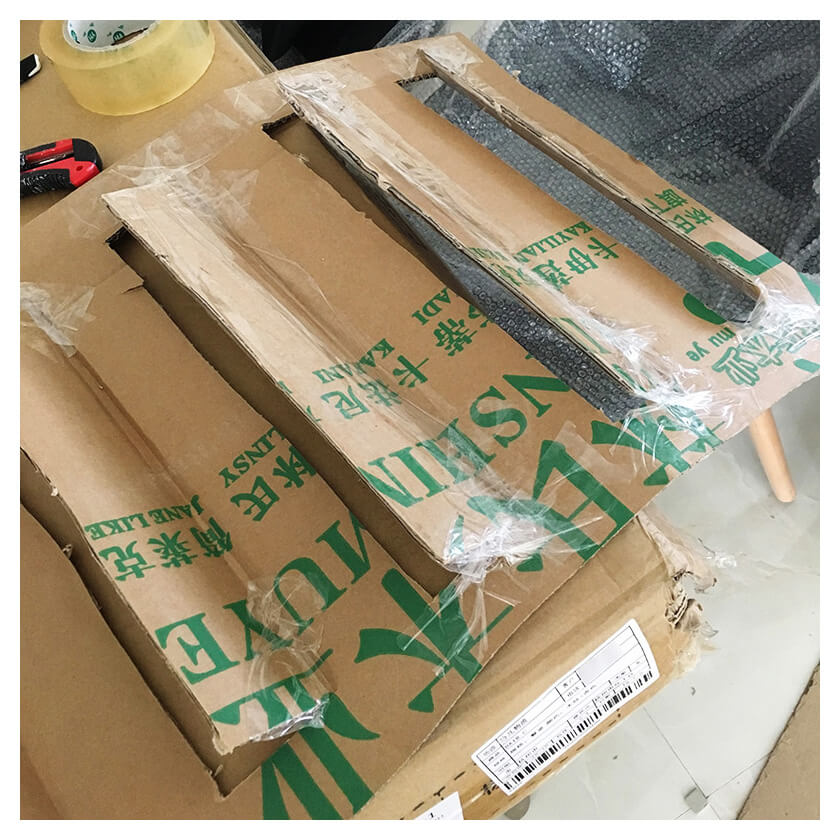
With three-section screen windows, measure each section separately. In the picture, the top and bottom shutters are separate, each wedged in its groove.
With the screen inside, you only need to secure the left, right, and bottom. The shutter can be slightly shorter than one section, making installation easier.
Finally, these are just for ventilation and rain. If you’re on a lower floor or in an insecure area, it is best to open and close your windows manually.
2016.08.02 Update: Wind resistance is the biggest weakness. Width, cardboard stiffness, and creases matter. My wider shutter blew open. It was almost 1m wide, the cardboard was flimsy, and it had been folded. Use high-quality cardboard for wider shutters.